Yamaha CVP-10 User Manual
Page 11
Attention! The text in this document has been recognized automatically. To view the original document, you can use the "Original mode".
6
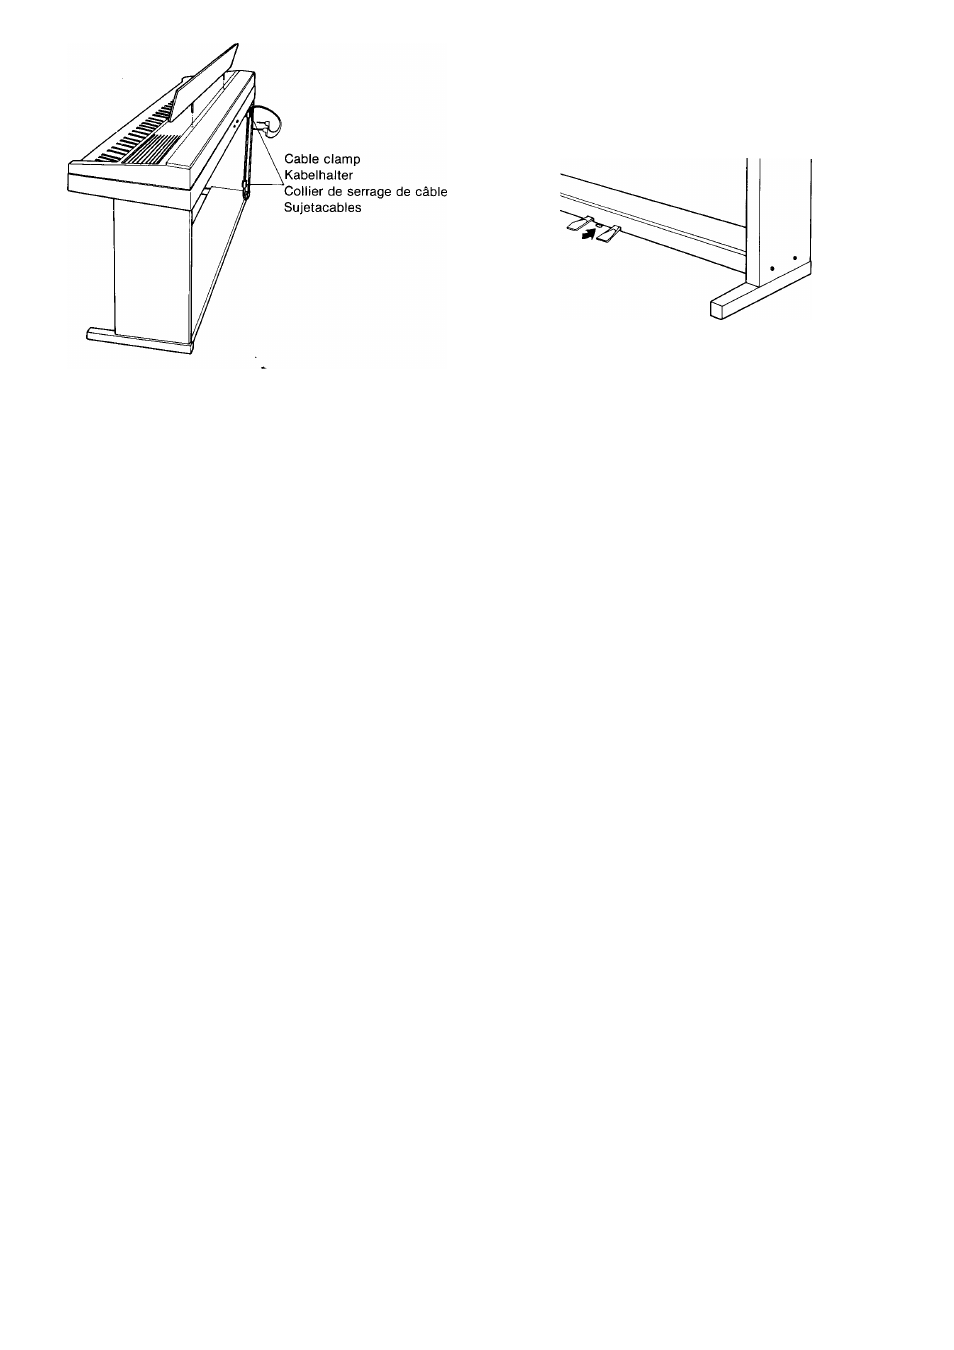
(1) Insert the plug.
Fix the pedal cords to the cord holder. Next, connect the
grey plug to the DAMPER jack on the rear panel of the
keyboard, and the black plug to the SOFT jack.
(2) Attach the music stand.
Insert the music stand into the 2 holes in the top board.
Loosen the adjuster on the bottom part of
pedal box (B) so that it touches the floor.
An adjuster is provided on the bottom part of pedal box (B)
to provide stability. Please lossen it so that it touches the
floor. This will ensure that the pedal box remains stable
when pushing down the pedals with your feet, thus enabling
more precise pedal control.
*To make sure that all connections have been made properly,
check each screw once again for secure fit.
(1) Den Stecker einstecken.
Das Pedalkabel in den Kabelhalter stecken. Dann den
grauen Stecker in die Buchse DAMPER an der Rückplatte
der Tastatur einstecken, und den schwarzen Stecker in die
Buehse SOFT.
(2) Den Notenständer anbringen.
Den Notenständer in die 2 Löcher auf der Oberplatte
einstecken.
Den
Einsteller
unten
am
Pedalkasten
(B)
lösen und so einstellen, daß er den Boden
berührt.
Ein Einsteller ist unten am Pedalkasten (B) vorhanden,
um mehr Stabilität zu bieten. Diesen Einsteller lösen und
so einstellen, daß er den Boden berührt. Dadurch wird
sichergestellt, daß der Pedalkasten stabil bleibt, auch wenn
die Pedale gedrückt werden, so daß präziseres Spiel
ermöglicht wird.
*Um sicherzustellen, daß alle Verbindungen richtig hergestellt sind,
alle Schrauben erneut im Hinblick auf festen Sitz überprüfen.
(1) Insérer la fiche.
Fixer les cordons des pédales au support de cordon.
Raccorder ensuite la fiche grise à la prise DAMPER, sur
l’arrière du panneau du clavier et la fiche noire, à la
prise SOFT.
(2) Fixer le porte-partition.
Insérer le porte-partition dans les deux orifices situés sur le
panneau supérieur.
Desserrer le réglage sur le socle du boîtier
des pédaies (B) jusqu’à ce qu’il touche le sol.
Un réglage est prévu sur le socle du boîtier des pédales (B)
pour garantir une plus grande stabilité. Prière de le desserrer
jusqu’à ce qu’il touche le sol. Ceci assure la stabilité du
boîtier des pédales lorsqu’elles sont enfoncées, ce qui
permet de contrôler ces pédales plus précisément.
*Pour s’assurer que tous les assemblages sont corrects, vérifier
chaque vis et la resserrer.
(1) Conecte las clavijas.
Fije los cables de los pedales al sujetacables. Después
conecte la clavija gris a la toma DAMPER, y la negra a la
toma SOFT del panel posterior del teclado.
(2) instaie ei portapartituras.
Inserte el portapartituras en los 2 orificios del tablero
superior.
Afloje el ajustador de la parte inferior de ia
caja de pedales (B) de forma que tal ajusta
dor toque el suelo.
En la parte inferior de la caja de pedales (B) existe un
ajustador que sirve para proporcionar estabilidad. Aflójelo
de forma que toque el suelo. Esto asegurará el que la caja de
pedales permanezca estable cuando pise los pedales para, de
esta forma, permitir un control más preciso de tales pedales.
* Vuelva a comprobar si todos los tornillos están bien apretados
para asegurarse de que todas las conexiones sean adecuadas.