Precautions on installation, Installation – Panasonic WV-7220D User Manual
Page 5
Attention! The text in this document has been recognized automatically. To view the original document, you can use the "Original mode".
PRECAUTIONS ON INSTALLATION
This panning unit Model WV-7220D is designed for
indoor use. Avoid mounting it outdoors under the eaves
or any other place where rain or moisture could be
problem.
If the panning unit is mounted upside down, as shown
below, the image on monitor TV will also be upside
down. Therefore, remove the camera mounting plate
from the top of the camera and attach it to the bottom
of the camera
A camera with various lenses and a camera housing
(Model WV-7110 and 7120D) can be used. Select a
location where the total weight is sufficiently support
and firmly fix the units onto plywood, gypsum board,
plaster
board
or concrete, install the panning unit
before mounting the camera on it.
Mount on flat surface - flat ceiling or mounting bracket
Model WV-7030.
Avoid a location which is susceptible to vibration, such
as close to a motor or ventilation fan.
INSTALLATION
CAUTION:
The following installation should be made by qualified
service personnel or system installers.
1.
Make holes which align to those on the Mounting Plate
and mount on the panning head.
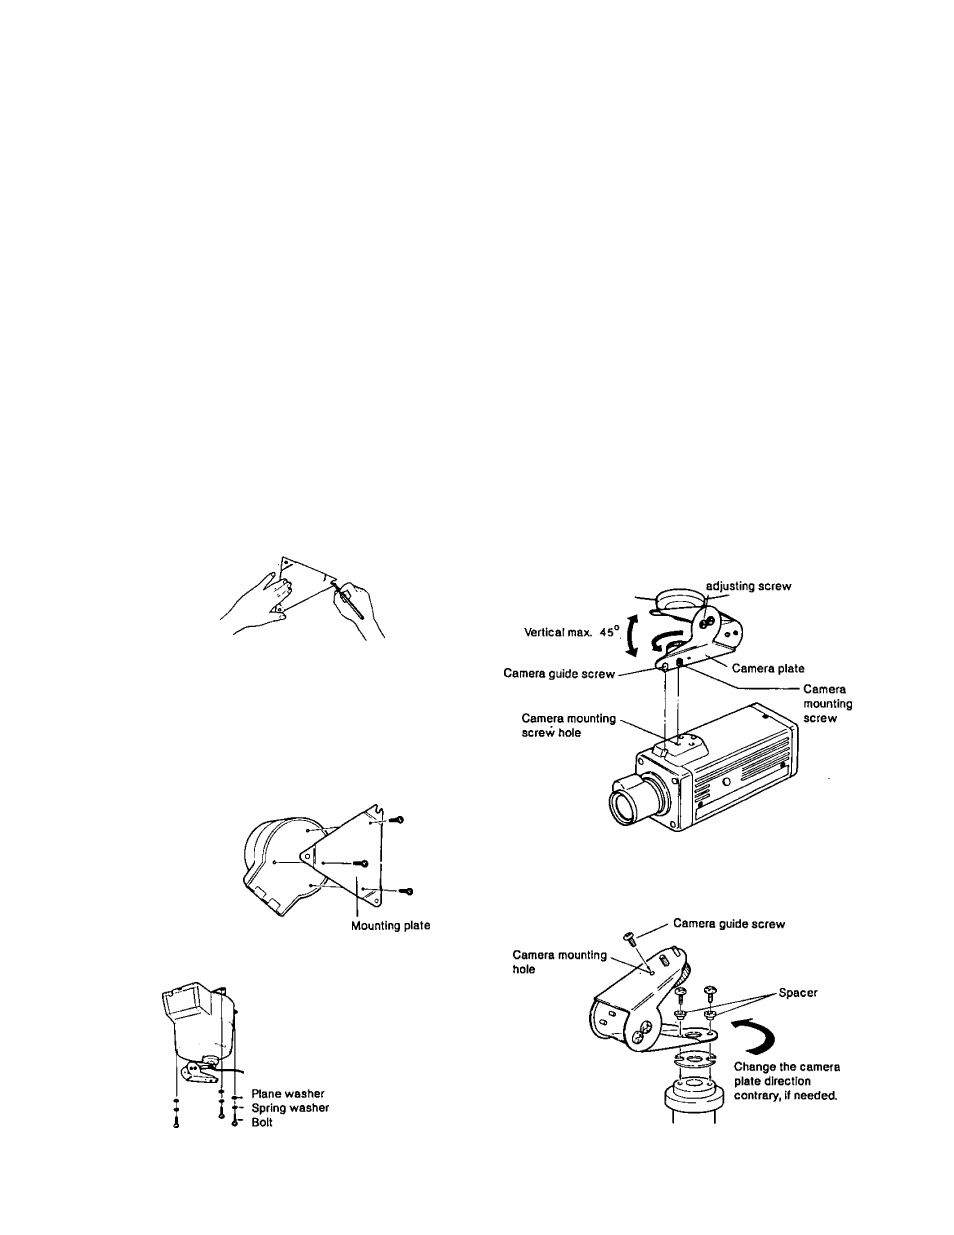
(a) Plot the three points for making holes
(b) Make three preliminary holes.
(c)
Mount the Mounting Plate to the base with it's
three screws on the base.
2.
Mount the panning head.
3.
Mount the low voltage camera (24V AC} with fixed focal
lens on the Camera Plate.
(1)
Mount the camera using with Camera Mounting
Screw.
Use rear side of the camera mounting screw hole
for better weight balance. Proper weight balance
will put less strain on the gears in the motorized
head.
(2) Adjust the tilt angle with Tilt Angle Adjusting Screw.
Set the focus ring at the proper distance.
Tilting angle
(3)
4.
When mount the panning unit upside down and camera
is aimed downward, remove the Camera Guide Screw
to the Camera Guide Hole. If needed, change the
direction of the Camera Plate.
CAUTION: After changing the camera plate direction,
replace these spacers.
-
4
-