2 configuring record schedule – DVR systems DVR-HDE-960H-960H2 Series User Manual
Page 51
parameters.
4)
If you want to copy the current sub-stream settings to other camera (s), click Copy to enter the
Copy Camera interface. Select the camera (s) and click OK to finish the copy settings.
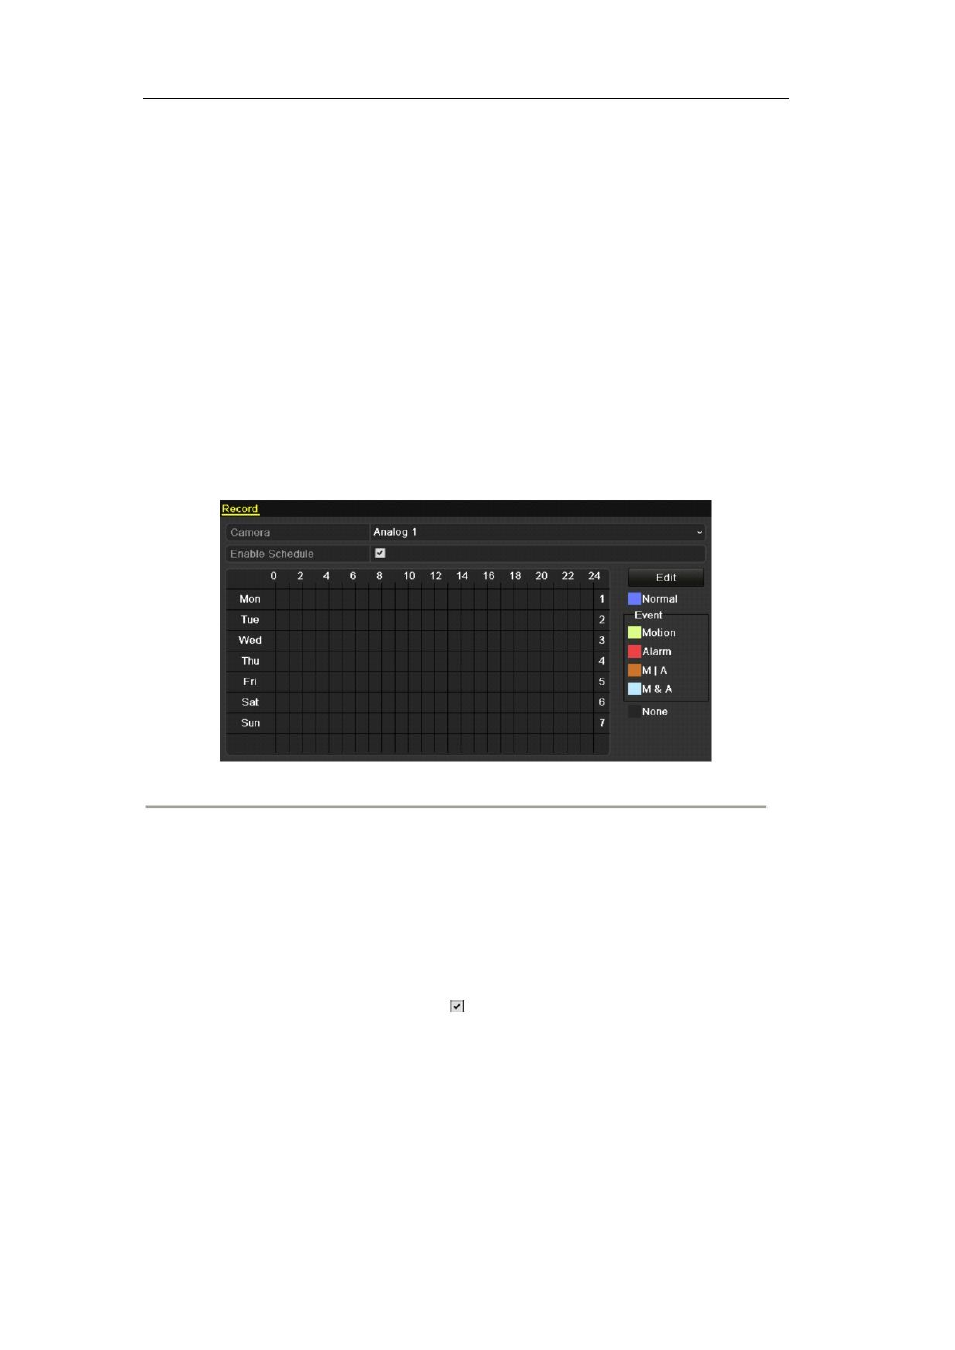
5.2 Configuring Record Schedule
Purpose:
Set the record schedule, and then the camera automatically starts/stops recording according to the configured
schedule.
Steps:
1. Enter the Record Schedule interface.
Menu>Record>Schedule
2. Configure Record Schedule
1) Click Schedule to enter the record schedule settings interface.
Figure 5.6 Record Schedule
2) Choose the camera you want to configure.
3) Check the check box after the Enable Schedule item.
There are two ways to configure the record schedule.
Task 1: Edit the Schedule
Steps:
1) Click Edit.
2) In the message box, you can choose the day which you want to set schedule.
3) To schedule an all-day recording, check
checkbox to enable all-day recording.
4) Set the Type in the dropdown list. Different recording types are available for different models.
Most models will support: Normal, Motion, Alarm, Motion/Alarm and Motion &
Alarm.
Note:
To enable Motion triggered recording, you must configure the motion detection settings as
well. For detailed information, refer to Chapter 8.1 and Chapter 8.2.
50