V.I.O. Adventure Cam User Manual
Page 16
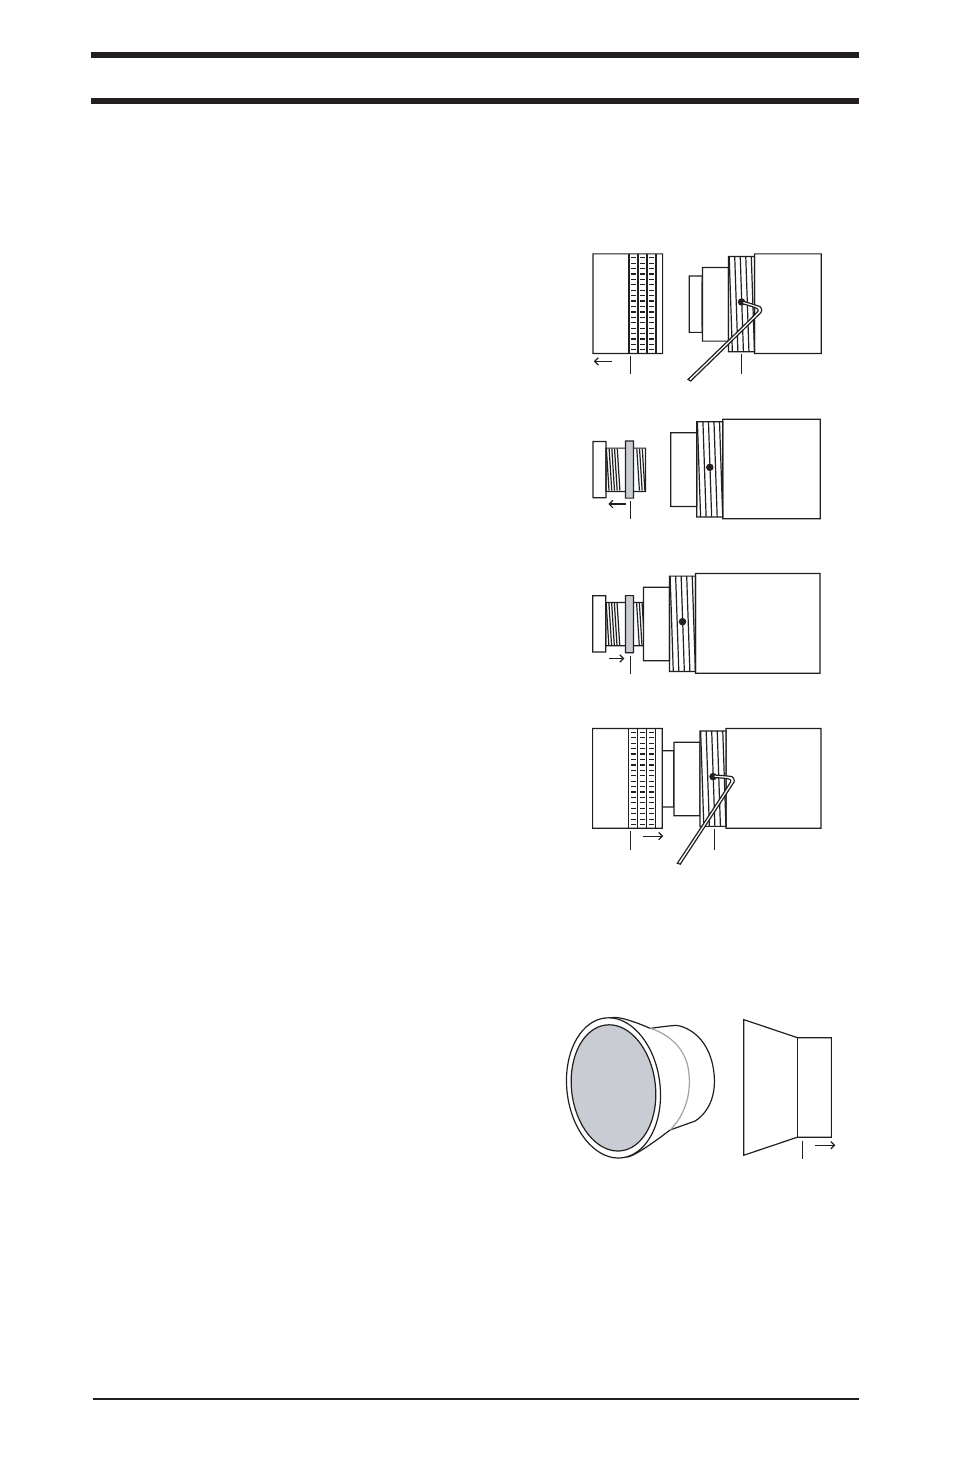
Table of Contents
Welcome
Products
How To
Support
Notes
Support: Warranty/Returns
30-Day Return
Warranty
Lifetime Return
Welcome: A note from our President
Lithium Ion Battery
LUX
MD4 Extension
Mini DV (Digital Video)
Mount
Neutral Density Filter
NTSC (National Television Standards Committee)
PAL (Phase Alternation Line)
Sony Proprietary Cable
VCR/VTR mode
POV
RCA
Resolution
Products: Adventure Cam
3
Support: Glossary
Lens
12v (12 Volts)
A / V Input (Audio/Video)
AC (Alternating Current)
Adventure Cam
Camcorder
CCD (Charge Coupled Device)
Composite
DC (Direct Current)
Field of View
LANC (Lan-cee)
3.5mm Mini Plug
Products: Adventure Cam H2O
Products: S.C.O.U.T. Cam
Products: Adventure Cam II
Products: Mounts
Products: Power Sources
Products: Plug Types
Support: Cam Comparison
Support: Mounting Tips
Products: Lens and Filter Tool Kit
Products: Neutral Density Filters
Products: Lenses
How To: Change the Lenses
How To: Change the Lenses
Before you begin changing the lenses, we recommend hooking your cam to a television or
recording device to check the focus. Please refer to the How To: Connect Cam to Television on
page 14 of this manual for proper hookup instructions.
Removal:
1. Remove the lens cover by twisting it
counterclockwise (A).
2. On the threaded section of the main body of the cam,
there are two sets of screw holes. DO NOT completely
remove the set screws – as they are very small and
easily misplaced. With the Allen wrench from the Tool
Kit, turn the set screws counterclockwise to loosen (B).
3. Remove the lens and tension device, if applicable) by
turning it counterclockwise (C).
Replacement*:
4. Choose the lens that fits your Field of View
requirements (see Lenses on page 9). Insert the new lens
and tension device into the main body and turn
clockwise (D). Be careful to avoid cross threading.
5. Find a point of reference that is the approximate
distance that you will be recording. Refer to your
television or recording device display to focus the new
lens. Turn the lens either clockwise or counterclockwise
to ensure that the image is focused clearly.
6. With the Allen wrench from the Tool Kit, turn the set
screws clockwise to tighten (F).
7. Return the lens cover to the main body by turning
clockwise (E).
*If using the 2.5mm: 92.5° Wide Angle lens please see
the special notice below before returning the lens cover.
A
C
D
B
E
F
15 | How To
How To: Connect Cable to Cam
How To: General Connections
How To: Change the Neutral Density Filters
How To: Connect Cam to Television
How To: Connect Cam to Recording Device
How To: Connect LANC to Recording Device
How To: Connect Cam to Power Source
Viosport Cigarette Lighter
How To: Connect Cam to Power Source
Viosport Battery Holder
Viosport Rechargeable Battery Pack
Support: Customer Service
Phone
Postal Mail
Welcome: Cam Care & Safety Precautions
Viosport 12v Rechargeable Battery Pack
Viosport Helmet Cam
How To: Focus the Lens
Special Notice: Using the Wide Angle Lens
Because the 2.5mm: 92.5° (wide angle) lens is
slightly larger than our other lenses, an additional lens
cover was developed to ensure optimal performance.
The new Wide Angle Lens Cover accomodates the
longer lens to eliminate the shadowing on the corners
of your footage. Please use the Wide Angle Lens
Cover whenever using the Wide Angle Lens.
Please Note:
The Wide Angle Lens Cover is not compatible with the neutral density filters. If you wish to
use the filters with the Wide Angle Lens you will have to use the original lens cover.
Tightening the regular lens cover while using the Wide Angle Lens may cause the glass to
break. Also, shadowing may occur on the corners of your footage. Viosport / Viotac will not
be responsible for any damage incurred if customers choose to use this method for using the
Wide Angle Lens.
E
Support: Toubleshooting
Support: Videography Tips