Operating guide, Install the fence transmitter, Charge the receiver collar – Petsafe YardMax™ Rechargeable In-Ground Fence™ User Manual
Page 9: Step
www.petsafe.net 9
Operating Guide
Install the Fence Transmitter
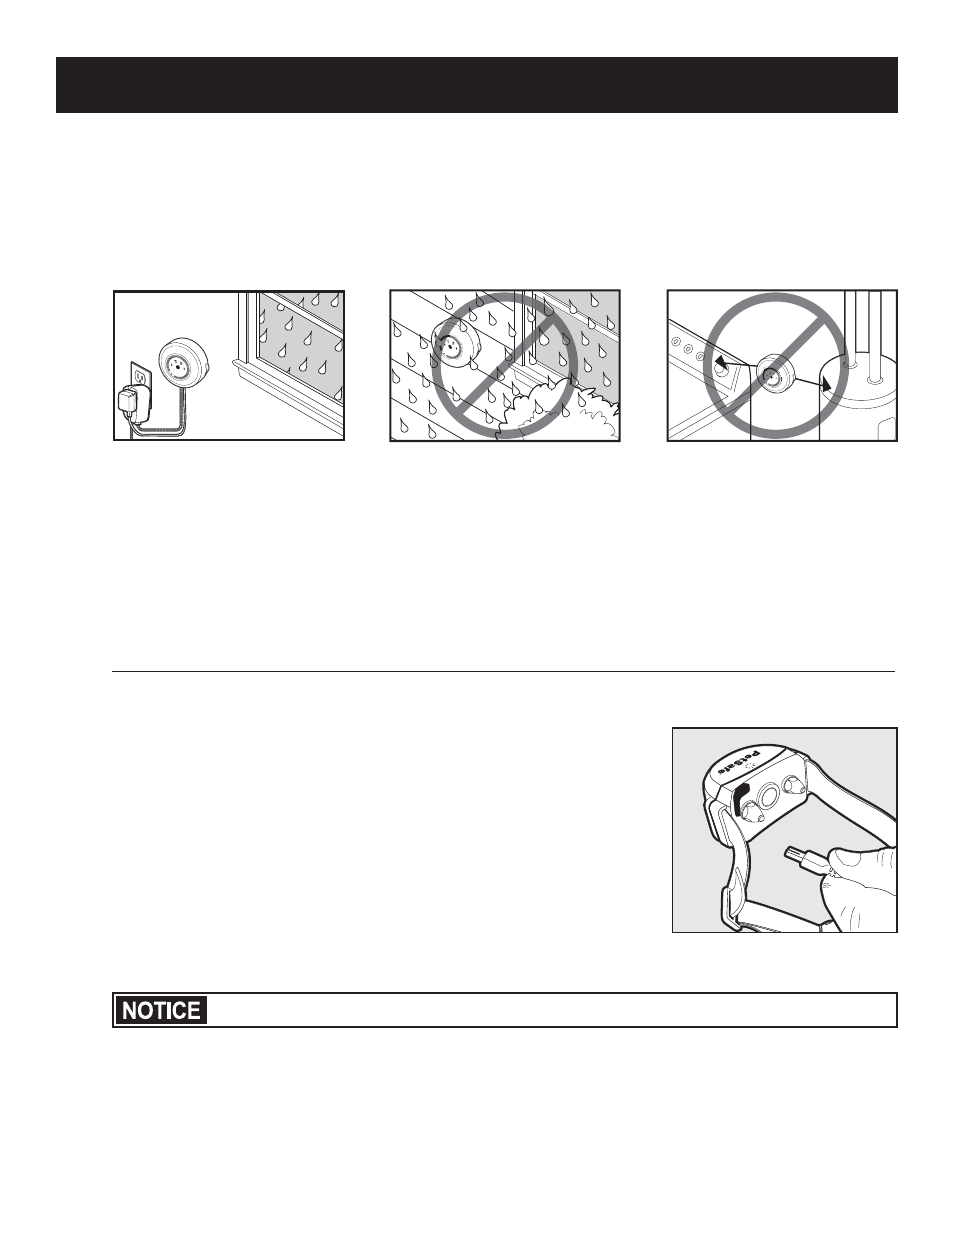
Place the Fence Transmitter:
• In a dry, well ventilated, protected area (1A, 1B).
• In an area where temperatures do not fall below freezing (e.g., garage, basement, shed, closet).
• Secured to a stationary surface using supplied mounting hardware.
• At least 3 feet from large metal objects or appliances as these items may interfere with the signal consistency
(1C).
• In an area that can be accessed easily so that you can hear and respond to alarms.
1
A
B
10
2
5
6
7
8
9
4
3
1A
1
B
10
5
6
7
8
9
1B
B
10
7
8
9
3ft.
1C
To Install the Fence Transmitter
1. Remove the mounting bracket from the back of the Fence Transmitter.
2. Using the screws and anchors provided, drill 3/16" diameter holes.
3. Mount the mounting bracket to the wall within 5 feet of a standard, grounded (3-prong) outlet.
4. Slide the Fence Transmitter over the mounting bracket.
Once you have mounted the Fence Transmitter, the Boundary Wire must exit the building. This can be
accomplished via a window or through a hole drilled through the wall. Ensure the drill path is clear of any
utilities. Make sure the Boundary Wire is not cut off or pinched by a window, door, or garage door, as this can
damage it over time.
To prevent fires and electrical hazards, install the Fence Transmitter in buildings that are in accordance with
state and local electrical codes.
Charge the Receiver Collar
To Charge the Receiver Collar
1. Lift the rubber cover protecting the Receiver Charging Jack.
2. Connect the Receiver Collar Charger connector to the Receiver Charging
Jack. Note: The connector only fits one way, do not force it into the
Charging Jack.
3. Plug the Receiver Collar Charger into a standard AC wall outlet. The
Receiver Collar light will glow red when the charger is properly seated
and charging.
4. Charge the Receiver Collar for 2-3 hours. The light will turn green when
charging is complete. A built in safety circuit prevents the Receiver Collar
from overcharging.
5. After charging, replace the rubber cover to protect the Receiving
Charging Jack.
Each charge can last up to three months depending on frequency of use.
2A
Do not charge your Receiver Collar every night. Frequent charging can have a negative effect on the battery. We
recommend that the Receiver Collar be used until the Receiver Indicator Light blinks yellow or red.
The Receiver Charger has two jacks to allow you to charge two Receiver Collars at the same time.
It does not matter if the Receiver Collar is On or Off while charging. As soon you plug in the Receiver Charger it
moves into charging mode.
Step
1
Step
2