Nexen RPS4014G-B0192T/023-EP2U 966725 User Manual
Page 5
5
FORM NO. L-21198-A-1204
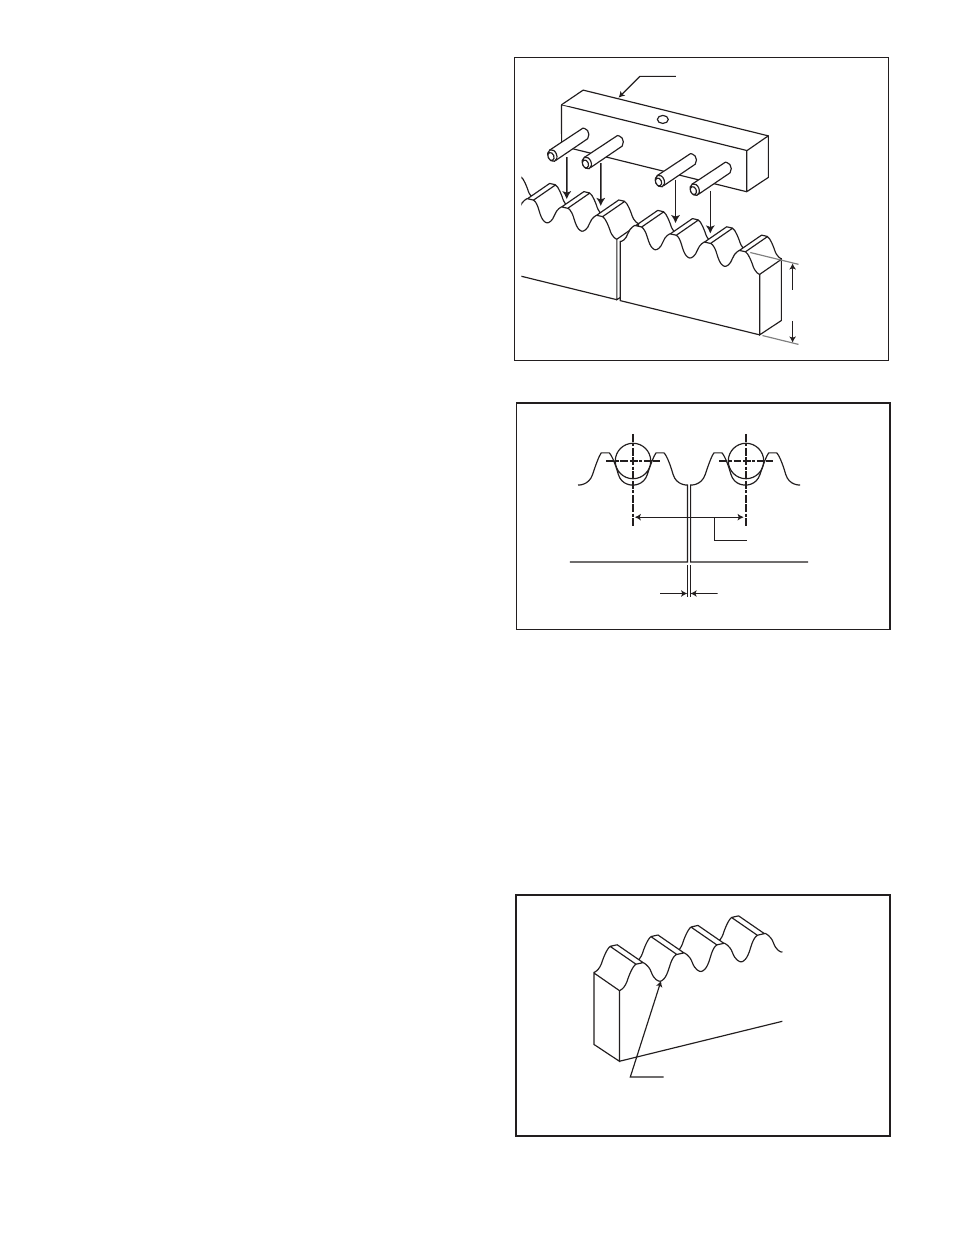
Alignment Tool
x.xx ± .02 mm
[x.xxx ± .0008 in]
RACK INSTALLATION
1.
Using customer supplied mounting bolts, connect the
first rack length to the mounting surface.
2.
Measure the distance from tooth peak to mounting
surface to ensure they are parallel within ±0.02mm
[0.0008 in]. Refer to Table 1 for recommended
tightening torque of rack mounting bolts.
2.
Align the second rack segment with the first
segment along the base of each rack.
3.
Lightly tighten the rack mounting bolts on the
second rack so it is slightly movable.
4.
Insert a connecting jig between the two racks
(Refer to Figure 2).
NOTE: Connecting jigs for each rack size are required
and available for purchase from Nexen. This jig is re-
quired for proper installation of multiple rack sections.
5.
Temporarily fasten the connecting jig to the mount-
ing surface using customer supplied mounting bolt.
Refer to Table 2 for recommended tightening torque
for the connecting jig mounting bolts.
6.
Adjust the second rack so that the jig pins rest
evenly in both racks and the jig is in full contact
with the side of both racks (Refer to Figure 3).
7.
Fully tighten the mounting bolts on the second rack.
8.
Carefully remove the connecting jig, avoiding any
rattling of the jig against the rack.
9.
Follow steps two through eight for any additional
rack lengths. Refer to CUTTING RACK LENGTH if
a rack must be shorted to accommodate your
application.
Figure 2
2 x tooth pitch
(0.1 - 0.2) clearance
Figure 3
CUTTING RACK LENGTH
NOTE: Nexen will factory-cut nonstandard rack lengths.
Customers may also cut rack lengths to accommodate
specific applications. The rack must be cut at the valley
of the tooth profile (See Figure 4).
NOTE: Rack teeth are heat treated; it will require an
abrasive saw to cut the rack.
Always place the customer-cut rack end at the end of
the rack length to avoid any disruptions in the pinion
travel.
Cut rack length at the
valley of the tooth profile.
Figure 4
Tables 1 & 2 are located on the following page.