Nexen HGP25 969053 User Manual
Page 10

FORM NO. L-21277-B-1213
10
A
Second Rack
I Rack Mounting Through Hole (See Table 2)
E
Through Hole
G
Tapped Hole
First Rack
Clearance 0.1 - 0.2 mm
Second Rack Reference Level
B
A
C
E
D
Rack width
Rack Mounting Reference Surface
Positional view of the rack mounting holes (plan view)
F Alignment
Tool Mounting
Bolt
Alignment
Tool
Rack
Segment
Tapped Hole
Mounting of Alignment Tool
GEN A
Through Hole
Mounting of Alignment Tool
GEN A
H Alignment Tool
Mounting Bolt
Alignment Tool
Rack
Segment
J Rack
Mounting Bolt
J Rack
Mounting Bolt
G Tapped Hole
E Through Hole
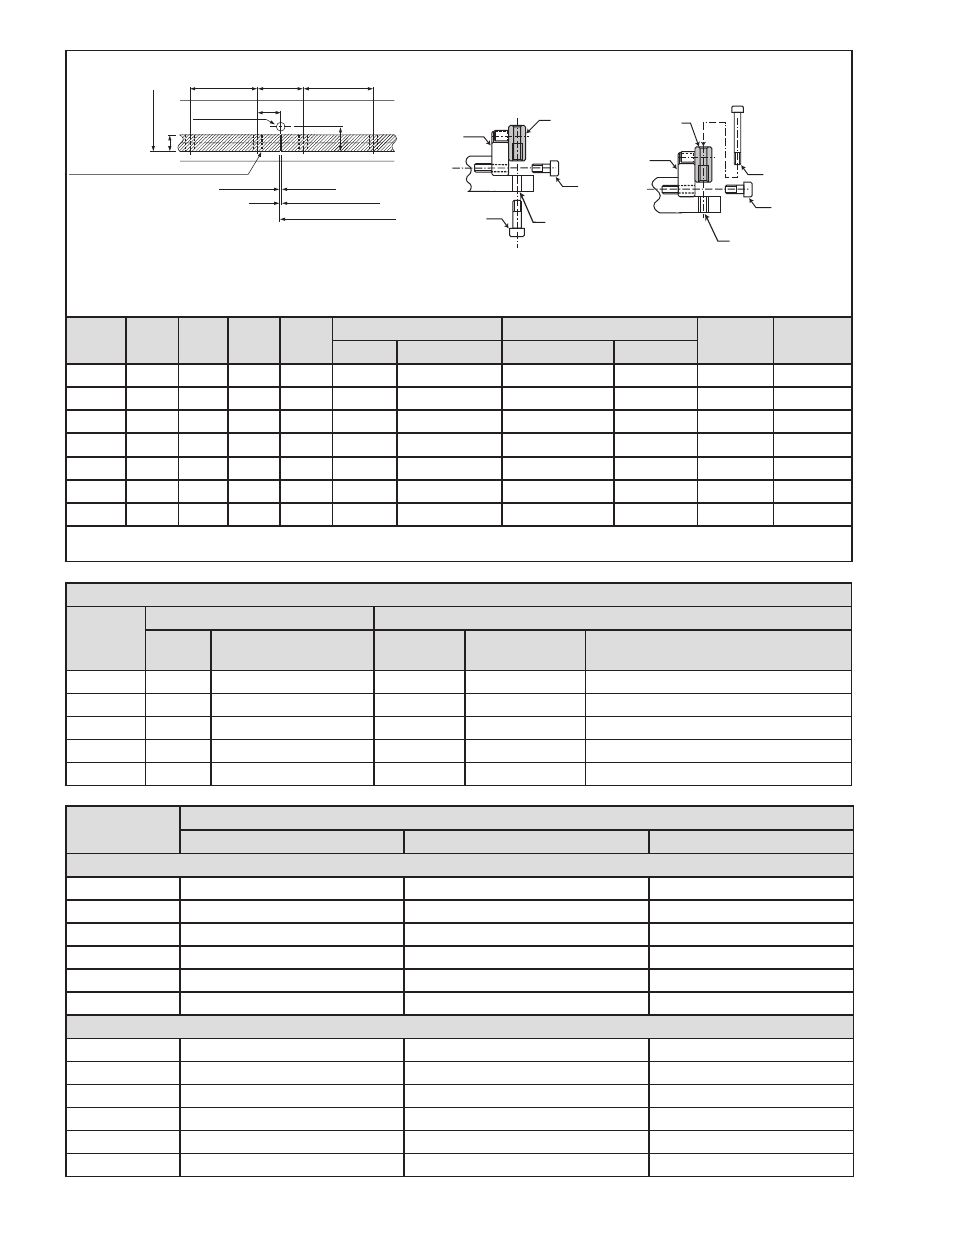
Alignment Tool Mounting Bolt Specifications
RPS
Size
Through Hole
Tapped Hole
Bolt
Size
Tightening Torque
Initial/Final Nm [in-lb]
Thread
Depth
mm [in]
Tightening Torque
Initial/Final Nm [in-lb]
16
M6
1/5 [9/44]
M8
16 [0.63]
1/8 [7/71]
20
M8
1/8 [7/71]
M10
20 [0.79]
1/12 [9/106]
25 & 32
M10
2/28 [18/248]
M12
24 [0.94]
2/30 [18/266]
40 & 4014
M10
3/32 [27/283]
M12
24 [0.94]
3/35 [27/310]
50
M10
3/32 [27/283]
M12
24 [0.94]
3/35 [27/310]
Figure 13
Bolt Type
Mounting Material
Steel
Cast Iron
Aluminum
Rack Mounting Tightening Torque for Socket Head Cap Screws (Class 10.9 or better)
M5
8.2 Nm [73 in-lb]
5.4 Nm [48 in-lb]
4.0 Nm [35 in-lb]
M6
16 Nm [140 in-lb]
10 Nm [89 in-lb]
8 Nm [71 in-lb]
M8
31 Nm [275 in-lb]
20 Nm [177 in-lb]
15 Nm [128 in-lb]
M10
68 Nm [602 in-lb]
45 Nm [398 in-lb]
33 Nm [292 in-lb]
M12
120 Nm [1062 in-lb]
78 Nm [690 in-lb]
58 Nm [513 in-lb]
M16
196 Nm [1735 in-lb]
131 Nm [1160 in-lb]
98 Nm [867 in-lb]
Rack Mounting Tightening Torque for Stainless Steel Screws (Class 8.8 or better)
M5
5 Nm [44 in-lb]
5 Nm [44 in-lb]
4.0 Nm [35 in-lb]
M6
10 Nm [89 in-lb]
10 Nm [89 in-lb]
8 Nm [71 in-lb]
M8
19 Nm [168 in-lb]
19 Nm [168 in-lb]
15 Nm [128 in-lb]
M10
41 Nm [363 in-lb]
41 Nm [363 in-lb]
33 Nm [292 in-lb]
M12
70 Nm [620 in-lb]
70 Nm [620 in-lb]
58 Nm [513 in-lb]
M16
137 Nm [1213 in-lb]
131 Nm [1160 in-lb]
98 Nm [867 in-lb]
Table 2
Table 1
The dimensions below are nominal in mm and applicable only to standard catalog offerings. Refer to Nexen product
drawings and CAD files for your product numbers for precise dimensions. Special and cut sections of rack may not conform
to these dimensions. The RPS 10 & 12 alignment tools do not require fasteners so no data is listed for them below.
Dimensions apply to standard length rack sections. Cut lengths and customs could vary. Refer to drawings for your specific product
numbers. * Bolt length will vary based on machine design.
RPS
Size
A
B
C
D
Through Hole Mounting
Tapped Hole Mounting
I
J
E
F
G & H
H
16
96
32
16
19.5
9
M8 x 1.25
M6 x 1.00
M6-50
7
M6
20
100
100
50
25.5
11
M10 x 1.50
M8 x 1.25
M6-60
9
M8
25
100
100
50
30.5
14
M12 x 1.75
M10 x 1.50
M10-75
11
M10
32
96
32
16
36.5
14
M12 x 1.75
M10 x 1.50
M10-95
14
M12
40
120
160
80
43.5
14
M12 x 1.75
M10 x 1.50
M10-95
18
M16
4014
80
120
60
54.0
14
M12 x 1.75
M10 x 1.50
M10-95
18
M16
50
62.50 62.50 31.25
54.0
14
M12 x 1.75
M10 x 1.50
M10-95
18
M16
