Dell C/Port APR User Manual
Page 8
Attention! The text in this document has been recognized automatically. To view the original document, you can use the "Original mode".
For information on changing the resolution of
an external monitor connected to the C/Port
APR, see “Video Drivers and Video Resolution”
in the online System User V Guide
on your
computer.
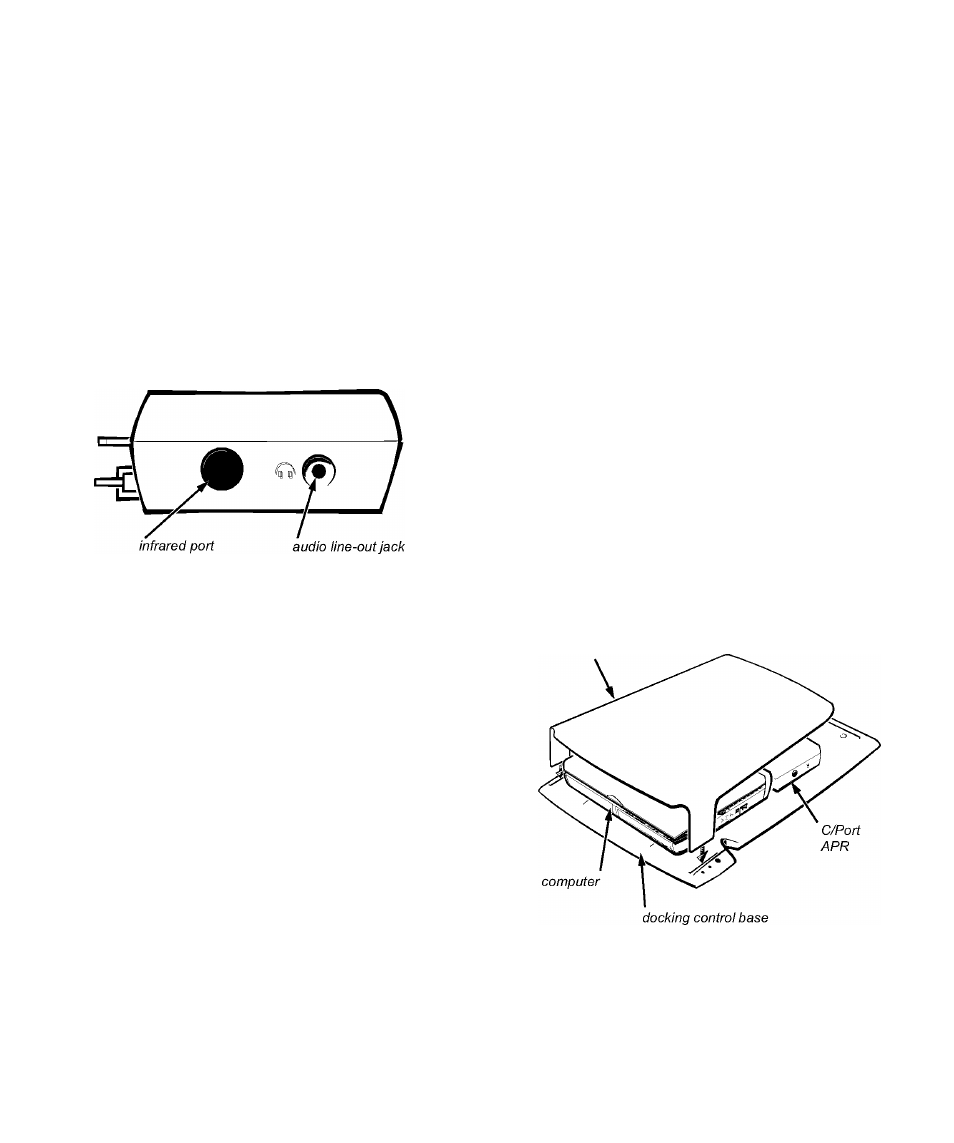
•
Speakers or headphones connected to the audio
line-out jack (see Figure 1-3).
•
An infrared device that works with the infrared
port on the C/Port APR (see Figure 1-3) and the
data communications software on the com
puter’s hard-disk drive.
For more information, see “Using External Devices”
in the online System User S Guide
on your computer.
Figure 1-3. Infrared Port and Audio Line-Out
Jack
The AC adapter powers the C/Port APR and the
computer at the same time. A battery inside the com
puter charges while you use the C/Port APR.
CAUTION: Always use the Dell AC adapter
that came with the C/Port APR. (Look for
model number PA-2 or PA-6 on the bottom of
the AC adapter.) Using any other commer
cially available AC adapter—or the AC
adapter from older models of Dell comput-
ers—could damage the C/Port APR or the
computer.
If the AC adapter cable is accidentally unplugged
from the C/Port APR, your data is safe as long as
you have a charged battery in the computer.
5. Place the C/Port APR and docking control base in
a convenient location on your desk or work area.
6. Attach the monitor stand to the docking control
base (see Figure 1-4), and then set an external
monitor on top of the stand.
The stand supports monitors that weigh up to
45.3 kilograms (kg) (100 pounds [lb]).
NOTE: If you are using the short alignment tray, you
cannot use the monitor stand.
3. Connect the external devices to their power
sources.
4. Connect the C/Port APR to alternating current
(AC) power.
Connect the AC power cable to the AC adapter. Next,
plug the AC adapter cable into the AC adapter con
nector on the C/Port APR. Then plug the AC power
cable into awn AC power source.
monitor stand
Figure 1-4. Attaching the Monitor Stand
1-4 Dell Latitude C/Port Advanced Port Replicator User’s Guide