Workrite Fino User Manual
Page 8
8
Workrite Ergonomics | 800.959.9675 www.workriteergo.com
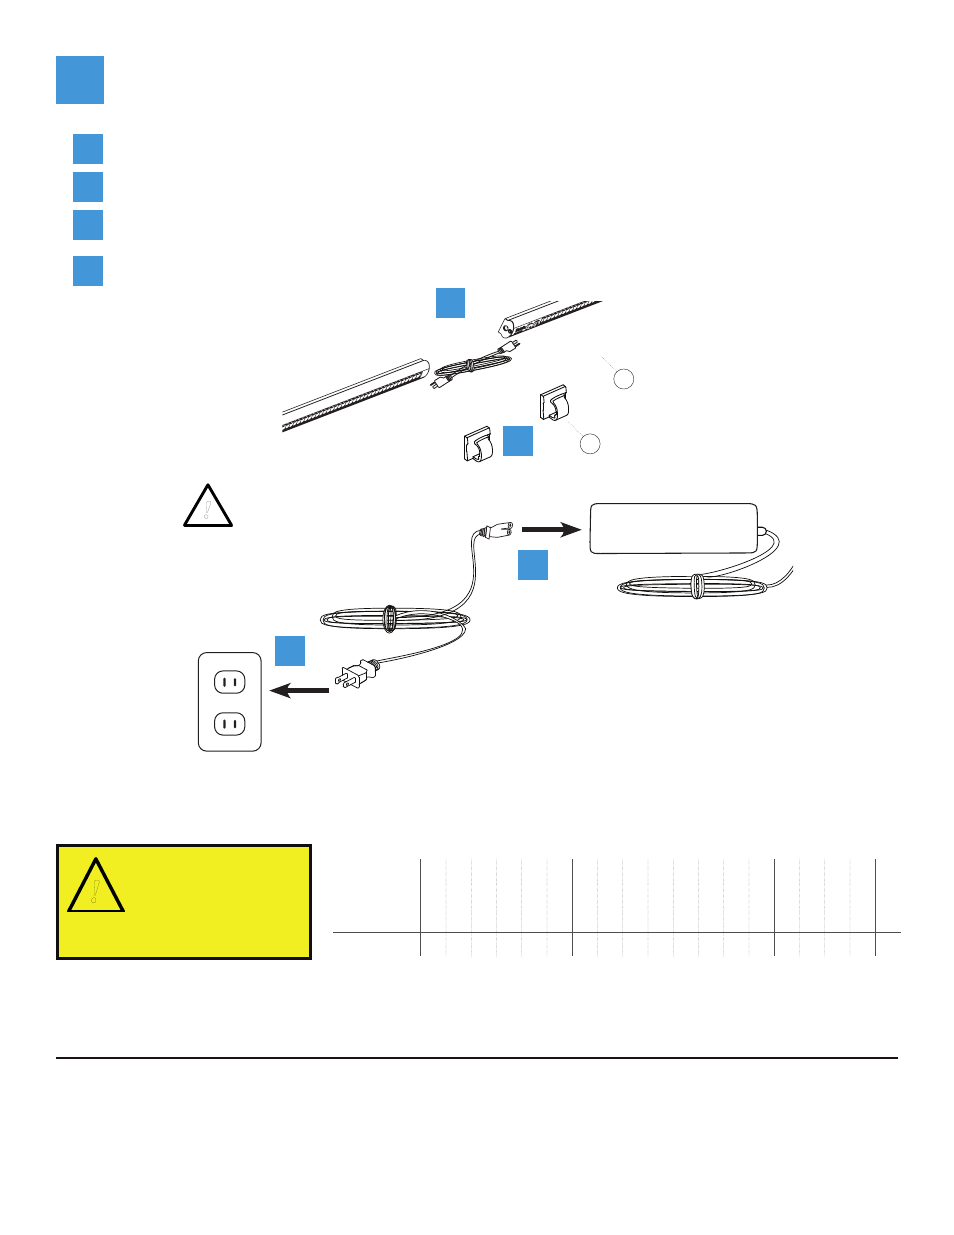
Fino Installation Instructions
Connect Daisy Chain Jumper units:
BEFORE PLUGGING INTO WALL connect all lights
7
Use Cable Clips(I) as needed to secure cord.
b
Connect later Finos together using 2-prong jumper cables or Connector (M).
a
Plug power cord into Transformer.
c
Plug in
M
I
a
c
Replacement parts
12", 24" & 48" Daisy Jumper Cords, xx" (xx = 12, 24, or 48) .................................................. FIN-DCxx96
1" Daisy Chain Connector ................................................................................................... FIN-DC01
Max 2.0A (48 watt) transformer .......................................................................................... FIN-T48
Fino hardware pack (contains qty 3 each of parts C, E and F, 4 of D, and qty 9 of G) .................. VER-HDWR
b
Maximum Daisy-chained units: Number of fixtures within same chain
FIN-24
1
1
2
1
1
1
2
2
3
2
3
3
4
5
FIN-36
1
1
2
1
2
1
2
3
2
1
FIN-48
1
1
2
1
2
1
1
1
Total/Chain 2
2
2
2
2
2
3
3
3
3
3
3
3
3
4
4
4
4
5
CAUTION
If connecting multiple
units in a daisy chain, to
reduce the risk of fire,
electric shock or injury to
persons, see table of maximum daisy
chained units at right.
!
Plug power cord into wall. Position light away from your eyes, and turn on.
d
d
Make sure all connections
are complete and secure!
!