Workrite Sierra Assembly Instructions for 3-leg Workcenters User Manual
Page 4
4
Workrite Ergonomics | 800.959.9675 www.workriteergo.com
Sierra Series Workcenters - Assembly Instructions for 2 and 3-leg Tables
4
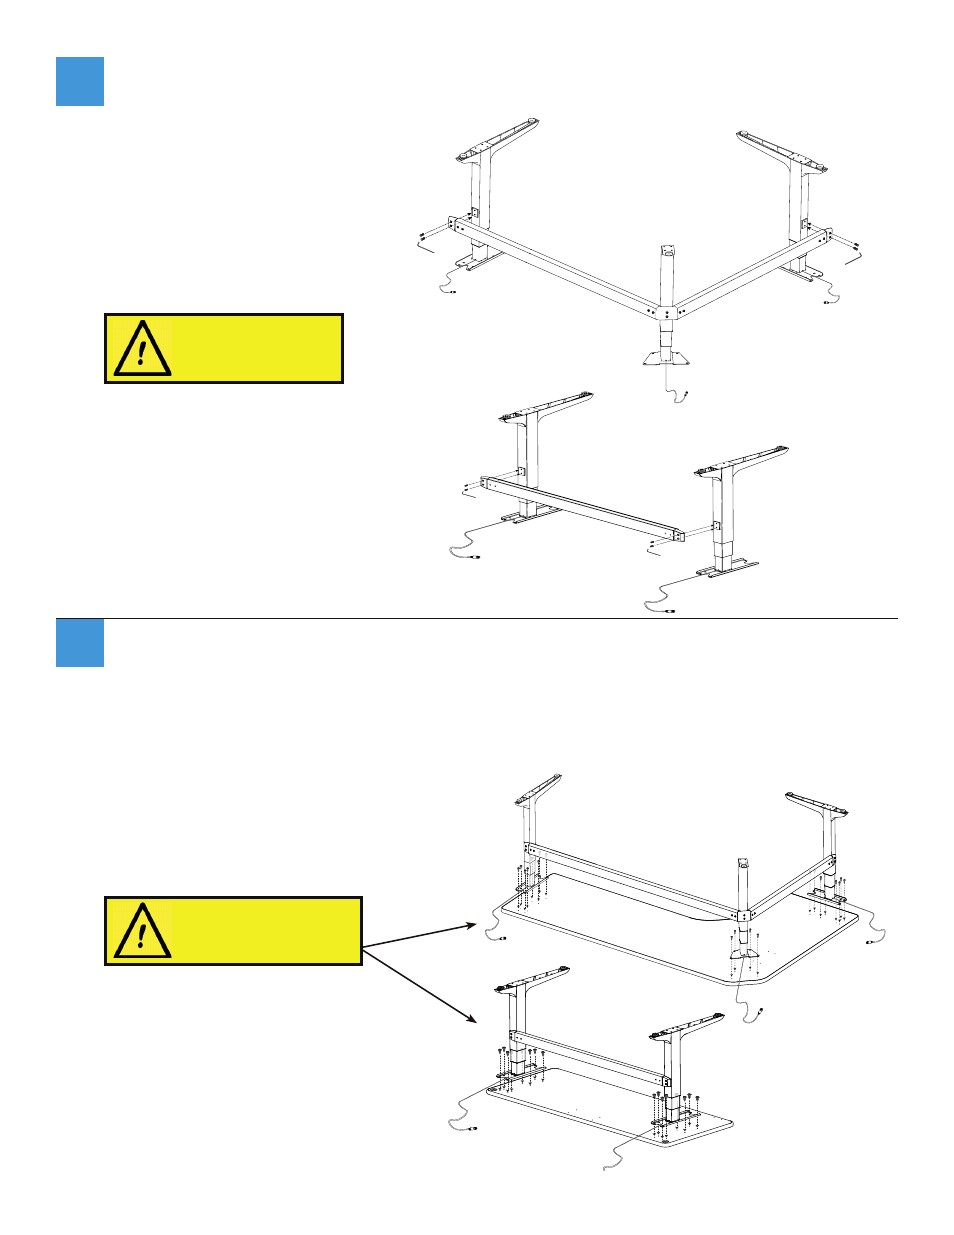
Attach Base to Tabletop
Be sure that the electric cables
are coming out from the back of
the legs and are not crimped or
pinched between the legs and the
tabletop.
If you have a Workrite tabletop, align top bracket mounting holes to pre-drilled holes in tabletop
and attach using #12 Phillips head Screws.
Otherwise, align base in desired position and mark placement of mounting holes, then use drill bit
to drill pilot holes at marked locations. Do not drill all the way through tabletop! Attach to the base
using #12 Phillips head Screws.
3
Attach Crossbars to Side Legs using ¼-20 x ⅝" Button head Machine Screws
To avoid stripping the threads,
always insert and make the
first few turns of the screw BY
HAND with an Allen wrench,
ensuring it is in straight.
3-Leg Tables
2-Leg Tables
3-Leg Tables
2-Leg Tables
D
D
D
B
B
B
B
E
E
E
E
J
J
J
J
J
A
A
F
F