Apply power, Check system operation, Connect and check monitors – Welch Allyn Mobile Acuity Hardware Installation Guide, 810-1626-03A - Installation Guide User Manual
Page 3: Shutdown & remove power
Mobile Acuity LT Hardwired System Installation Guide
3. Apply Power
• Make sure AC power source is on and all
power cords are plugged in.
• Apply power to the terminal server (check
front panel power switch).
• Apply power to the laptop computer (power
switch in upper left corner).
• Apply power to Propaq power adapters (if
adapter has power switch, make sure it is
on).
4. Check System Operation
Perform these steps to confirm that the system is
operating properly.
• Examine the following devices to make sure
LEDs are active indicating power is
supplied:
--Laptop computer
--Terminal server
--Propaq monitor power adapters
• Confirm that the Mobile Acuity LT displays
a screen similar to the following, and that the
“CHECK NETWORK” message is NOT
displayed.
5. Connect and Check Monitors
• Apply power to each monitor by pressing
the right-side power switch.
• Connect a blue data cable from the Terminal
Server to each monitor.
• Confirm that within 2 minutes the Acuity LT
displays for each monitor a waveform
window similar to the following:
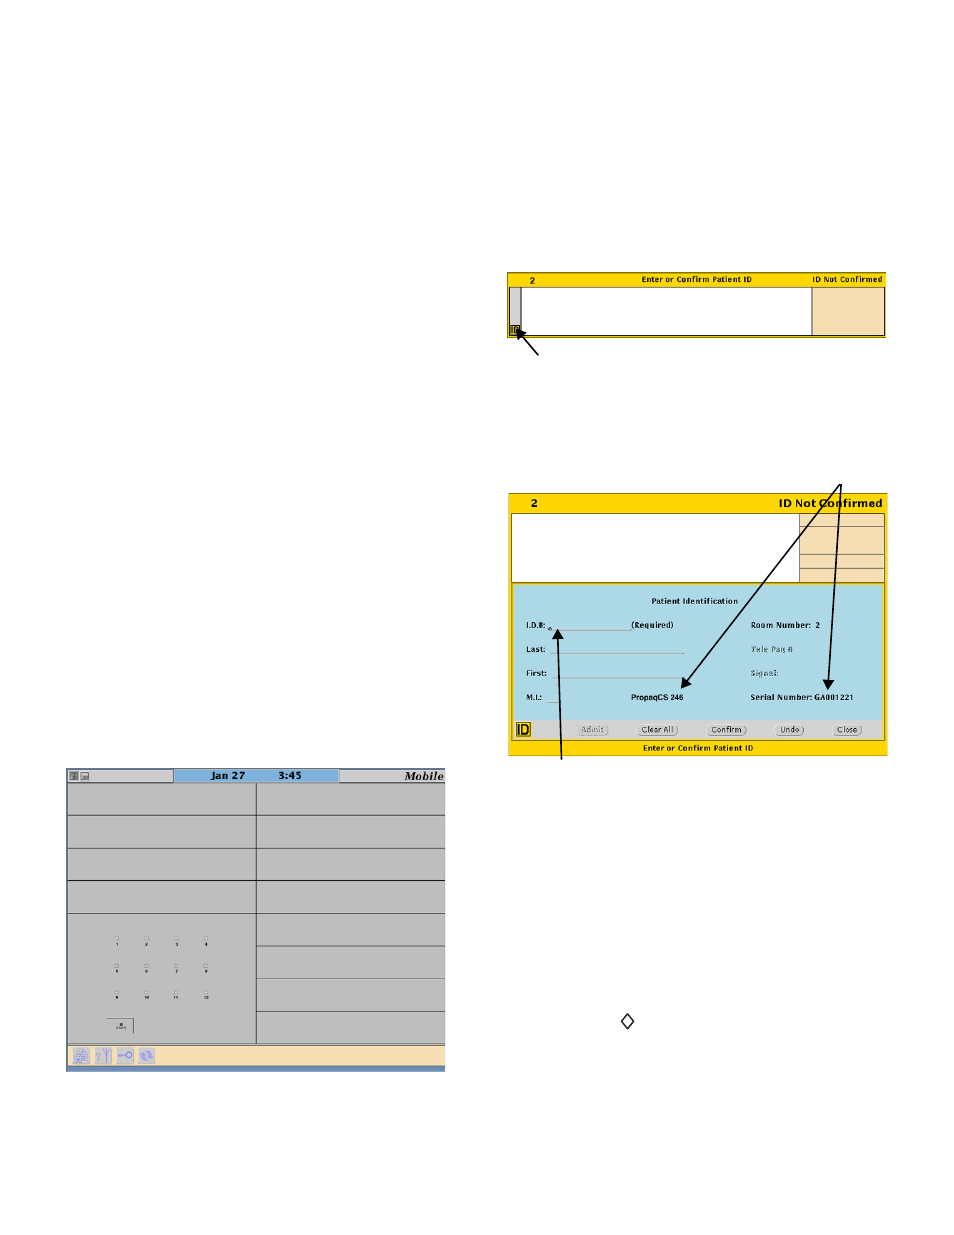
• To assign a Patient ID for a new patient, click
the ID icon in the Enter or Confirm Patient
ID Waveform Window.
6. Shutdown & Remove Power
• Notify staff members so procedural changes
in patient care can be put into place.
• At the Mobile Acuity LT laptop computer,
move the pointer into the gray area in the
upper right hand corner of the screen, hold
down the “ ” key (between “Fn” and “Alt”
keys) and press the right touch pad key.
• When the System Menu appears in the upper
right corner, click “Shutdown Workstation”,
then click “Confirm”.
• After the system shuts down, turn off power
to all equipment.
Note
The laptop computer will not operate for more
than about 45 minutes without connection to ac
power. To avoid loss of monitoring, make sure
the laptop is connected to ac power.
• Check the monitor model and serial
number and make sure it matches the
monitor connected to your patient
• Enter the Patient ID and Patient name,
then click “Confirm”.