Installation continued, Installation, Extension handle valve – Thetford 80 Marine Electra Magic User Manual
Page 4
4
5
Installation Continued
RV and Marine Models
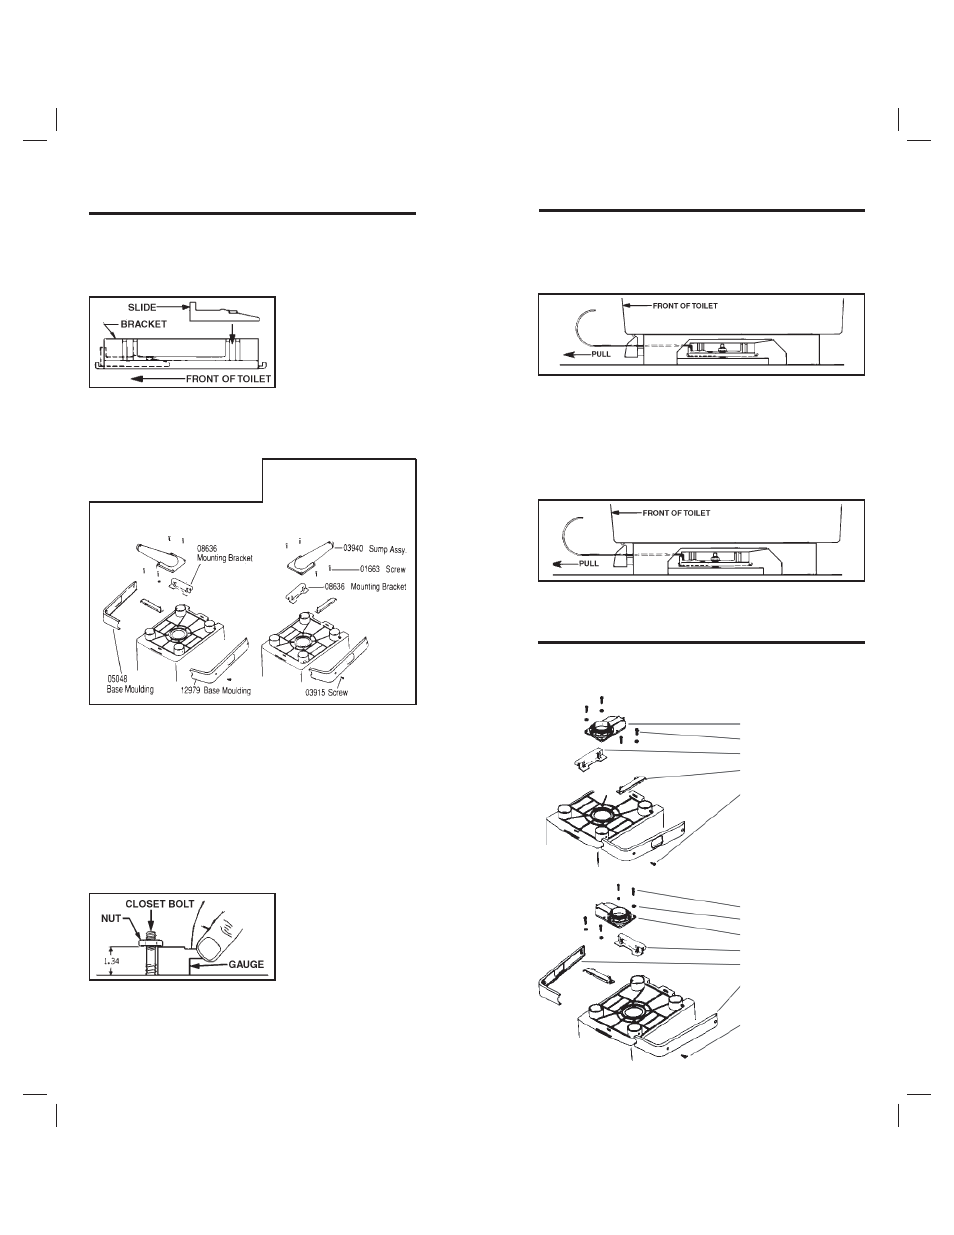
7. Insert a screwdriver or other long rigid instrument under
toilet. With a sharp blow drive each slide back until it
slides under nut and snaps into position.
8. If slides cannot be driven by one or two blows, remove
toilet and adjust each nut one-half turn upward and repeat
procedure from Step 6.
9. If toilet wobbles excessively, remove slides by catching
tabs with a hooked instrument and pulling forward, as
shown below. Lift toilet off, adjust each nut one-half
turn downward and repeat procedure from Step 6.
MULTIPLE POSITIONS
SUMP DISCHARGE
Side Discharge
Rear Discharge
Installation
Marine Model
CAUTION: Toilet is not explosion proof and must not be
located in an area where an explosive atmosphere exists,
such as gasoline fumes, etc.
1. Install white fork-
shaped slides on
brackets. Make one
right bracket as-
sembly and one left
bracket assembly.
(Right bracket assembly shown.)
2. Mount bracket assemblies and sump to bottom of toilet
with four screws. Brackets are sandwiched between sump
and toilet.
3. Locate toilet position with template and install bolts
in fl oor drilling 7/32” dia. hole in fl oor, putting acorn
nut on screw, and driving bolts into fl oor with wrench.
Remove acorn nuts.
4. Also using template, locate position for plastic locator
disc. Drill 5/32” dia. hole in fl oor and fasten disc to fl oor
with fl at sides oriented parallel to sides of toilet.
Important: This disc prevents toilet from moving on
fl oor.
5. Install one nut on each bolt and screw nuts down until they
touch top of gauge. If
gauge is misplaced,
bottom surface of nuts
should be 1.34 in. (3.4
cm) above fl oor.
6. Lower toilet over bolts until nuts go through rectangular
holes in metal brackets, and the unit rests on its feet.
Marine Installation Instructions continue on Page 5.
Extension Handle Valve
Toilet Model 24320 Only
Multiple positions using extension handle valve:
08707 Slide-EZ
Valve
08737 Screw
02792 Lockwasher
08636 Mounting Bracket
03915 Screw
08737 Screw
02792 Lockwasher
08707 Slide-EZ
Valve
08636 Mounting Bracket
12979 Base Moulding
05248 Base Moulding
03915 Screw