Small hoop embroidery – SINGER S10 STUDIO Instruction Manual User Manual
Page 47
47
140x140
i
o
q
t
e
r
t
y
SMAll HOOp EMBrOIDEry
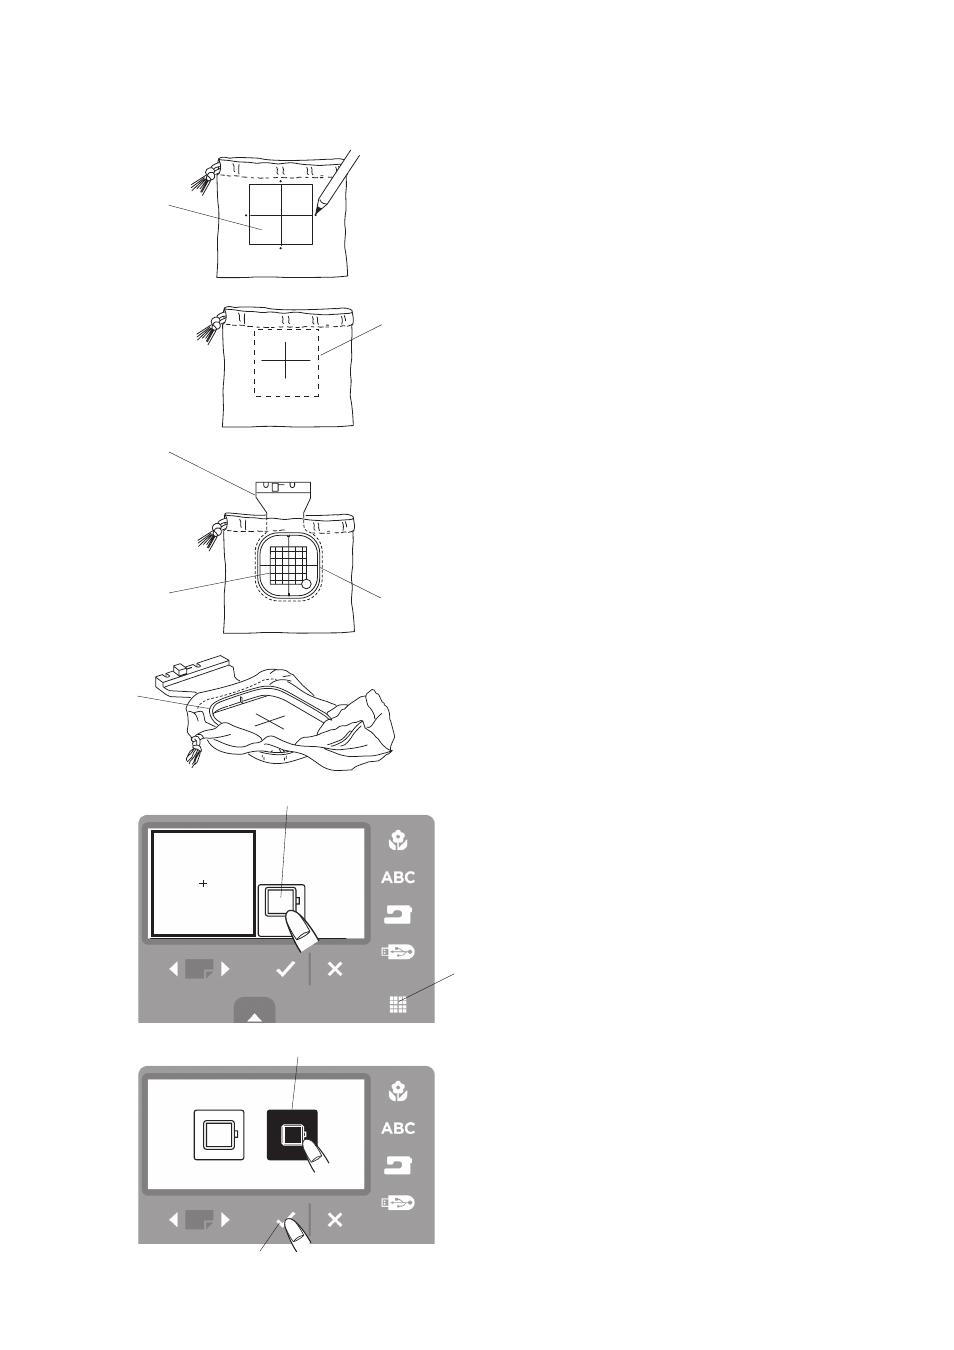
Step z
Put the design template sheet on the fabric and mark
the 4 dots as illustrated.
q
Design template sheet
140x140
50x50
!0
Step x
Draw the center lines on the fabric (small bag).
w Center lines
Position stabilizer inside bag under center lines.
e
Stabilizer inside the bag
Step c
Insert the outer hoop into the bag under the stabilizer.
Set the inner hoop with the template on the outside of
bag. Match the center lines on the fabric with the
template. Press inner hoop into outer hoop. Tighten
the hoop adjusting screw.
r
Outer hoop
t
Inner hoop
y
Template
Step v
Remove the template. Bring the unhooped part of
the bag fabric out from under the hoop (see
illustration), making sure that no part of it is placed in
the area to be embroidered t.
Step b
Press the edit button and the hoop selection icon.
u Edit button
i Hoop selection icon
Step n
Press the small hoop icon to select the small hoop
and press the OK √ button.
o Small hoop icon
!0 OK √ button
u
Design images will be on template sheets provided
with machine.
Your machine comes with two hoops - a large hoop and
a small hoop. The small hoop allows you to embroider
many projects for which the large hoop may be too big.
Below is an example of how you could embroider a
smaller project, such as a drawstring bag.
How to Sew a Design on a Small Bag
z
x
c
v
b
n