SINGER S10 STUDIO Instruction Manual User Manual
Page 24
24
q
w
e
r
t
u
y
u
t
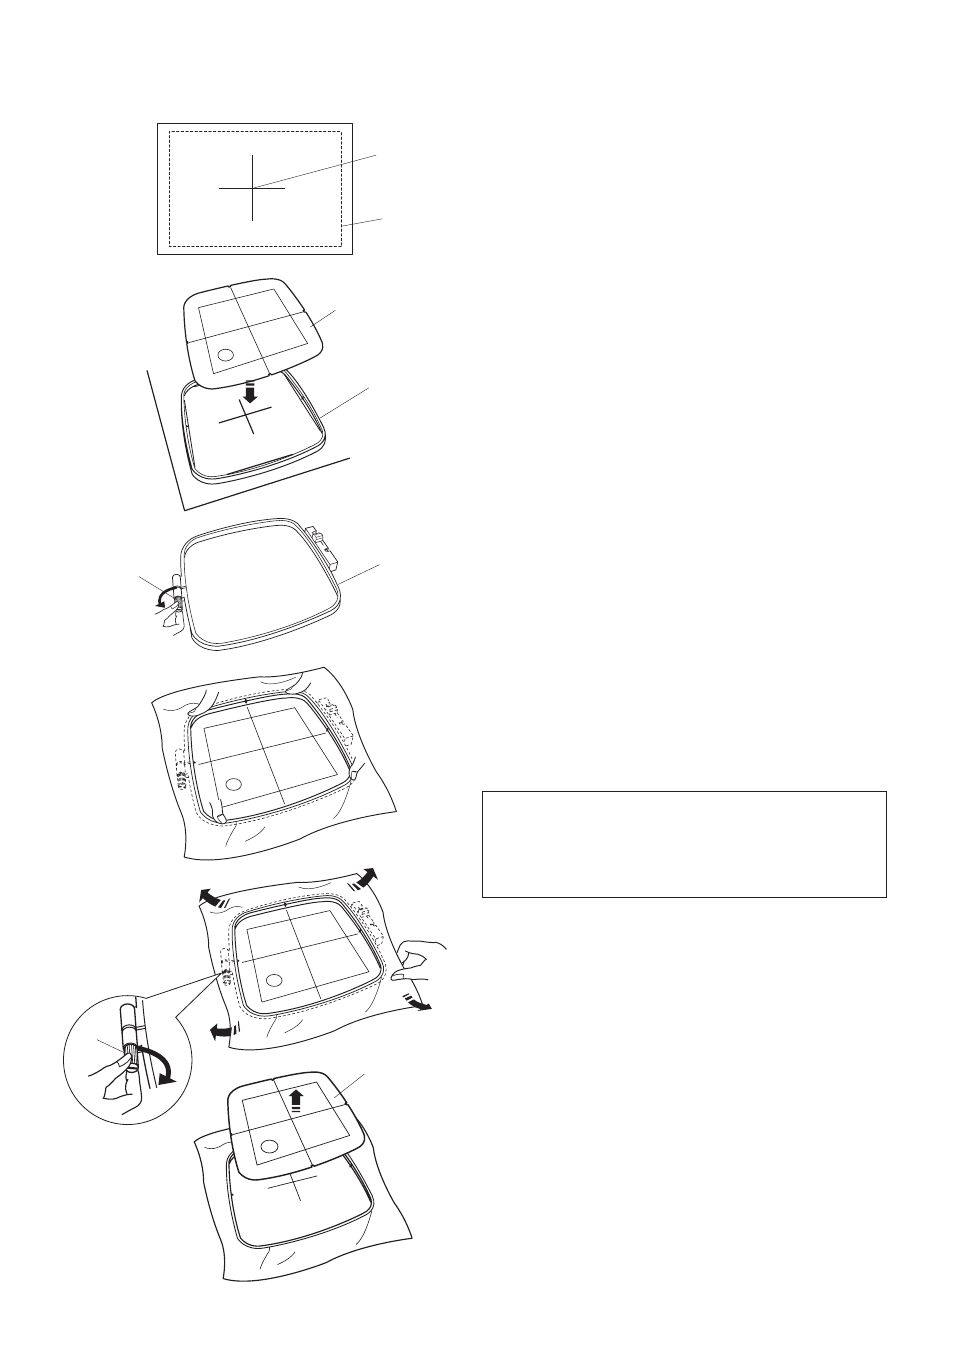
Securing Fabric in the Embroidery Hoop
Step z
Choose the proper placement of design on fabric.
Mark the center lines on the right side of the fabric
with tailor’s chalk or disappearing ink pin.
Place the stabilizer on the wrong side of the fabric.
q Fabric
w Center lines
e Stabilizer
Step x
Place the inner hoop with the template on the fabric,
matching the center lines.
r Inner hoop
t Template
Step c
Loosen the hoop adjusting screw of the outer hoop.
y Outer hoop
u Hoop adjusting screw
Step v
Lay the fabric, template and the inner hoop on the
outer hoop.
Push the inner hoop into the outer hoop.
Step b
Tighten the hoop adjusting screw.
Pull fabric corners to remove any slack fabric in hoop.
Step n
Tighten the hoop adjusting screw securely.
Step m
Remove the template.
Never force inner hoop into lower hoop. Release
the adjusting screw until inner hoop positions easily
into lower hoop. Forcing the hoop can damage the
adjusting screw and leave hoop marks on the fabric.
Never force inner hoop into lower hoop.
Template Sheets
Use the template sheets included with machine to mark
precise center lines for the built in designs. Position
template sheet on project to precisely position hoop.
See page 47, Step 1, for example.
z
x
c
v
m
bn