Rice Lake Livestock Solutions - Contrast Control Installation for 920i Weighcenter User Manual
Contrast control potentiometer installation, 920i, Weighcenter
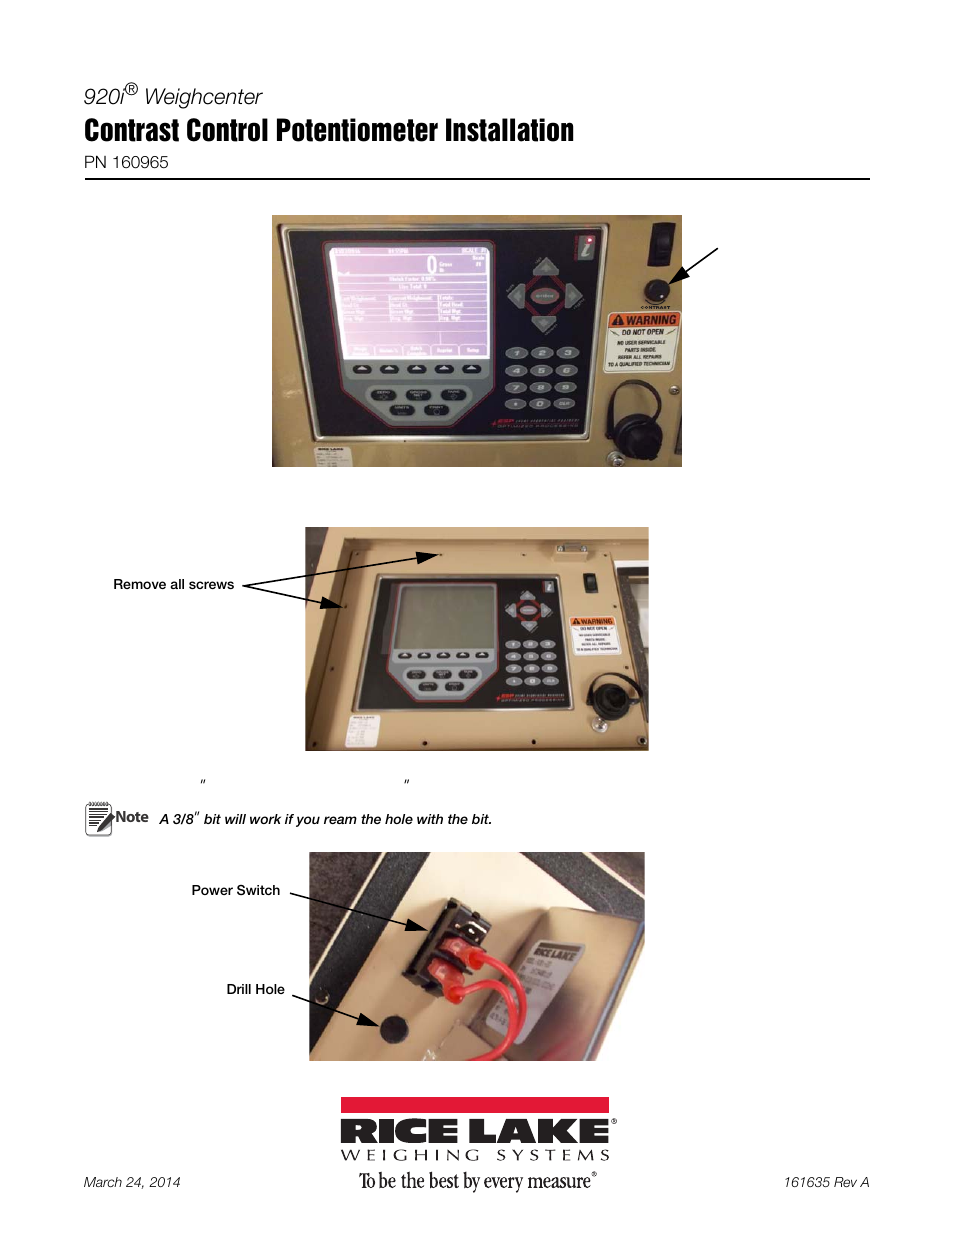
Table of contents
Document Outline
- Rice Lake Weighing Systems is an ISO 9001 registered company.
- Contrast Control Potentiometer Installation
- Figure 1. Contrast Control Potentiometer Installed
- 1. Remove the screws to remove the front bezel from the weighcenter frame.
- 2. Drill a 25/64” hole in the front bezel at 3/4” under the power switch.
- 3. Insert the potentiometer into the hole and tighten down with 1/2” wrench.
- 4. To remove back plate, remove the screws securing the it to the indicator.
- 5. Route the 8-pin connector cable through cord grip.
- 6. Locate J14, J16, J17 on the CPU board and remove the black jumpers.
- 7. Install the 8-pin connector as shown in Figure 8 making sure red wire is on Pin 1 of J14.
- 8. Using the splice taps, connect the wires from the potentiometer to the wires from the connector, see Figure 9.
- 9. Gather wires and wire tie the cable to the anchors.
- 10. Tighten cord grip and reassemble the unit.
- 11. Power unit up and verify the contrast potentiometer functions.
- Contrast Control Potentiometer Installation