Rice Lake 480 Panel Mount Option User Manual
Page 2
2
480 Legend Series Panel Mount Option
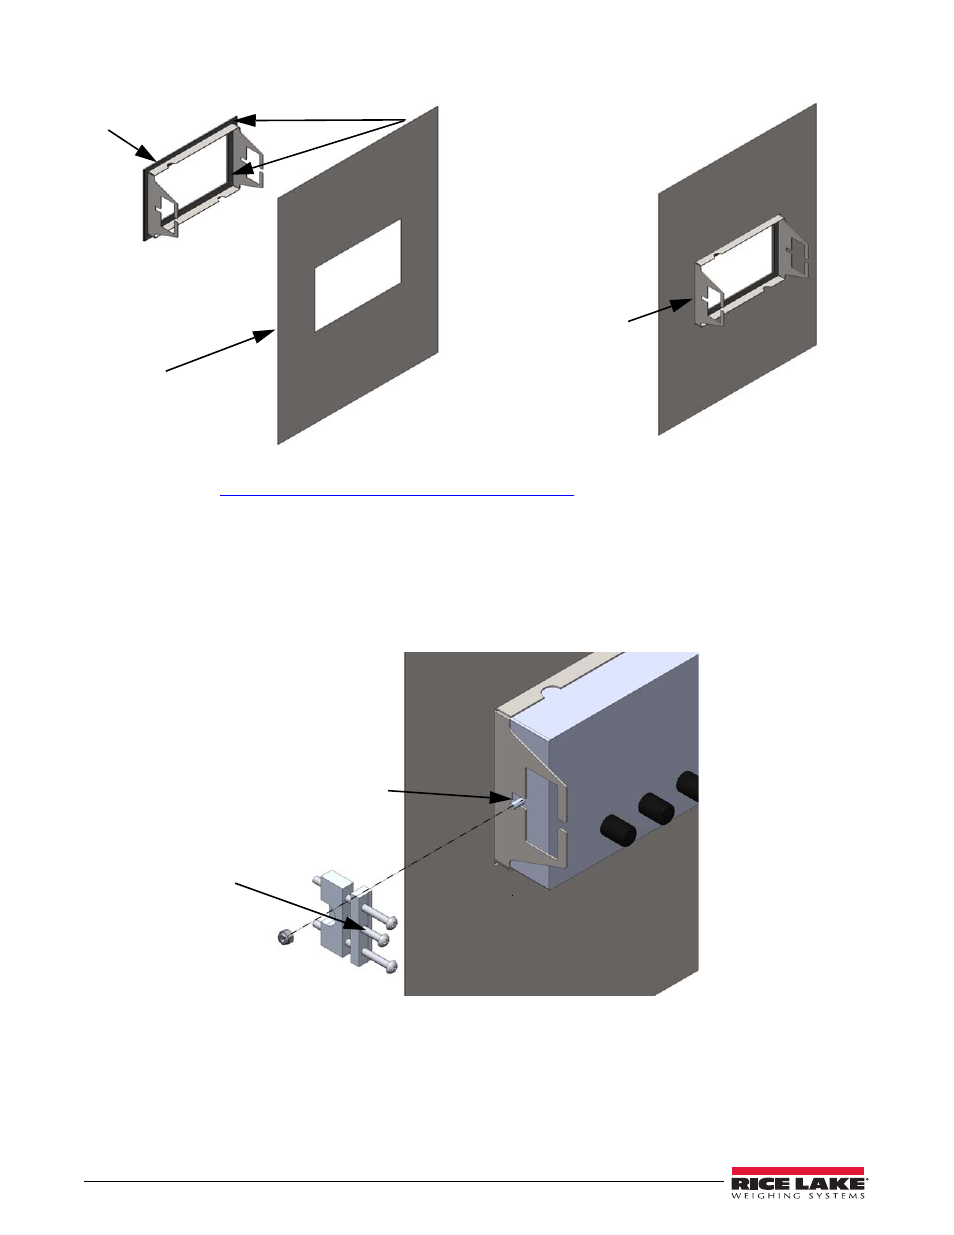
3. Peel adhesive backing from the bezel gaskets, than press bezel into the panel cutout.
Gaskets, outside
edge and inside
Bezel Bracket
Panel to be
mounted to
Bezel bracket inserted
in panel
Figure 3. Insert Bezel Bracket
4. Follow the
all cabling and the back panel of
the indicator.
5. Insert the indicator into the panel mount bezel from the inside of the panel. Align the mounting studs to the
slot in the bracket.
6. Place one clamp assembly over the mounting stud on one side of the indicator.
7. Install one M6 x 1 lock nut on the mounting stud, tighten only until the locking feature is engaged and the
nut is not allowed to rotate off the stud. The clamp assembly will be able to rotate freely on the stud. Do not
over tighten, this contact must slide when the clamp is applied in Step 8.
Align mounting studs to slots in bezel bracket
Do not over tighten, this contact must slide
when the clamp is applied in Step 8.
Center screw of clamp
assembly.
Figure 4. Install Indicator
8. Tighten the center screw of the clamp assembly as shown in Figure 4, until the indicator is pressed securely
against the inner bezel gasket.
9. Tighten the outer screws of the clamp assembly until the bezel is held loosely against the panel.
10. Place the other clamp assembly over the remaining mounting stud on the indicator.
11. Secure with the remaining M6 x 1 lock nut (Do not tighten the nut against the clamp assembly, see Step 7).