Vta (vertical tracking angle) adjuster wheel, Page 2, Enteprise adjustments – Origin Live Enterprise C User Manual
Page 2
Page 2
VTA (vertical tracking angle) adjuster
wheel
It is important to experimentally set the optimum arm height
by listening to different vta settings. If the arm base is too
high, the sound is usually slightly on the bright side and
lacking body in the bass – too low and it veers on the dull
side. To enable precise and repeatable vta setting your origin
Live arm has an integral vta adjuster wheel. This method of
height adjustment is extremely accurate, with obvious benefi ts
in terms of speed of adjustment. This means better listening
comparisons between different vta settings.
VTA Calibration:
The arm must be “unclamped” for the
vta wheel to work – see diagram for clamping grub screw
position. Just under the arm plate is the thin knurled vta
height adjuster wheel – The wheel has silver markings on the
edge so that you to see how far you turn it. There are actually
only 2 silver marks to allow you to count each half revolution
of the wheel. Every half revolution is equivalent to a 0.5mm
increase in height.
Clamping:
For the sake of speed in vta setting, we
recommend that you leave the arm unclamped during the
comparisons. However it will sound FAR better clamped
tight, once you have arrived at the vta “sweet spot”. An Allen
key is provided for this purpose and the position of the
clamping grub screw is shown in the relevant diagram.
The wheel is capable of raising the arm around 30mm but not
more than 20mm is recommended for optimum performance.
Transit and unpacking:
You will notice 2 cork strip
wedges in the space between the top of the arm tube and the
yoke. This is to prevent any movement out of parallel between
the yoke base and the turret plate whilst in transit. Remove
the cork strip and keep in a safe place as it should be replaced
for arm transit. Now go tho the next page for making the
dual pivots operational.
Thank you for purchasing an Origin Live arm. Enjoy getting
closer to the original sound and enter the heart of your music.
We hope to serve you in the future.
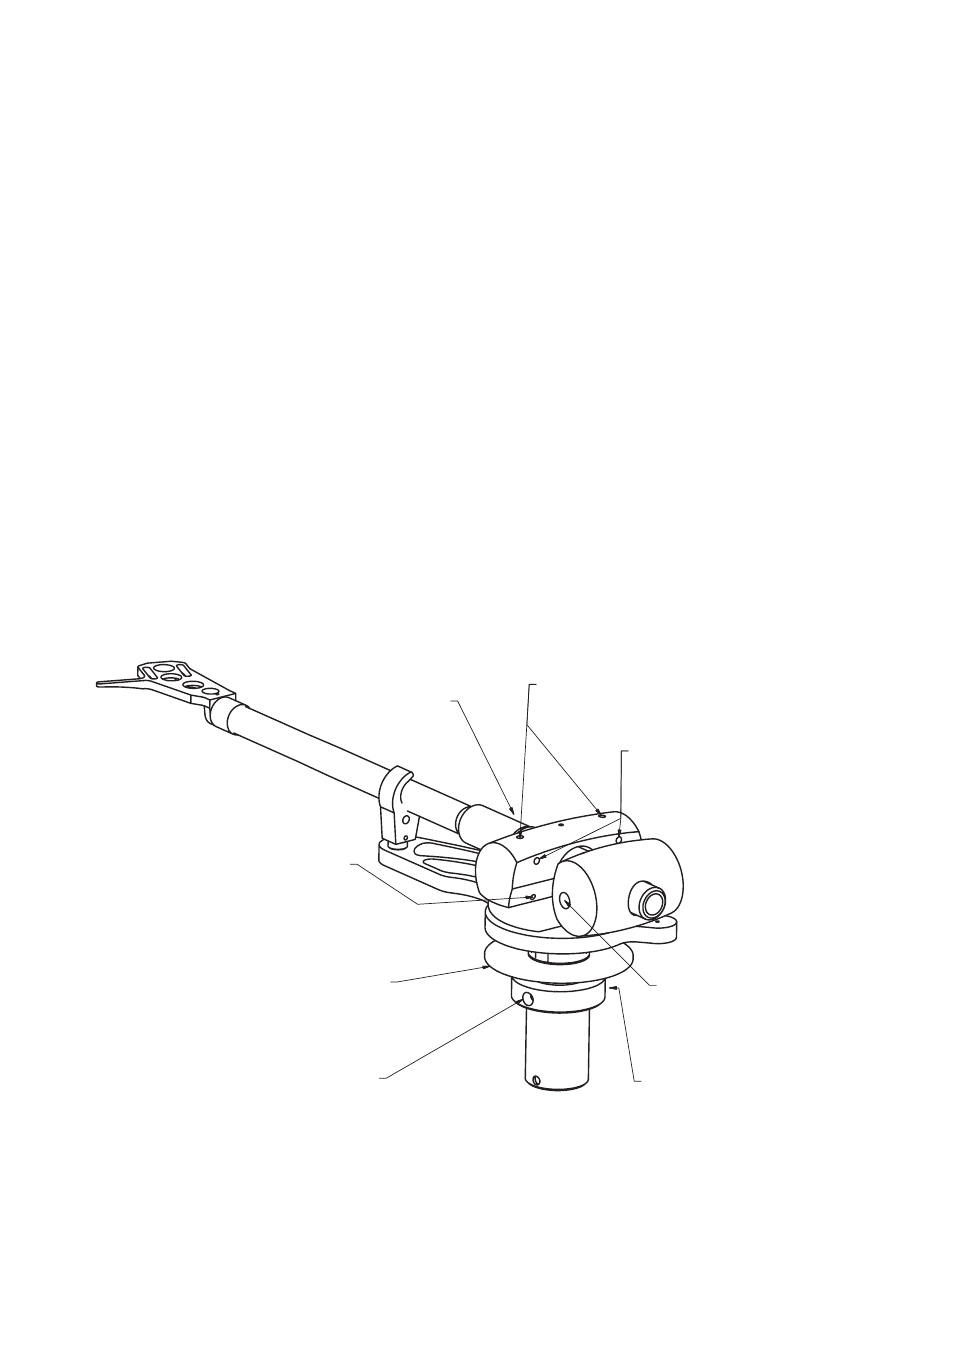
VTA CLAMPING SCREW
Tighten according to suit your deck
(Advise light clamping or none at all)
AZIMUTH PIVOT ADJUSTER SCREW
(Do NOT adjust without reading instructions- in
worst case you could damage pivots if you do)
COUNTERWEIGHT
CLAMPING SCREW
line up with groove along stub
DO NOT TOUCH THESE SCREWS
they clamp in the retaining rings which
prevent the arm coming apart
- loosing can result in breaking arm wires.
ENTEPRISE ADJUSTMENTS
VTA HEIGHT ADJUSTER WHEEL
Half turn clockwise raises arm 0.5mm
Must slacken VTA clamping screw before turning
Reclamp after adjusting to your preferred tension
AZIMUTH CLAMPING SCREWS
Best to slacken off approx 1 turn
for optimum performance
Tighten for transit
Do NOT adjust this grub screw
opposite the VTA clamp screw
Remove cork packing
strips and keep them
for transit purposes