Home Legend Hardwood and Bamboo T-molding User Manual
Page 4
Doc.ID: 095
Effective: 2-11-2013
Title: Installation Hardwood/Bamboo Stair Nose
Rev.:2
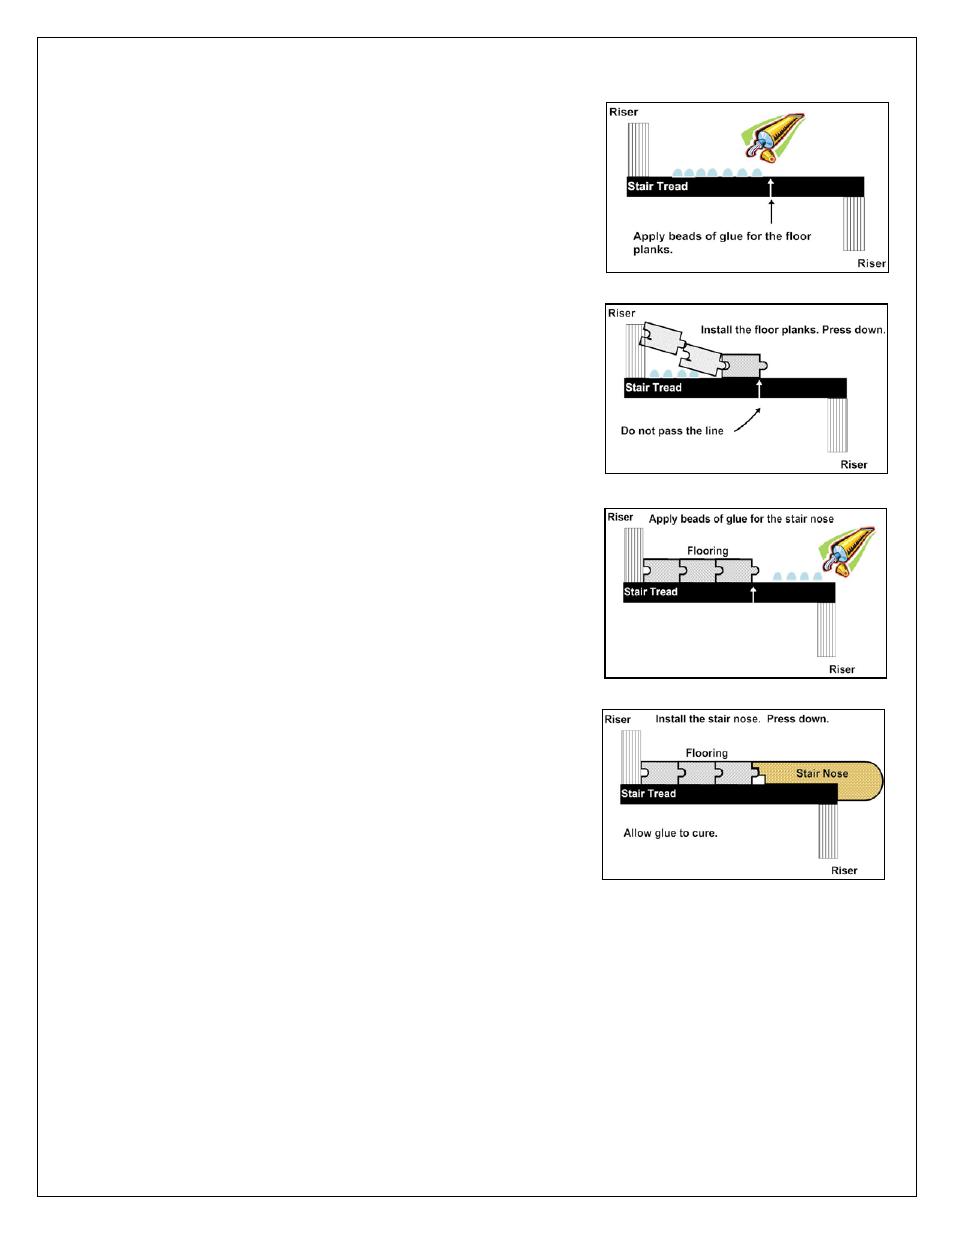
Step 3.
Apply several beads of flooring adhesive or construction adhesive to the
surface of the stair tread. This is to bond the flooring plank to the
surface of the stair tread, thereby making it the new stair tread, to
match with the stair nose that will be installed.
Step 4.
Press the flooring planks firmly into the adhesive to ensure maximum
bonding.
Step 5.
Apply beads of the construction adhesive along the entire width and
edge of the stair tread.
Step 6.
Replace the stair nose onto the edge of the step, into the newly laid
adhesive beads. Push the stair nose against the riser and the tongue
of the flooring until it is flush with the flooring plank.
As previously done with the flooring plank, press the stair nose firmly
into the adhesive to ensure maximum bonding to the stair tread.
At this time, both the flooring and the stair nose can be reinforced
with 1-1/4” finish nails. Counter sink the nails. Fill the holes with
color-matched putty.
Step 7.
Allow the glue to cure. Follow glue manufacturer’s recommendation. Once cured, the stair nose installation is
complete and it is available for immediate use.