Assembling the appliance – Gastroback 40133 Design Juicer Advanced Pro User Manual
Page 9
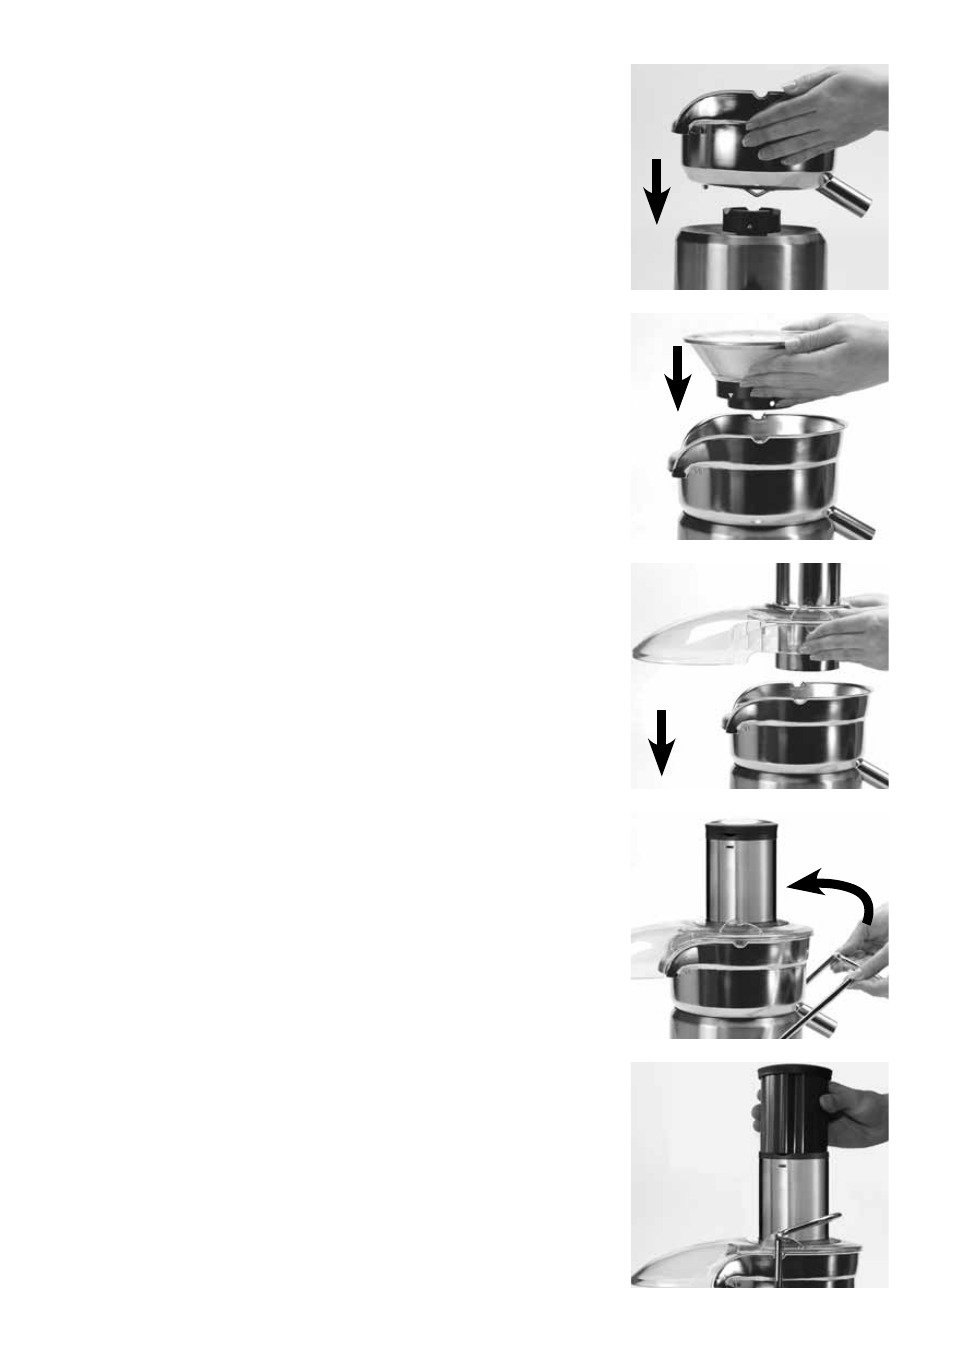
ASSemBlinG The APPliAnCe
Step1:
Place the filter bowl surround on the motor base. Locate the
integrated pulp container so that the spout fits through the hole
on the front of the motor base (picture A).
Step2:
wARninG:
Handle the units with care and do not use any
force. Pay attention to the sharp blades on the stainless steel
micro mesh filter and the feed chute to avoid injury. Always
completely assemble your juicer before you plug the plug into
the power point.
ATTenTiOn: Ensure the stainless steel filter basket is clean
before assembling. Any dehumidified left over food on the
basket will block the fine mesh holes. If necessary remove
excess fibre build up (from fruit or vegetables) according to the
instructions ´Care and Cleaning`.
Align the arrows on the stainless steel filter basket with the
arrows on the motor drive coupling and push down until it
clicks into place. Ensure the stainless steel filter basket is fit-
ted securely inside the integrated pulp container and onto the
motor base (picture B).
Step 3:
Place the juicer cover over the stainless steel filter on top of the
filter bowl surround (picture C). The feed chute has to be posi-
tioned in the middle of the filter basket and the pulp spouting
of the cover has to face away from the interlocking safety arm.
Step 4:
Raise the safety locking arm straight up and lock into the two
grooves on either side of the juicer cover. The safety locking
arm should now be in a vertical position and locked into place
on top of the juicer cover (picture D).
important: If the safety locking arm is not in the right position
the motor will not start moving.
Step 5:
Slide the food pusher down the feed chute by aligning the
groove of the food pusher with the small protrusion on the
inside of the top of the feed chute. Continue to slide the food
pusher down the feed chute (picture E)
39
B
A
C
D
e