Gastroback 40138 Design Multi Juicer Digital - Smoothie User Manual
Page 11
49
arrows on the motor drive coupling and push down until it
clicks into place. Ensure the stainless steel filter basket is
fitted securely inside the integrated pulp container and onto
the motor base (picture B).
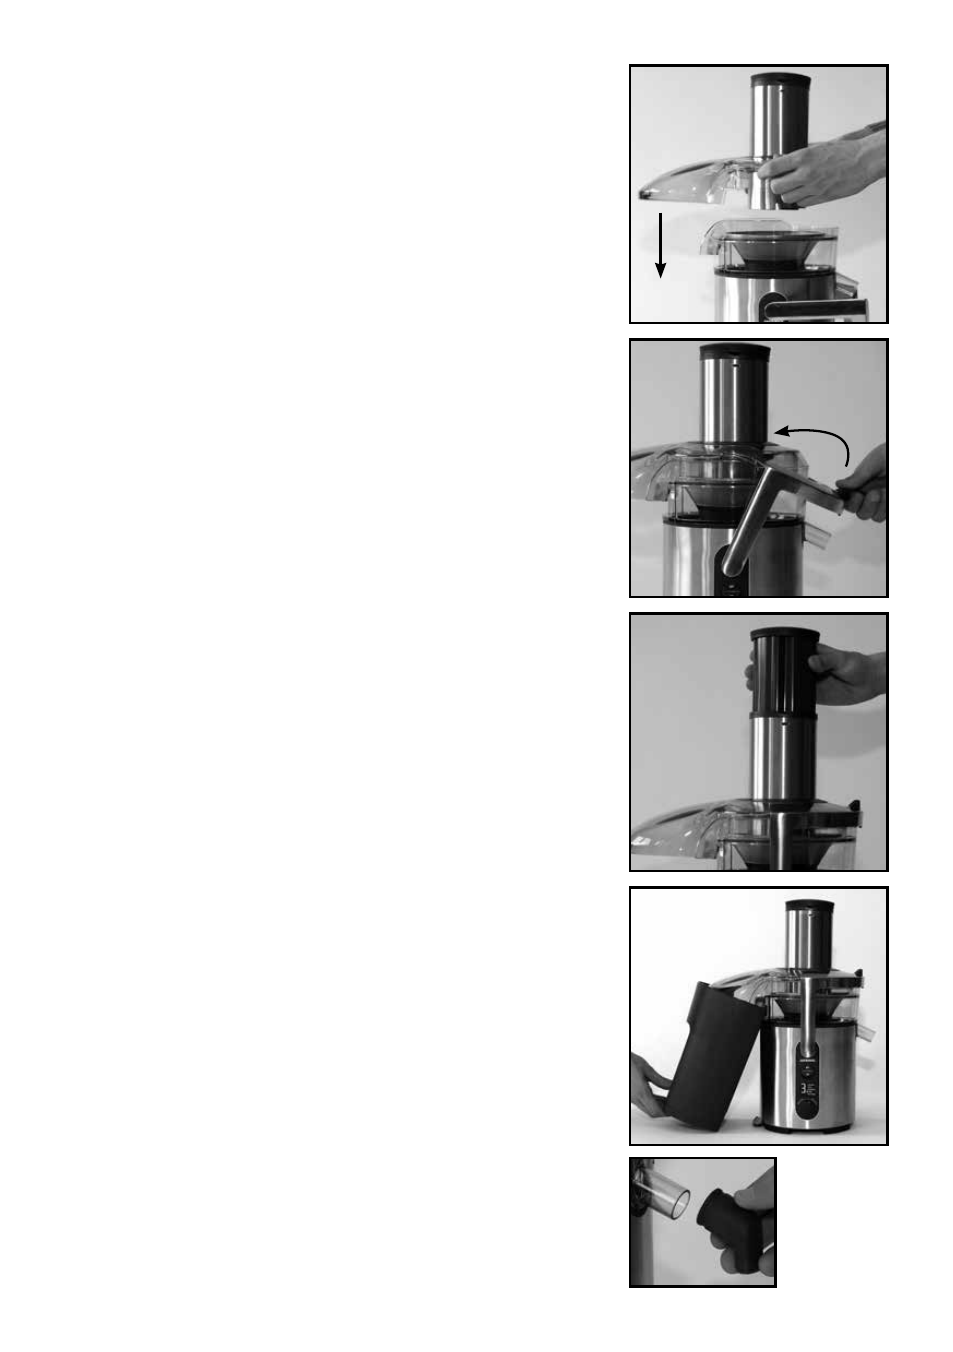
Step 3:
Place the juicer cover over the stainless steel filter on top of
the filter bowl surround (picture C). The feed chute has to
be positioned in the middle of the filter basket and the pulp
spouting of the cover has to face away from the interlocking
safety arm.
Step 4:
Raise the safety locking arm straight up and lock into the two
grooves on either side of the juicer cover. The safety locking
arm should now be in a vertical position and locked into
place on top of the juicer cover (picture D).
important: If the safety locking arm is not in the right posi-
tion the motor will not start moving and the display shows
“Lockbar”.
Step 5:
Slide the food pusher down the feed chute by aligning the
groove of the food pusher with the small protrusion on the
inside of the top of the feed chute. Continue to slide the food
pusher down the feed chute (picture E)
Step 6:
Place the pulp container into position by tilting the motor
base slightly to the right. Insert the container under the juicer
cover on the left-hand side ensuring it is supported by the
container support extending from under the motor base
(picture F).
note: Pulp can then be used in other dishes, or as compost
for the garden or discarded.
Step 7:
Place the juice jug provided under the spout on the right-
hand side of the appliance. The juice jug lid can be used to
avoid any splatter.
Alternatively you can fit the custom-designed juice nozzle
over the juice spout and place a glass underneath. The juice
nozzle will prevent splatter, ensuring mess free juicing
(picture G).
C
D
e
f
G