Replacement of filter cartridges - all ro units, Ews, inc. / environmental water systems 4.2-18 – Environmental Water Systems RU Series User Manual
Page 18
EWS, Inc. / Environmental Water Systems
4.2-18
www.EWSWATER.com office: 702-256-8182 (m-f; 8:30-4:30, pst) fax: 702-256-3744 [email protected]
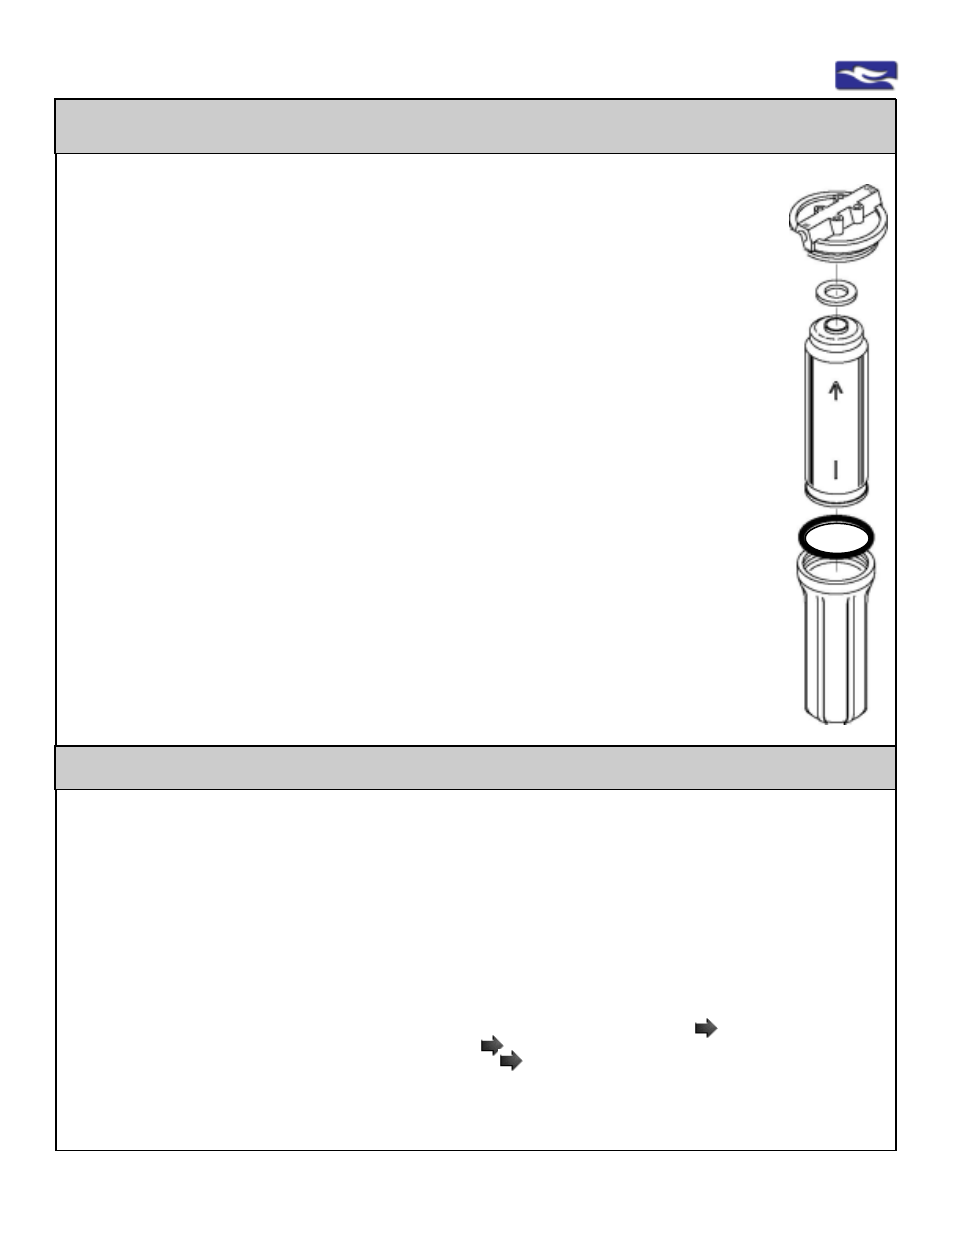
Replacement of Filter Cartridges - All RO Units
It is recommended that all filters be changed at least annually or more frequently based on usage and
local water conditions. The quantity and quality of the water processed effects the life of the filters.
Housing to
be removed
Upper
Housing
to Bracket
Housing
O-Ring
Step 1:
Open dispenser/faucet. Lock handle in the up and open position and allow water to flow.
Water will eventually only drip then almost come to a stop.
Now go to Step 2. Keep dispenser/faucet open until instructed to close.
Step 2:
When water has come to a stop or very slow drip, Close inlet water supply to the system.
Step 3:
Using your spanner wrench, turn housing (which contains the filter cartridge)
counterclockwise to loosen. Remove housing.
Step 4:
Remove filter and dispose.
NOTE:
See optional disinfection procedure of empty unit on page 4.1-20 before replacing any filters,
membranes, or UV lamp (if applicable)
Step 5:
Insert new filter(s), replace and tighten housing by turning clockwise.
CAUTION:
The GAC Postfilters (UDF10HP on all RO Units, OCB on 5-Stage RO only) has a gasket
that must be at the top of the filter to be replaced correctly. All other filters do not have a
top or bottom and can be inserted either way.
CAUTION:
Inspect O-Ring for housing base. Make sure it is clean, free of any debris and not
damaged or kinked. Make sure it is correctly seated into the channel inside the housing
before replacement.
GAC
Filters
“UDF10HP”
& “OCB”
Gasket
Must
Face Up
all other
cartridges
can go in
either
direction
Step 6:
ONCE NEW FILTERS/MEMBRANE HAVE BEEN REPLACED - CHECK AND FOLLOW ALL
APPROPRIATE STEPS FOR “SYSTEM START-UP AND OPERATION PROCEDURES”
CAUTION:
WATER WILL BE PRESENT WHEN FILTERS ARE CHANGED.
A pan, towel, etc. should be placed under the housings to catch any water.
strictly for illustration purposes only
Replacement of In-Line Postfilter - 4&5 Stage Units Only
NOTE: In-Line filters are labelled as a “Postfilter” on top of all 4-& 5-Stage Units. The filter is a self-contained cartridge.
Replacements do not come with fittings. Follow instructions for the removal and replacement of these cartridges.
CAUTION:
In-Line cartridges have a proper water flow direction - Note the word “FLOW” and the Arrow on top of the cartridge.
4-Stage: Units: IN from the swivel “T” (white & yellow tube) TO the single connection with blue tube.
5-Stage: Units: IN from the single connection with white tube TO the swivel “T” (white & yellow tube) connection.
Step 6: Re-connect all the tubing into the correct fittings and locations.
White and yellow tubes at “T” connection. Single blue (4-Stage) or white (5-Stage) tube at other connection.
WARNING:
FOLLOW THE CORRECT PROCEDURES FOR THE REMOVAL AND INSERTION OF TUBING
Step 7: FOLLOW ALL APPROPRIATE STEPS FOR “SYSTEM START-UP AND OPERATION PROCEDURES”
Step 1: Identify the end of the filter cartridge with the swivel “T” connection with two (2) tubes.
Yellow tube is always straight in. White tube is always at the bottom of the “T”.
Step 2: Disconnect the white tube and the yellow tube. Disconnect fitting from the filter cartridge
by turning counter-clockwise. Keep for re-connection.
Step 3: Identify the end of the filter cartridge with the connection with one (1) tubing fitting:
Step 4: Disconnect the blue (4-Stage Units) tube or white (5-Stage Units) tube. Disconnect fitting
from thefilter cartridge by turning counter-clockwise. Keep for re-connection.
Step 5: Using Teflon tape (not included) wrap threads on the quick connect fittings in a clockwise
motion for at least three revolutions. Re-connect the quick connect fittings on the new filter
cartridge by hand tightening fitting clockwise into the filter cartridge. DO NOT OVERTIGHTEN