Djdlm-obdii setup – Dynojet Data Link Module - OBDII User Manual
Page 8
Data Link Module-OBDII Installation and User Guide
D A T A L I N K M O D U L E - O B D I I
DJDLM-OBDII Setup
4
. . . . . . . . . . . . . . . . . . . . . . . . . . . . . . . . . . .
DJDLM-OBDII SETUP
This section provides basic instructions for setting up the DJDLM-OBDII with
WinPEP 7. To ensure safety and accuracy, perform the procedures as they are
described.
I
NSTALLING
THE
DJDLM-OBDII
1
Connect the DJDLM-OBDII to the vehicle’s data port. The data port is usually
located on the driver’s side underneath the dash.
2
Connect the DJDLM-OBDII to your computer, where you are running the WinPEP
software, using either the wired or wireless network. Verify that your computer
system has network connectivity with the DJDLM-OBDII.
3
Turn the vehicle’s key to the ON position. The engine may need to be running on
some vehicles in order to power the DJDLM-OBDII.
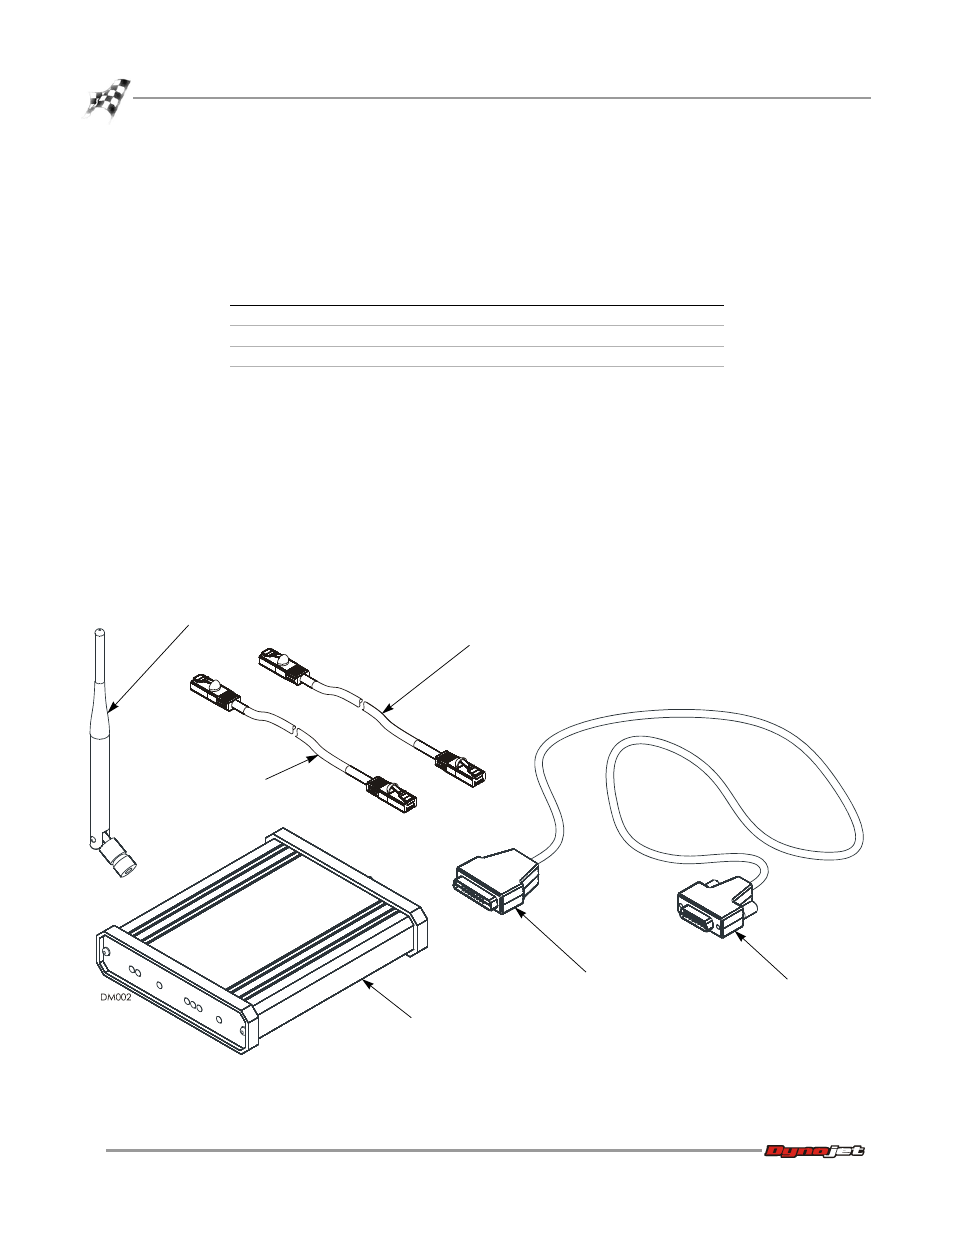
Figure 1: Installing the DJDLM-OBDII
part
description
quantity
DJDLM-OBDII (P/N 76100008) includes the following:
42900000
cat5e patch cable, 15', black
1
42900001
cat5e crossover patch cable, 14', red
1
66100005
OBDII Data Link Module, with antenna and
15-pin cable
1
connect to
vehicle’s data port
connect the15-pin
cable to the
DJDLM-OBDII
use red cat5 crossover cable
to connect to peer to peer
wired network
connect antenna for
wireless networks
use black standard cat5
cable to connect to a
wired network hub
DJDLM-OBDII
module