Dynojet 224: Pit Installation Guide User Manual
Page 35
B A S I C D Y N O O P E R A T I O N
Loading the Vehicle
Version 4
In Ground Model 224 Automotive Dynamometer Installation Guide
3-3
6
Secure the non-drive wheels using the provided tire chocks. Do not use tire
chocks for four wheel drive vehicles on four wheel drive dynos.
7
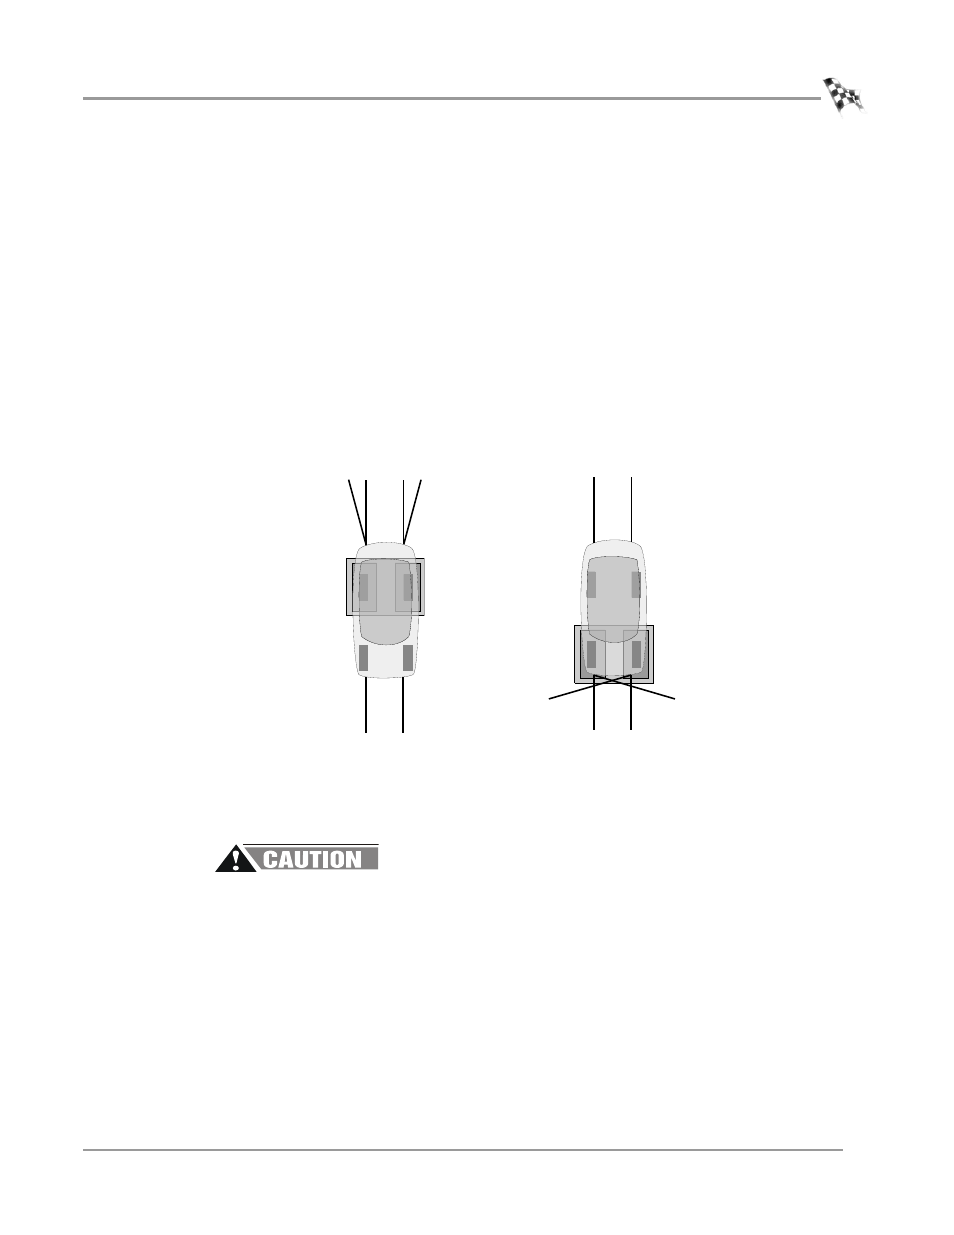
Attach the tie-down straps.
Rear Wheel Drive
• Attach two tie-down straps from secure anchor points to the rear of the
vehicle. Attach additional tie-down straps from the rear of the vehicle as shown
• Attach two tie-down straps from secure anchor points to the front of the
vehicle.
Front Wheel Drive
• Attach two tie-down straps from secure anchor points to the rear of the
vehicle.
• Attach two tie-down straps from secure anchor points to the front of the
vehicle. Attach additional tie-down straps across the front of the vehicle to
form a crisscross.
Figure 3-2: Attach Tie-down Straps
8
Tighten the tie-down straps evenly making sure that the drive wheels remain
centered on the drum.
The tie-down straps should always be connected to the vehicle’s solid axle or
the suspension control arms. Factory tie-down hooks connected to the
vehicle’s frame may be used on the end opposite the drive wheels (for
example: the front end of a rear driven vehicle).
9
Release the brake on the vehicle and the dyno.
10 Start the vehicle and put the transmission into first gear or drive.
11 Press the accelerator pedal so the drums begin turning slowly. While the drums
are slowly turning, get a feel for the stability of the vehicle.
12 Stop the vehicle, check all the straps, and ensure the vehicle is tracking straight on
the dyno.
rear wheel drive
front wheel drive