Installation, Removing the hood, Figure 2: dynoware ex+ modules – Dynojet 250: DynoWare EX+ Upgrade User Manual
Page 9: Figure 3: remove the hood
I N S T A L L A T I O N G U I D E
Installation
Version 3
DynoWare EX+ Upgrade Installation Guide
3
. . . . . . . . . . . . . . . . . . . . . . . . . . . . . . . . . . .
INSTALLATION
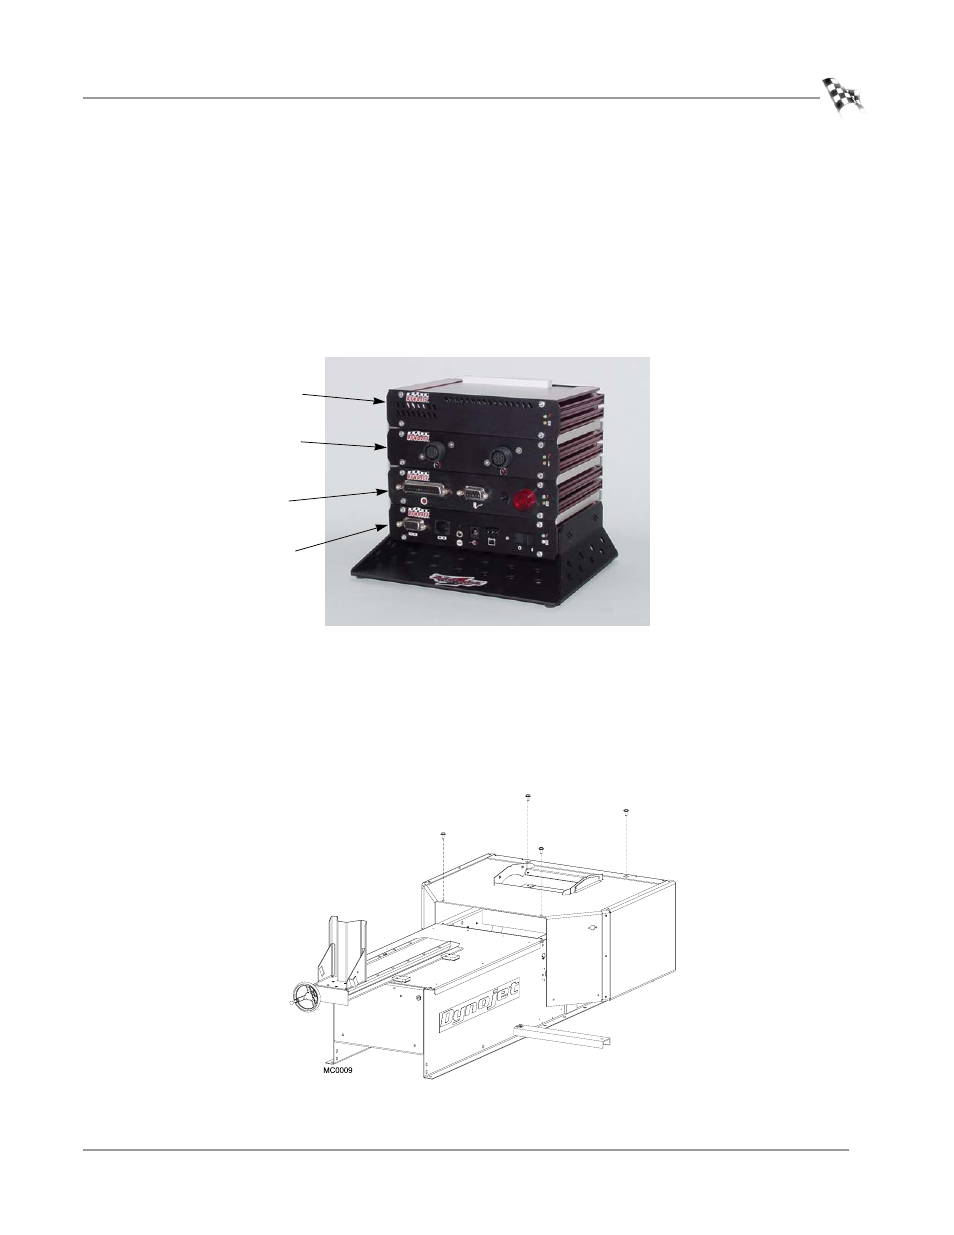
The DynoWare EX+ system is comprised of four modules: the CPU Module, the
Dynamometer Input/Output Module, the RPM Module and the Atmospheric Sensing
Module. The upgrade requires a new pickup card and Breakout board (the interface
between the dyno and the new DynoWare EX+ hardware). This section will provide
you with the information necessary to install and connect the new components. If you
have an air brake you will need to make additional modifications; refer to “Air Brake
Modifications” on page 7 for more information.
Figure 2: DynoWare EX+ Modules
R
EMOVING
THE
H
OOD
1
Disconnect all power to the dyno.
2
Remove the four bolts securing the hood to the dyno.
3
Prop up the hood and disconnect all battery wires.
4
Remove the hood.
Figure 3: Remove the Hood
atmospheric
sensing module
RPM module
dynamometer
input/output module
CPU module