Removing the original hardware, Figure 5a: remove the rpm box, Figure 5b: remove the rpm box – Dynojet 250: DynoWare EX+ Upgrade User Manual
Page 10
DynoWare EX+ Upgrade Installation Guide
D Y N O W A R E E X + U P G R A D E
Installation
4
R
EMOVING
THE
O
RIGINAL
H
ARDWARE
1
Disconnect the cables from the existing pickup card.
Figure 4: Disconnect the Cables from the Pickup Card
2
Disconnect the cables from the RPM box, if present.
3
Remove the cable clamps securing the wiring harness under the front dyno cover.
4
Remove the old cables. Be sure to leave the starter cable in place.
5
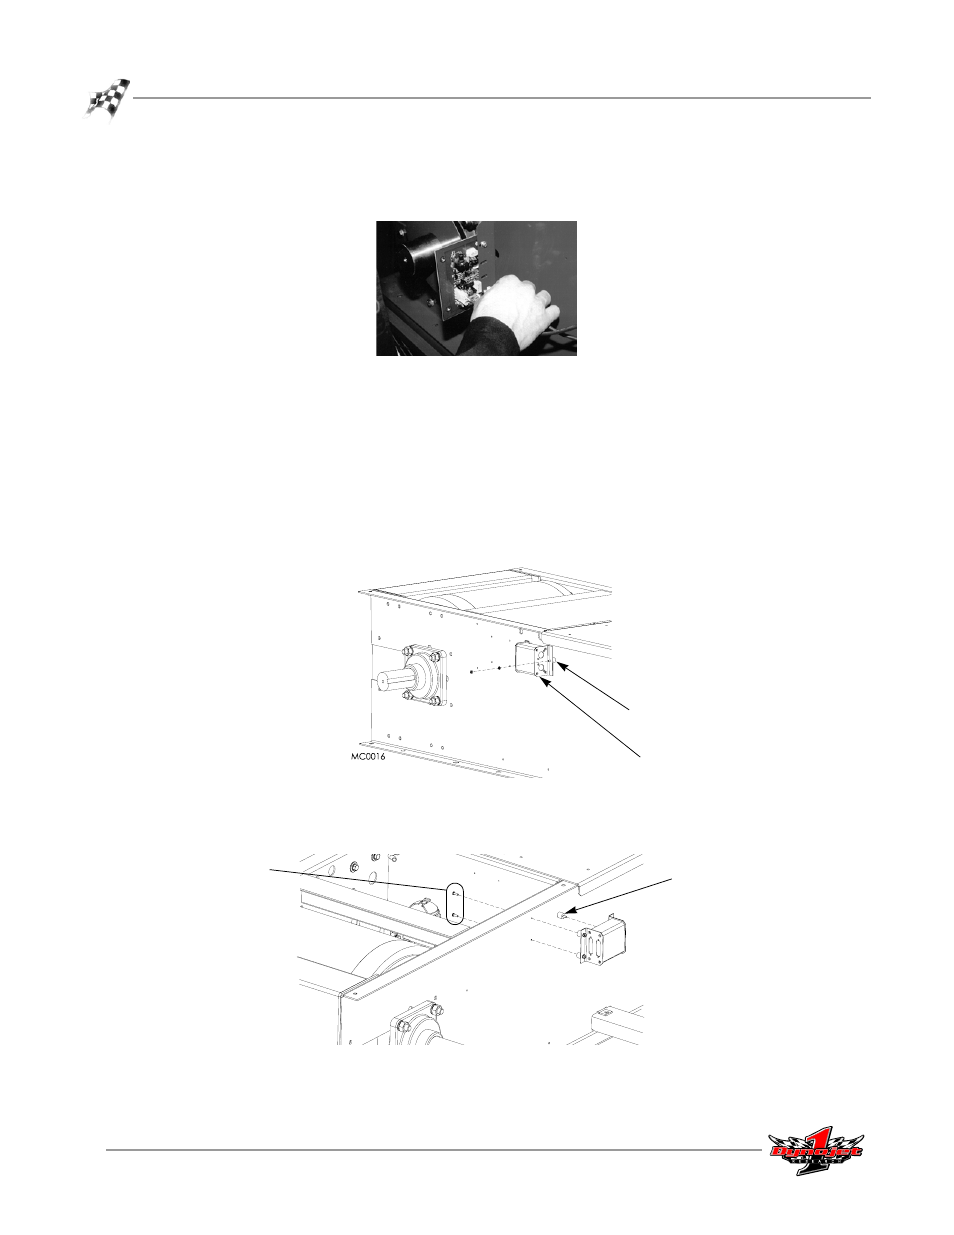
Remove the RPM box, if present.
5a
Remove the nut and washer from the vibration dampening mount on the
right side of the RPM box.
Note: This dampening mount will remain in place due to the difficulty of
removing the screw that secures it to the frame.
Figure 5a: Remove the RPM Box
5b
Remove the two screws securing the two remaining dampening mounts and
remove the RPM box.
Figure 5b: Remove the RPM Box
6
Remove the two screws securing the pickup card and remove the card.
RPM box
dampening mount
screws
this dampening mount
will remain attached