Code 3 WingMan with Torus User Manual
Page 5
5
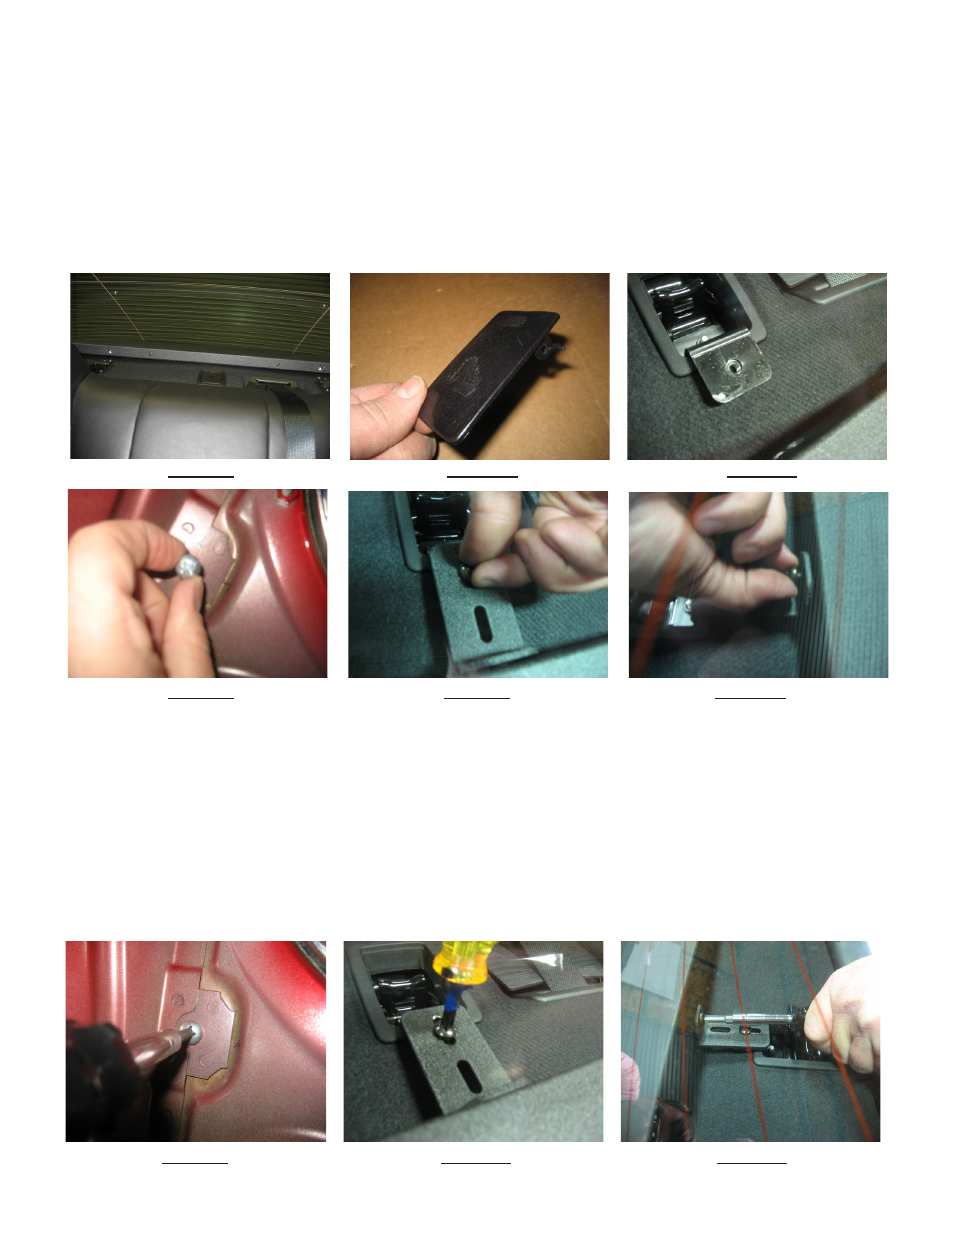
FIGURE 15 FIGURE
16
FIGURE
17
FIGURE 18 FIGURE 19
FIGURE
20
FIGURE 21 FIGURE
22
FIGURE
23
Step 8 From inside the trunk tighten the (2) 1/4"-20 X 5/8" Phillips Pan Head Screws (see Figure 21).
Step 9 Back inside the rear passenger area of the vehicle push the WingMan back tight against the rear window and tighten the (2) 1/4"-20 X
1/2" Black Zinc Plated Phillips Pan Head Screws that fasten the WingMan Mounting Brackets together (see Figure 22).
Step10 Tighten the (2) 1/4"-20 X 1/2" Black Zinc Plated Phillips Pan Head Screws that fasten the WingMan Mounting Brackets to the WingMan
(see Figure 23).
Step11 Reposition the vehicle's fabric upper trunk liner and replace the Christmas Tree Fasteners.
Note: If the Gasket has wavy areas where it contacts the rear window you can press down firmly all along the rear contour on top of
the WingMan as far back as you can reach to allow the gasket to pop back into shape.
Note: As stated in Step-3 if it is desired that you retain the plastic child restraint covers you will have to trim the covers to clear the
WingMan's Mounting Brackets before re installing the covers.
Step 5 From inside the trunk of the vehicle, slip a supplied 1/4" internal tooth lock washer onto a supplied 1/4"-20 X 5/8" Phillips Pan Head Machine
Screw and thread the screw through the existing mounting holes in the child restraint area and into the WingMan's Pemserted Mounting Bracket (see
Figure 18). Repeat this step for both sides of the car. Note: It is helpful to have an assistant hold the WingMan's Mounting Bracket to prevent
movement while you are threading the screws in.
Step 6 Slip a supplied 1/4" internal tooth lock washer onto a supplied Black Zinc Plated 1/4"-20 X 1/2" Phillips Pan Head Machine Screw, Position the
slotted WingMan Mounting Bracket, and thread the screw through the slot in the slotted WingMan Mounting Bracket and into the previously installed
Pemserted WingMan Mounting Bracket (see Figure 19). Repeat this step for both sides of the car.
Step 7 Slip a supplied 1/4" internal tooth lock washer onto a supplied Black Zinc Plated 1/4"-20 X 1/2" Phillips Pan Head Machine Screw and thread the
screw into the WingMan's outer Panel (see Figure 20). Repeat this step for both sides of the car.
2011+ Dodge Charger continued