7 electrical connection, 1 extension cords, 15 complete overview – CASO Germany FastVac 3000 User Manual
Page 36: 1 appliance diagram
caso FastVac 3000
36
14.7 Electrical connection
In order to ensure the safe and trouble-free operation of the device, the following
instructions must be observed for the electrical connection:
• Before plugging in the unit, compare the voltage and frequency data on the vacuum
sealer’s rating plate (found on the bottom of the unit) with that of your electrical network.
This data must be compatible. If in doubt consult a qualified electrician.
• The electrical outlet must be protected by a 16A safety cut-out switch.
• The use of a multi-plug outlet adapter is not recommended due to fire danger.
• Inspect the power cord for damage and ensure it doesn’t run under the unit or over hot
or sharp surfaces.
• The electrical safety of the unit is only guaranteed if it is connected to a properly
installed protective conductor system. Use of the unit without a protective conductor is
prohibited. If in doubt, consult a qualified electrician. The manufacturer cannot be made
responsible for damages due to a missing or damaged protective conductor.
14.7.1
Extension cords
If an extension cord is used:
► The electrical rating of the extension cord should be at least as great as the electrical
rating of the unit.
► The cord should be arranged so that it does not drape over a countertop or tabletop
where it can be pulled on by children or tripped over.
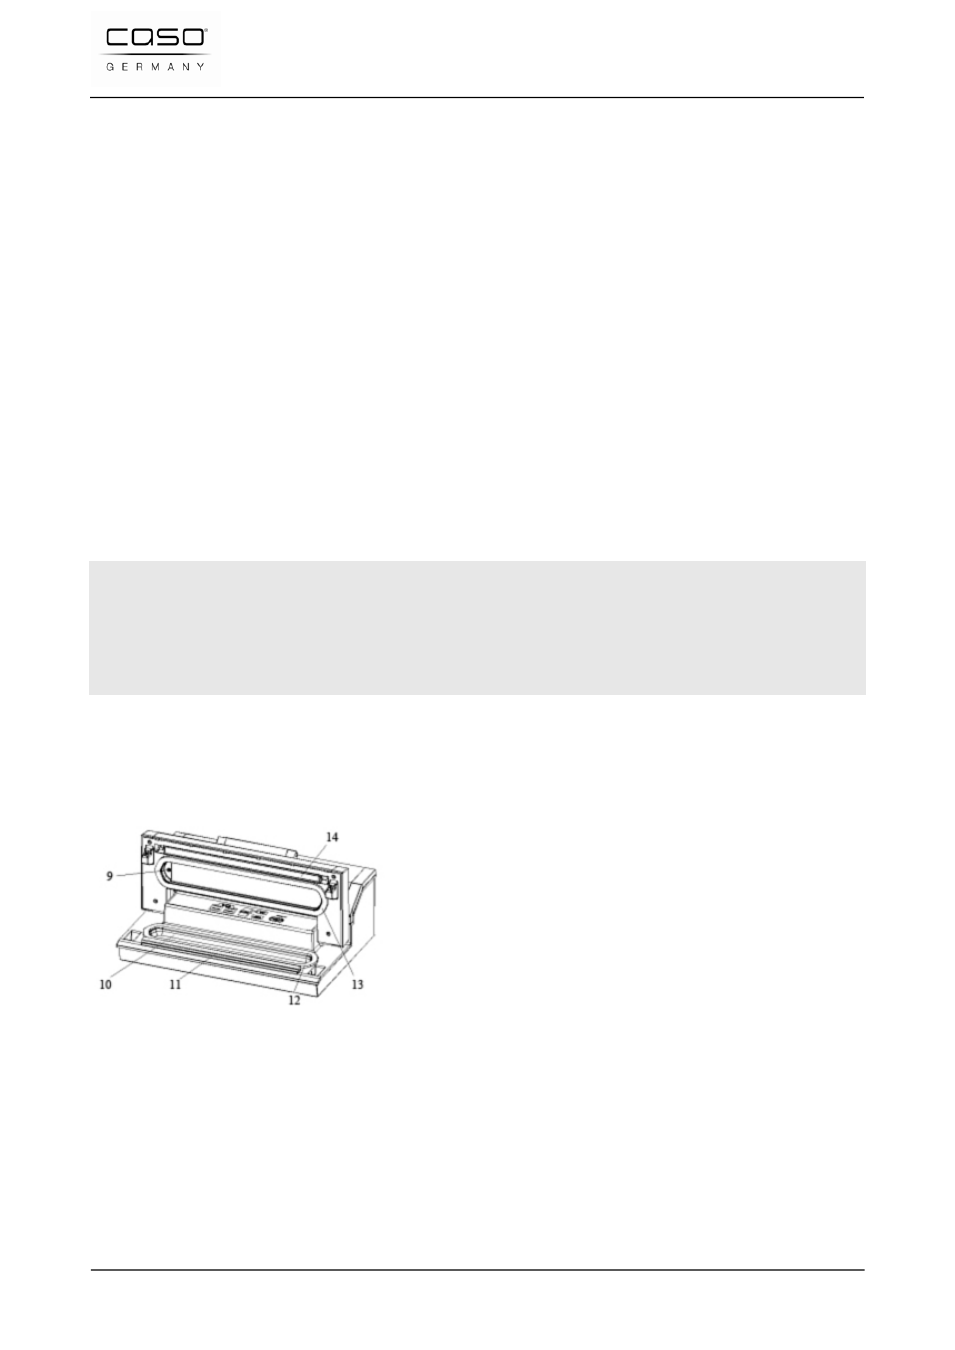
15 Complete Overview
This chapter provides you with an overview of your vacuum sealer and explains some of
its key features.
15.1 Appliance diagram
9. Air intake: Air intake connects with vacuum
chamber and pump. Do not cover this air intake
when placing bag for Vacuum&Seal operations.
10. Vacuum chamber: Position the open end of
the bag inside the chamber.
11. Sealing strip: Place the bag to be sealed over this strip.
12. Lower gasket
13. Upper gasket
14. Sealing element
15. Cutter: Press and slide in one direction or another to cut bags to a desired size.
16. Cutter rack
17. Front handle: Press down to lock the cover. And lift to open the cover.