Facia installation and removal, Lock installation and removal – Craftsman 706.596690 User Manual
Page 5
Attention! The text in this document has been recognized automatically. To view the original document, you can use the "Original mode".
FACIA INSTALLATION AND REMOVAL
Tools Required:
3/8" Wrench
drill
5/32" drill bit
Rivet gun
Pliers
To remove facia
• Remove enough drawers to reach the
top back inside of the chest.
• Remove lock. (See lock installation
and removal.)
• Remove chest top. See chest top
installation and removal.
• Carefully drill out (2) rivets holding
facia to chest.
• Remove facia.
To reinstall facia
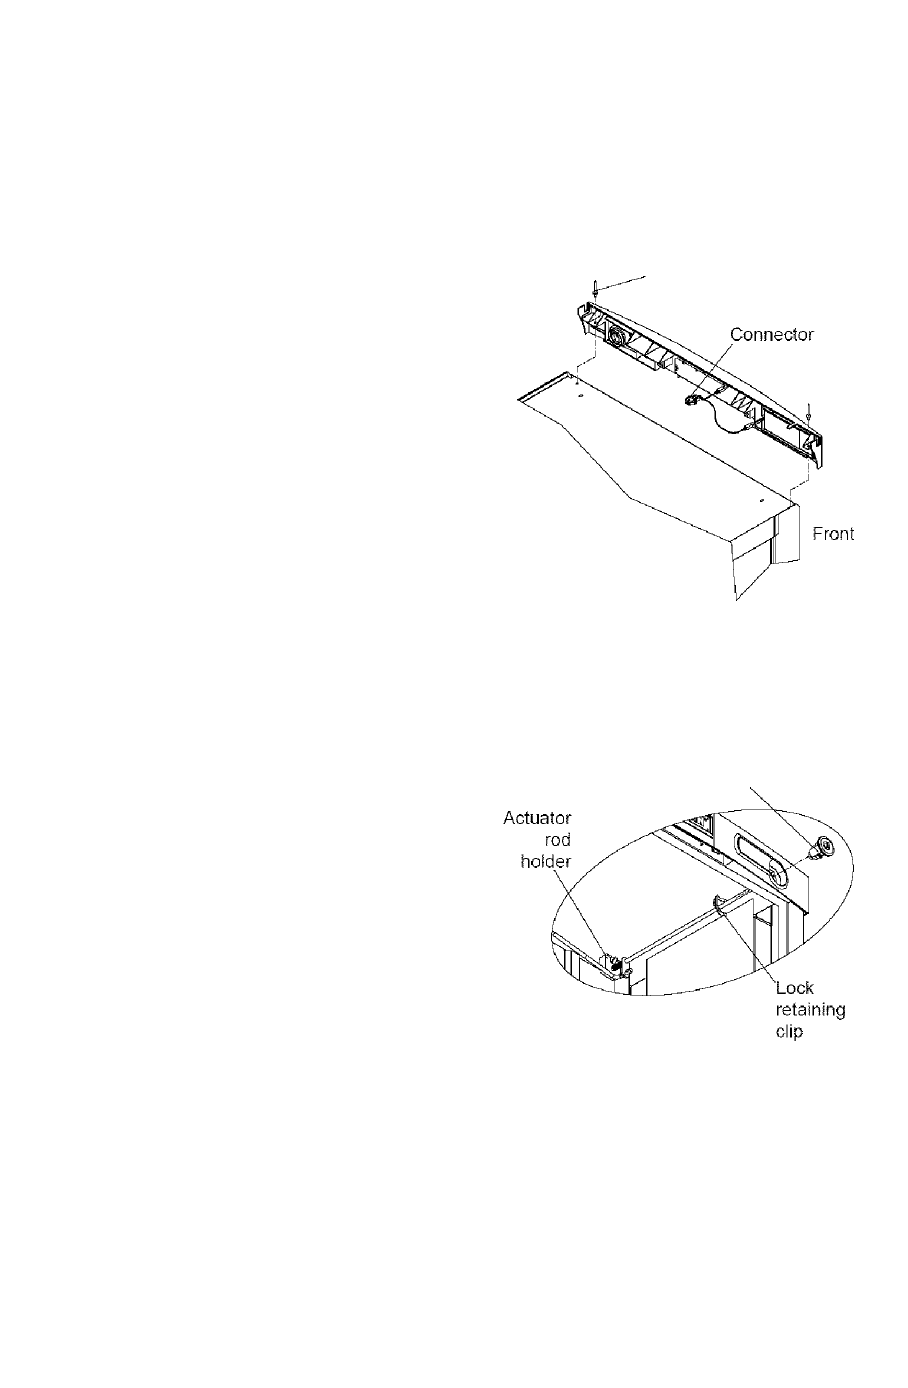
• Position facia on unit. Make sure
connector is on top of chest.
• Attach using (2) rivets supplied.
• Reinstall lock, chest top, and drawers.
Rivet
LOCK INSTALLATION AND REMOVAL
LOCK INSTALLATION AND
REMOVAL
To remove lock
• Remove enough drawers to reach the
lock retaining clip behind the lock.
• Remove lock retaining clip. Pull lock
out to remove.
To reinstall lock
• Position lock in unit. Install retaining
clip to hold lock in place.
• Make sure the back of the actuator
rod is inserted into the actuator rod
holder in the back of the unit.
• Push actuator rod toward back of unit
and line up with lock. Insert the
actuator rod into the back of the lock.
• Test lock operation.
• Reinstall drawers.
Lock