У op a c kiln g checking contents, Tools needed – Craftsman 113.225931 User Manual
Page 6
Attention! The text in this document has been recognized automatically. To view the original document, you can use the "Original mode".
CONTENTS
safety
INSTRUCTIONS FOR POWER TOOLS
2
ADDITIONAL SAFETY INSTRUCTIONS FOR BELT AND
ELECTRICAL REQUIREMENTS ......................... .::,,.............5
UNPACKING AND dNECKlNG C O N T E N T S 6
ASSEMBLY
...........
,:.
,
.
.
.
.
.
„ . „ . , 7
: : ; ; Assembling Steel: L e g s . . : . ; . . . , . . , , 8
Mounting Belt and Disc Sander on Steel Leg Set...... 8
installing Sanding Disc and Dust Trap .
Installing Motor, V-BeitTensioning and Tracking .... 11
Óri-Otf Switch.:.:.,.,............................................... 12
Installing Work Table
...14
installing Abrasive Beit Tensioning and Tracking ....14
Installing Belt Dust Trap.................................. ........15
Installing Backstop
16
GETTING TO KNOW YOUR SANDER........................ 16
Belt Adjusting Screws
. . , . , . „ , . . . , . 1 7
Belt Locking Screws..................................................17
Work Table Tilt Lock Screw........ ............................. 17
Backstop Lock Screw.... ........... i........ ....................... 18
Belt Table Locking Boils.......... .................................18
Belt Table Stop......................................................... 18
BASIC OPERATION ............................................................ 19
:
Surface Finishing on the Abrasive Belt...................20
:
End Finishing on the Abrasive Belt......................... 20
Finishing Curved Edges on the Abrasive Belt.......21
Finishing Small End Surfaces and Curved Edges
on Disc...................................................................21
MAINTENANCE.................................................................... 22
Motor Maintenance and Lubrication........................22
LUBRICATION...................................................................... 22
Recomnnended Accessories................................... 22
TROUBLESHOOTING.......................................................... 23
REPAIR PARTS ...................................................................25
Motor Connections.................................................... 29
У op a c kiln g
checking contents
Model ; 11^
and Disc Sander is shipped
eoniplete in one carton but DOES NOT INCLUDE Steel
Legs or Motor.
:
Model 113.225931 Belt and Disc Sander is shipped
complete in one carton and INCLUDES Steel Legs and
Motor.
Separate all parts from packing materials and check each
; : item with iliustration and;'Table of Loose Parts." Make
certain all iterns are 'accounted for, before discarding any
packing material.
^ ^ ^
If any parts are missing, do not attempt to assemble the
Beit and Disc Sander, plug in the power cord, or turn the
. svvitch on Liritil, the missing parts: are . obtained and
■ ; installed correctly.
, : ■ ■
Using a 1/2" wrench; remove the plywood attached to
the machine. Save; the nuts and bolts and washers; You
wit! need them for attaching the machine to the base.
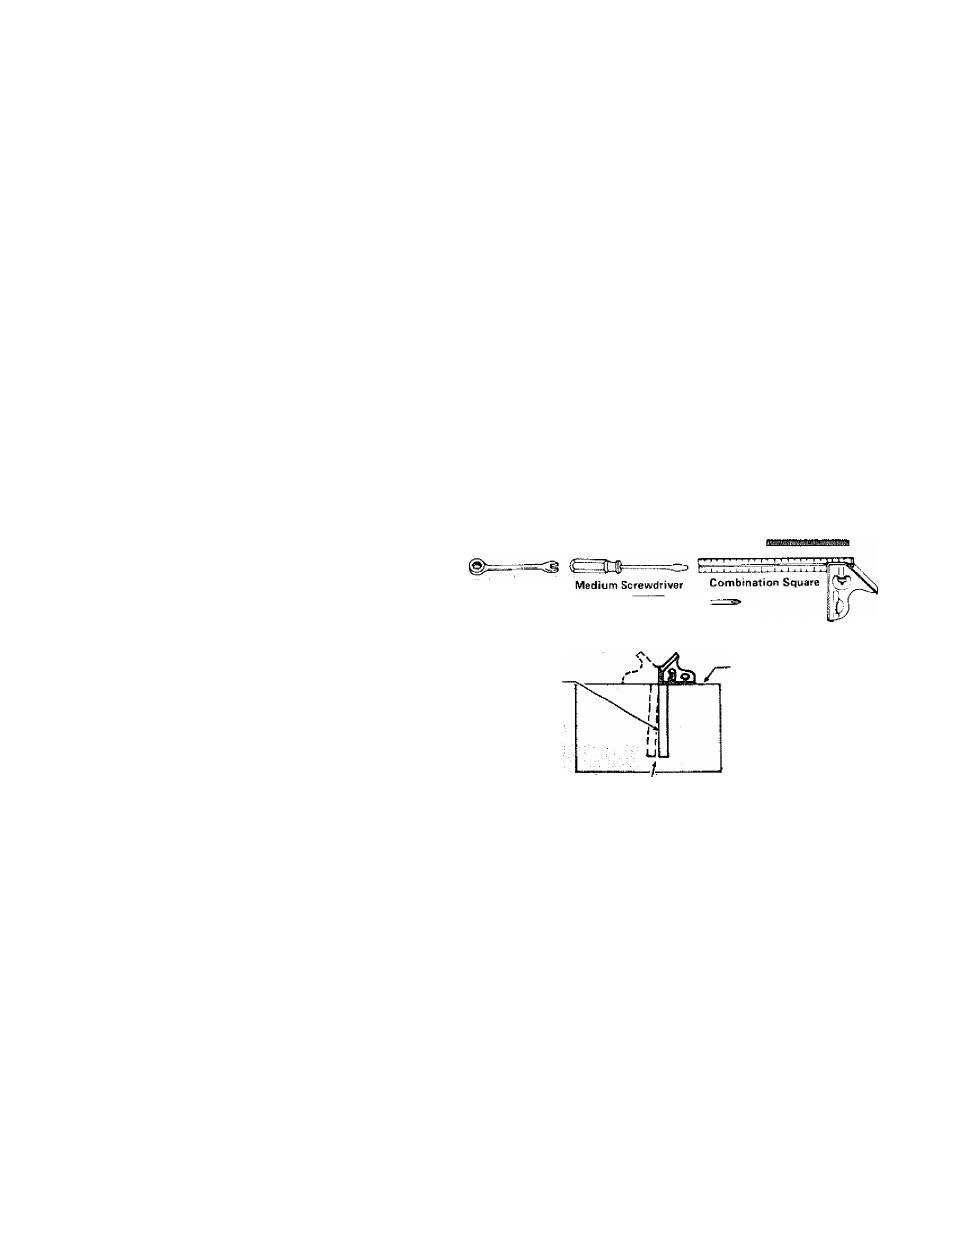
TOOLS NEEDED
1/2" Wrench
7/16" Wrench
3/4"
Wrench
3/8" Wrench
DRAW
light
LINE
014 ВОДНО
ALONG THIS EDGE
#2 Phillips Screwdriver
COMBINATION SQUARE MUST BE TRUE.
STRAIGHT EDGE Of
80AR0 3/4 ' THICK
THIS EDGE MUST BE
PERFECTLY STRAIGHT
SHOULDÔE NO GAP OR OVERLAP HEBE WHEN
SQUARE IS PLIPPEO OVER IN DOTTED POSITION