Craftsman 113.24181 User Manual
Page 9
Attention! The text in this document has been recognized automatically. To view the original document, you can use the "Original mode".
Lay
REAR
FENCE
GUIDE
BAR
on
table
to
act
as
a
straightedge. If outer edge of extension is higher or lower
than table surface;
A.
Slightly loosen nuts holding bracket to extension
using 7/16 in. wrench.
B.
Move end of extension up or down until outer edge
is even with table surface .. . check with GUIDE
BAR .. . tighten nuts.
C.
Recheck INNER edge of extension to make sure it
has not moved . .. readjust, if necessary.
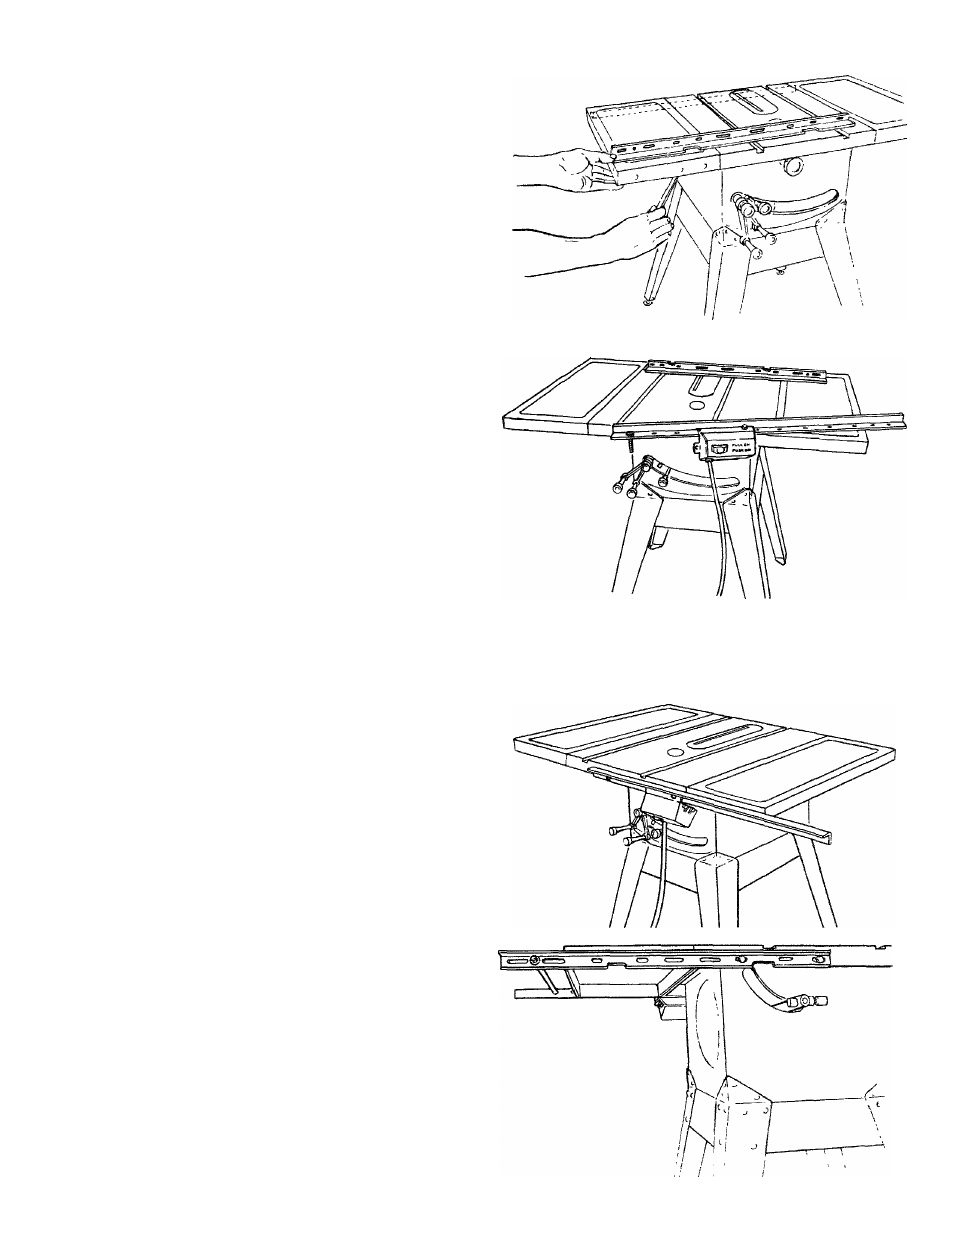
INSTALLING RIP FENCE GUIDE BARS
1.
From
among
the
loose
parts
find
the
following
hardware:
2 Hex. Head Screws, 5/16 in. - 18 x 1-1/2 in. long
2 Hex. Head Screws, 5/16 in. - 18 x 7/8 in. long
4 Hex. Nuts, 5/16 in. - 18 (approx, dia. of hole 5/16
in.)
4 External Lockwashers, 5/16 in. (approx, dia. of hole
5/16 in.)
2 Spacers, 3/4 in. dia. x 1/2 in. long
2 Self-threading nuts
2.
Lay guide bars on table.
NOTE:
The various holes in the bars allow them to be
repositioned on the saw and also makes them adaptable
to other models.
3.
Insert 1 1/2 in. long screw through the FIRST hole
from
the
LEFT
IN
THE
FRONT
BAR
...
insert
another 1 1 / 2 in. long screw through LARGE hole in
SWITCH
BRACKET
then
through
SIXTH
hole
in
bar.
Hold them in place with a piece of masking tape from
the underside.
4.
Place spacers on screws.
5.
Insert bolts through holes in middle and on right side of
front of saw table . . . install lockwashers and nuts.
DONT
SCREW
NUTS
ON
ALL
THE
WAY,
just
get
them started on the screws.
6
.
Remove the 3 screws from rear of table extension.
7.
Insert 7/8 in. long screws in FIRST and THIRD holes
of rear bar and attach to table the same way.
8
.
Insert ends of FENCE GUIDE BAR ROD through
round holes at outer end of bars.
NOTE; The ends of the ROD are not threaded ... the
SELF THREADING NUTS will cut threads on the rod
as they are screwed on.