Craftsman 113.24181 User Manual
Page 10
Attention! The text in this document has been recognized automatically. To view the original document, you can use the "Original mode".
9.
Hold rod with one hand and with a 7/16 in. wrench or
pliers start screwing on ONE of the nuts only A TURN
OR TWO ... screw on other nut the same way.
10.
Using TWO 7/16 in. wrenches or pliers tighten both of
the nuts.
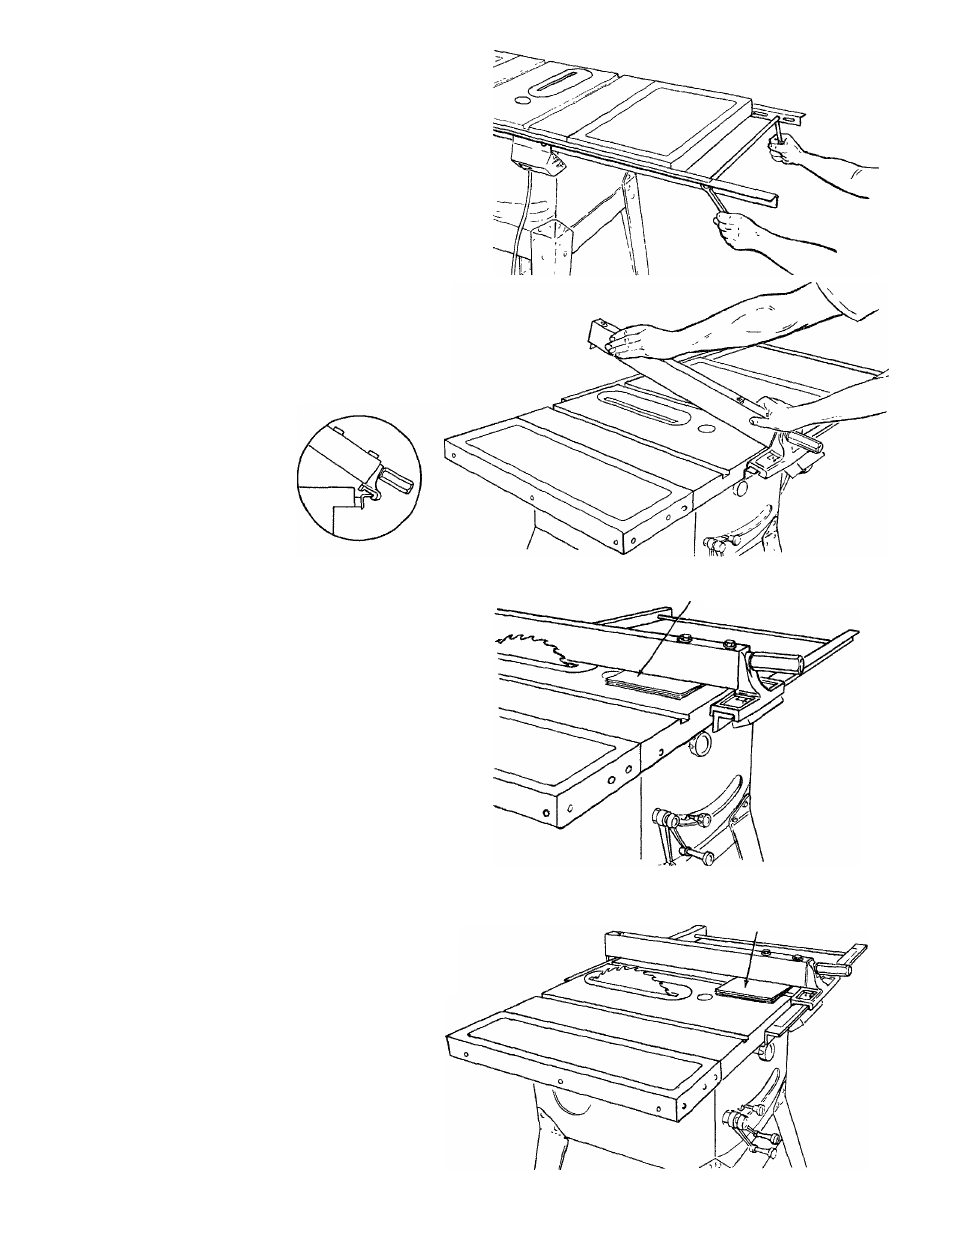
11. Slide the bars so that screws are in the MIDDLE of the
slotted holes.
12.
Position rip fence over miter gauge groove, holding up
the rear end while engaging front end with bar . ..
lower fence onto table.
13. Raise blade all the way up.
14. Carefully move fence against blade.
15.
Move
front
bar
until
“0"
mark
on
rip
scale
is
approximately at tip of pointer.
16.
Move FRONT bar upwards until fence is approximately
1/32 in. above table ... tighten screw at left end of
bar.
NOTE: Fold a piece of newspaper making
8
thicknesses
and place between rip fence and table to act as a spacer.
This will hold the fence off of the table approx. 1/32
in.
17.
Adjust rear bar so that the fence is approximately 1/32
in. above table make sure it is square with fence guide
bar rod ... tighten screw at end of bar.
18.
Replace screws in rear of table extension ... be sure
top surface of extension is PARALLEL to top surface
of rear guide bar.
8 THICKNESSES
OF PAPER
19.
Move fence to RIGHT edge of table ... make sure it is
approx.
1/32
in.
above
table
at
front
and
rear
and
tighten screws.
8 THICKNESSES
OF PAPER
10