Assembly, Mounting support legs, Mounting leg bracket – Craftsman 113.299780 User Manual
Page 8
Attention! The text in this document has been recognized automatically. To view the original document, you can use the "Original mode".
assembly
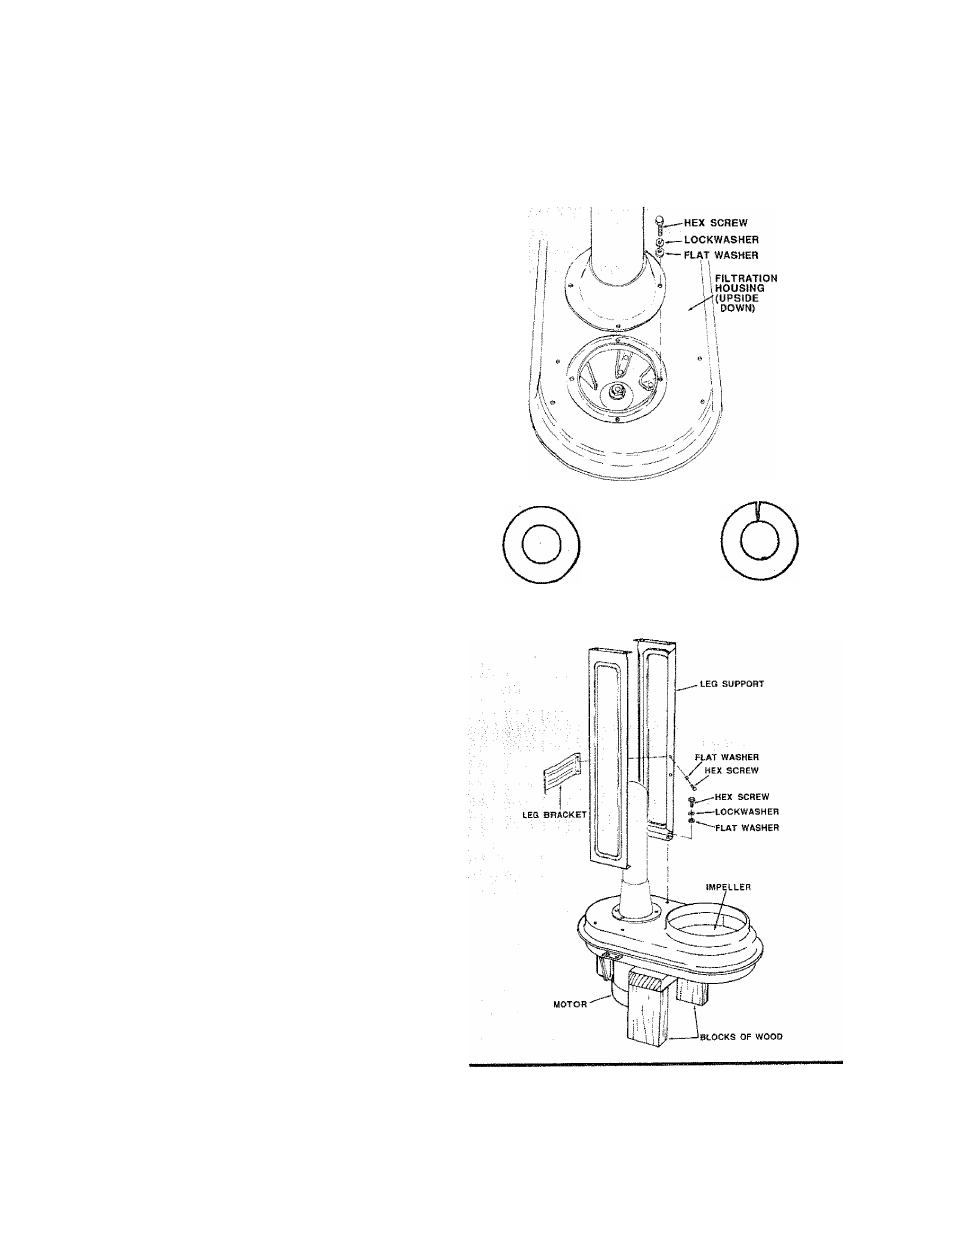
3- Carefully turn the
Filtration Housing upside
down so
that the Motor endbei! rests against the floor.
4. Support the opposite side of
Filtration Housing wlh
a
block of wood.
A.
Place O -R ing in relief of
Inlet pipe
{See page 18}
5. Position/n/efGuardinlinewiththethreaded holes on
the base of the
Filtration Housing.
NOTE: Make
surelnlet Guard
is pointing to rear of
machine.
6. Place lockwasher and flat washer on hex screw and
insert through the holes of the
Inlet Guard
into the
threaded holes of the
Filtration Housing as
shown.
■
(
/
V
u
:
7
'
'
V
v
:
'
^ ; A
guard
must
y ./
. ' 'Í POINT TO
■■
■■■, It^REAR OF
. V,
. MACHINF.
— INLET GUARD
7. Complete the process for the otherthree holes using
same method.
DO NOT SECURE SCREWS AT THIS TIME.
MOUNTING SUPPORT LEGS
1. Locate the following items from the loose parts bag:
Description
Qty.
A Flat Washers* {5/16 x 11/16 x 3/32) .....4
B Hex Screws *{M8 x 1.25 - 12).... ..........4
C Lockwashers* {5/16).................. . 4
CAUTION: To avoid injury, keep hands away
from fan blade.
2. Position left
Leg Support
as shown. .....
3. Place lockwasher and flat washer on hex screw and
insert through the holes in the
Support Leg
and
secure to the threaded holes in the
Filtration Housing
as shown.
4. Use same method to attach
Right Support Leg.
5 . Secure hex screws with the use of adjustable wrench.
Items are shown actual size
MOUNTING LEG BRACKET
1. Locate the following items from the loose parts bag:
Description
Qty.
A Flat Washers* (5/16 x 11/16 x 3/32).....4
B Hex Screws* (M8x 1.25-12)............ 4
2. Insert
Leg Bracket
between the
Support Legs
and
slide against the angled flange of the
Leg.
NOTE: Make sure holes in
Leg Bracket
align with
holes on
Leg Support.
3. Place flat washer on hex screw, insert through angled
flange of
Leg Support
and attach to threaded hole of
Bracket.
4.
Repeat steps 2 and 3 using same process on other
three holes.