Assembly and adjustments – Craftsman 137.248850 User Manual
Page 10
Attention! The text in this document has been recognized automatically. To view the original document, you can use the "Original mode".
ASSEMBLY AND ADJUSTMENTS
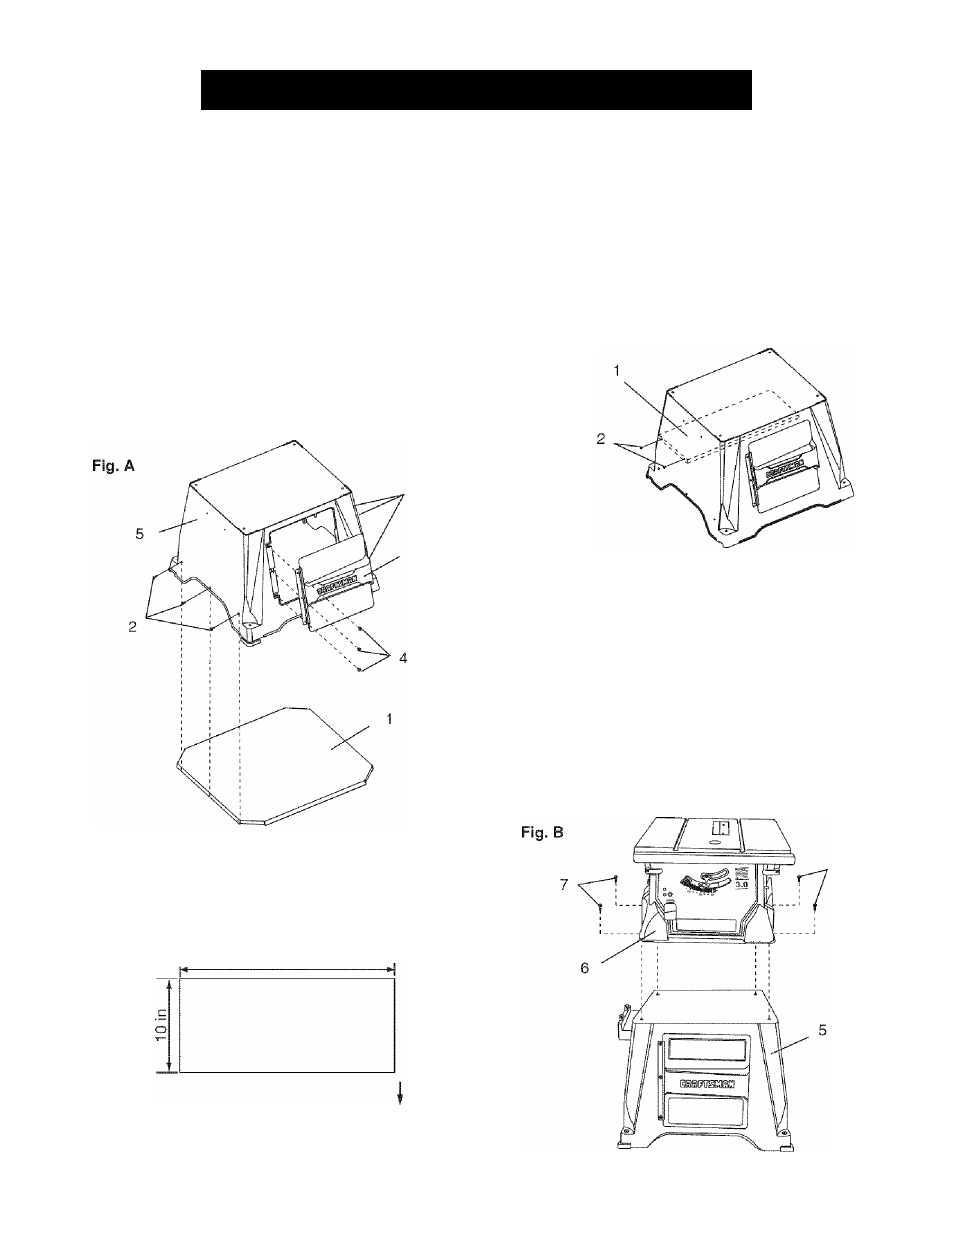
ASSEMBLING STAND (FIG. A)
1
.
2
.
3.
4.
5.
Unpack all parts and group by type and size. Refer
to the parts list for correct quantities.
Attach the stand door (3) to the front of the stand
base (5) using three screws M5*12-12 (4).
Attach the floor plate {1) to the stand (5) using
ten screws M5*12-12 (2). See PARTS LIST AND
SCHEMATIC FOR STAND SECTION.
NOTE: A shelf (not included ) can be added to the
stand base (see next section prior to installing the
floor plate (1)).
Tighten hardware.
Place the stand on a level surface and adjust the
rear-left adjustable foot, so the stand is contacting
the floor.
SHELF CONSTRUCTION (FIG. A-1)
* Use good quality plywood or solid wood
« The shelf must be installed before the floor plate (1)
{Fig. A).
Fig. A-1
22-1/2 in
83^
HI 3/4 in
t
INSTALLING A SHELF (NOT INCLUDED) (FIG. A-2)
NOTE: Attach shelf before assembling the floor plate.
Turn the stand upside down.
Rest the shelf board against the 4 shelf support fins
located on the side of the cabinet.
Drill 4 apporpiately sized holes, two on each side ,
through the cabinet into the shelf endgrain.
Secure the shelf with four wood screws (not
included).
Tighten the four wood screws.
Fig. A-2
1
.
2
.
3.
4.
5.
ASSEMBLE TABLE SAW TO STAND (FIG. B)
1. Place the saw (6) on the stand (5).
2. Line up the four holes in saw base and stand (5).
3. Fasten saw to stand using four hex bolts (7).
4. Tighten all four hex bolts (7).
NOTE: DO NOT OVER TIGHTEN. THIS MAY
DAMAGE THE SAW BASE.
A WARNING
IF THE STAND WILL NOT BE USED, DO NOT
OPERATE THE TABLE SAW ON THE FLOOR. THIS
IS A VERY DANGEROUS POSITION.
10