Craftsman 196.205690 User Manual
Page 18
Attention! The text in this document has been recognized automatically. To view the original document, you can use the "Original mode".
relation to the weld puddle. The gun is either
PUSHED {see Figure 11) into the weld pud
dle or PULLED away from the weld puddle.
centered over the weld joint. This is the easi
est type of bead to make.
PUSH
Puddle
py^L
Figure 11.
Travel Direction
For most welding jobs you will pull the
gun along the weld joint to take advan
tage of the greater weld puddle visibility.
2. TRAVEL SPEED
is the rate at which the
gun is being pushed or pulled along the
weld joint. For a fixed heat setting, the
faster the travel speed, the lower the
penetration and the lower and narrower
the finished weld bead. Likewise, the
slower the travel speed, the deeper the
penetration and the higher and wider the
finished weld bead.
TYPES OF WELD BEADS
The following paragrapjhs discuss the most
commonly used welding beads.
Once you have the gun in position with the
wire lined up on the weld joint, lower your
helmet, pull the trigger and the arc will start.
In a second or two you will notice a weld
puddle form and the base of the bead be
ginning to build. It is now time to begin to
move with the gun. If you are just learning to
weld, simply move the gun in a straight line
and at a steady speed along the weld joint.
Try to achieve a weld with the desired
penetration and a bead that is fairly flat and
consistent in width.
As you become more familiar with your new
welder and better at laying some simple weld
beads, you can begin to try some different
weld bead types.
There are two basic types of weld beads, the
stringer bead and the weave bead.
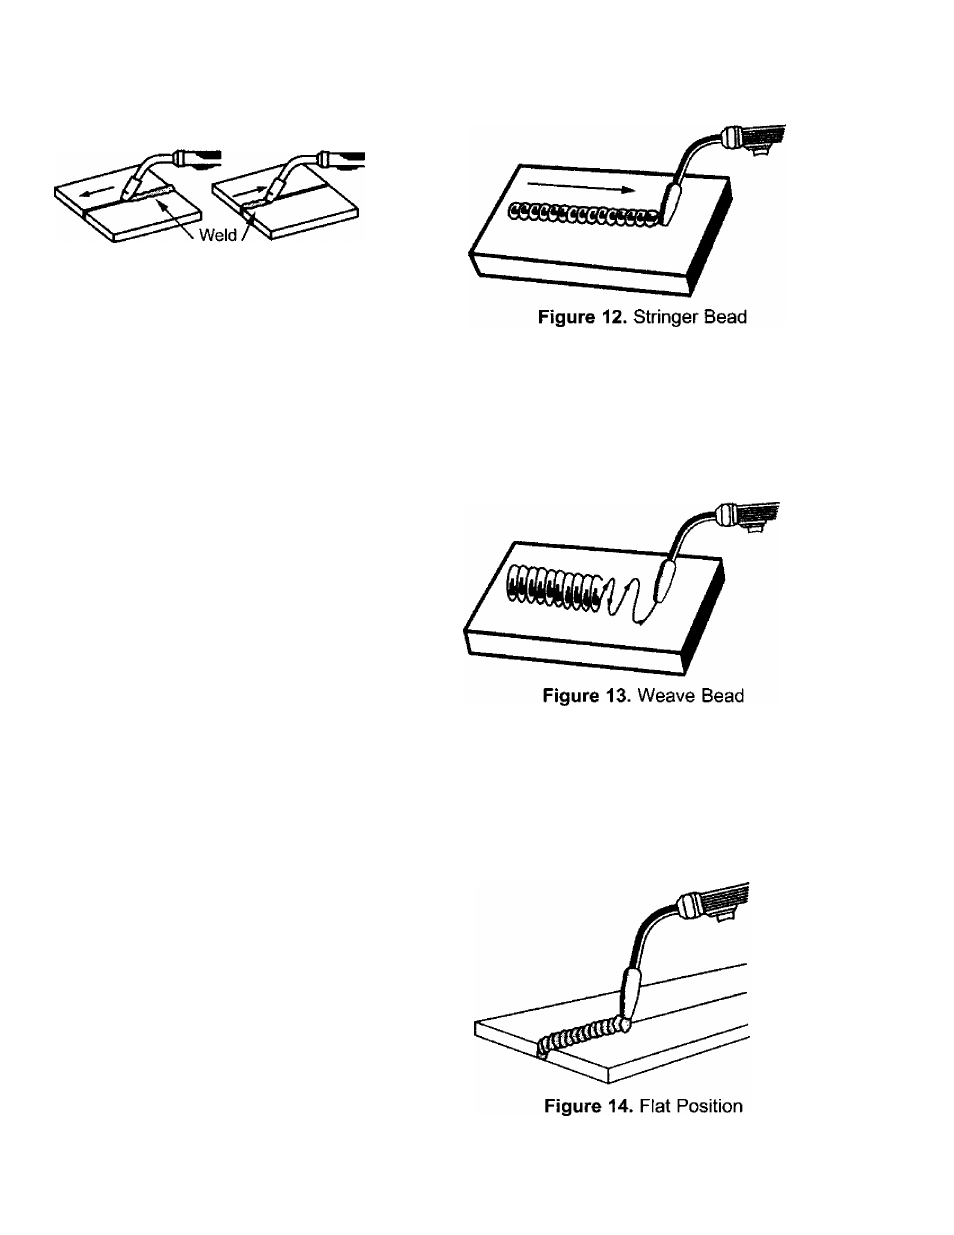
1. The STRINGER BEAD (Figure 12) is
formed by traveling with the gun in a straight
line while keeping the wire and nozzle
18
2. The WEAVE BEAD (Figure 13) is used
when you want to deposit metal over a wider
space than would be possible with a stringer
bead. It is made by weaving from side to
side while moving with the gun. It is best to
hesitate momentarily at each side before
weaving back the other way.
WELDING POSITIONS
There are four basic welding positions: flat,
horizontal, vertical, and overhead.
1. The FLAT POSITION (Figure 14) is the
easiest of the welding positions and is most
commonly used. It is best if you can weld in
the flat position if at all possible as good
results are easier to achieve.
2. The HORIZONTAL POSITION (Figure 15)
is next in difficulty level. It is performed very
much the same as the flat weld except that