Convergence, 2 press the button so that the picture edges, Become straight – Sony GDM-W900 User Manual
Page 11: 1 press the screen button, 2 press the button to seiect the parameter you, Want to adjust referring to the foilowing, Press the button so that the red or blue, Shadow disappears, H convergence" (horizontal convergence), V convergence' (vertical convergence)
Attention! The text in this document has been recognized automatically. To view the original document, you can use the "Original mode".
Convergence
The adjustment data becomes the individual setting for each
input signal received.
o
I
1
Press the GEOM button.
The "GEOMETRY" OSD appears.
GEOM
GEOMETRY
„ О
£3
Ol—
□ 0 ON '
□ B
23
10
2
Press the
button so that the picture edges
become straight
- 3 +
ft)
u
The OSD automatically disappears after about 10 seconds.
To turn off the OSD, press the GEOM button again.
To reset, press the RESET button while the OSD is on. The
picture rotation and the pincushion settings are both reset.
1
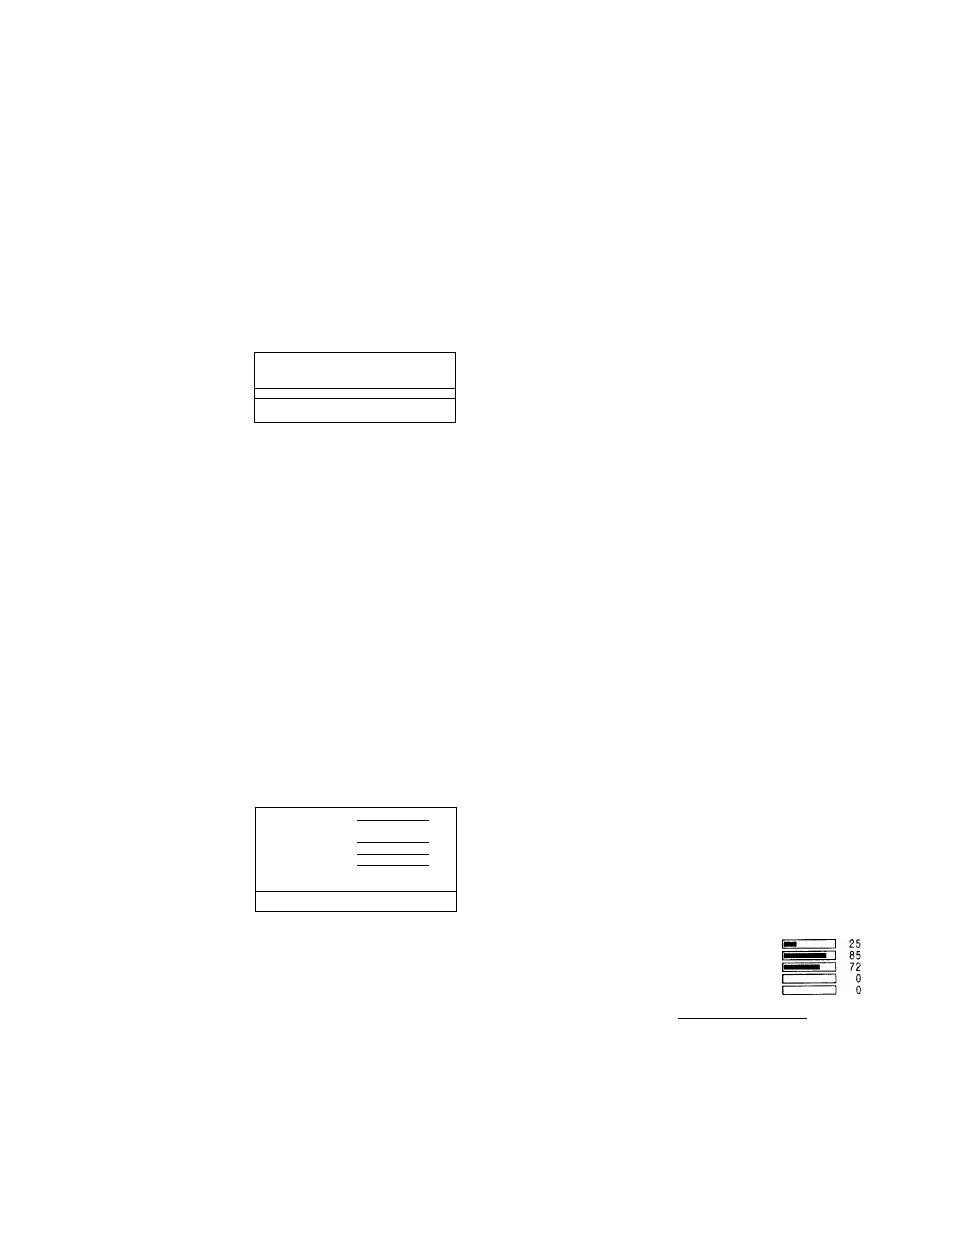
Press the SCREEN button.
The "SCREEN" OSD appears.
SCREEN
SCREEN
►H CONVERGENCE тшшшшшт 1 85
V CONVERGENCE шшшшт
72
CANCEL MOIRE
•OFF «ON
MOIRE ADJ
1--------
n
0
LANDING
ADJUST-^
DEGAUSS
•ON
a 0
SELECT
В S
SET/ADJUST
2
Press the
button to seiect the parameter you
want to adjust referring to the foilowing.
The selected parameter turns yellow.
The OSD automatically disappears after about 30 seconds.
To turn off the OSD, press the SCREEN button again.
To reset, press the RESET button while the OSD is on. The
selected parameter is reset.
Ihe adjustment data becomes the common setting for all
input signals received.
Press the
button so that the red or blue
shadow disappears.
'H CONVERGENCE" (Horizontal convergence)
◄ " . . . to move Red to the left and Blue to the right
■ ♦ . . . to move Red to the right and Blue to the left
"V CONVERGENCE' (Vertical convergence)
•^... to move Red down and Blue up
^... to move Red up and Blue down
Canceling the Moire
The adjustment data becomes the individual setting for each
input signed received.
Press the 0^/*^ button to select "ON" for "CANCEL
MOIRE."
If the picture becomes unclear
The picure may become unclear by canceling moire.
1 Press the
button to select "MOIRE ADJ."
2 Press the
button to adjust beginning from 0
until the moire is minimum.
Landing
Correct when the color is not uniform due to influence from
the earth's magnetizm.
The adjustment data becomes the common setting for all
input signals received.
First, degauss the screen, then display an entirely white
picture for more than 20 minutes before the adjustment to
adjust more accurately.
1
2
3
4
Press the ^4/
t
button to select "DEGAUSS."
Press the 0*^ button.
The screen is degaussed for about five seconds.
Press the
button to select "LANDING."
Press the 0*^ button.
The "LANDING" OSD appears on the screen.
- 3 +
LANDING
►SCREEN MENU -►
CENTER TOP/ВОТ
LEFT TOP
RIGHT TOP
RIGHT BOTTOM
LEFT BOTTOM
D n
SELECT
В В
ADJUST
5
Press the
button to select the position, and
adjust by pressing the 0
button.
To return to the "SCREEN" OSD, select "SCREEN MENU
and press the 0-^ button.
To reset, press the RESET button while the OSD is on. The
selected parameter is reset.
11