Recording a cd, To stop recording, To add the surround effect – Sony MHC-331 User Manual
Page 15: Recording a cd: selecting tape length, Automatically (tape select edit)
Attention! The text in this document has been recognized automatically. To view the original document, you can use the "Original mode".
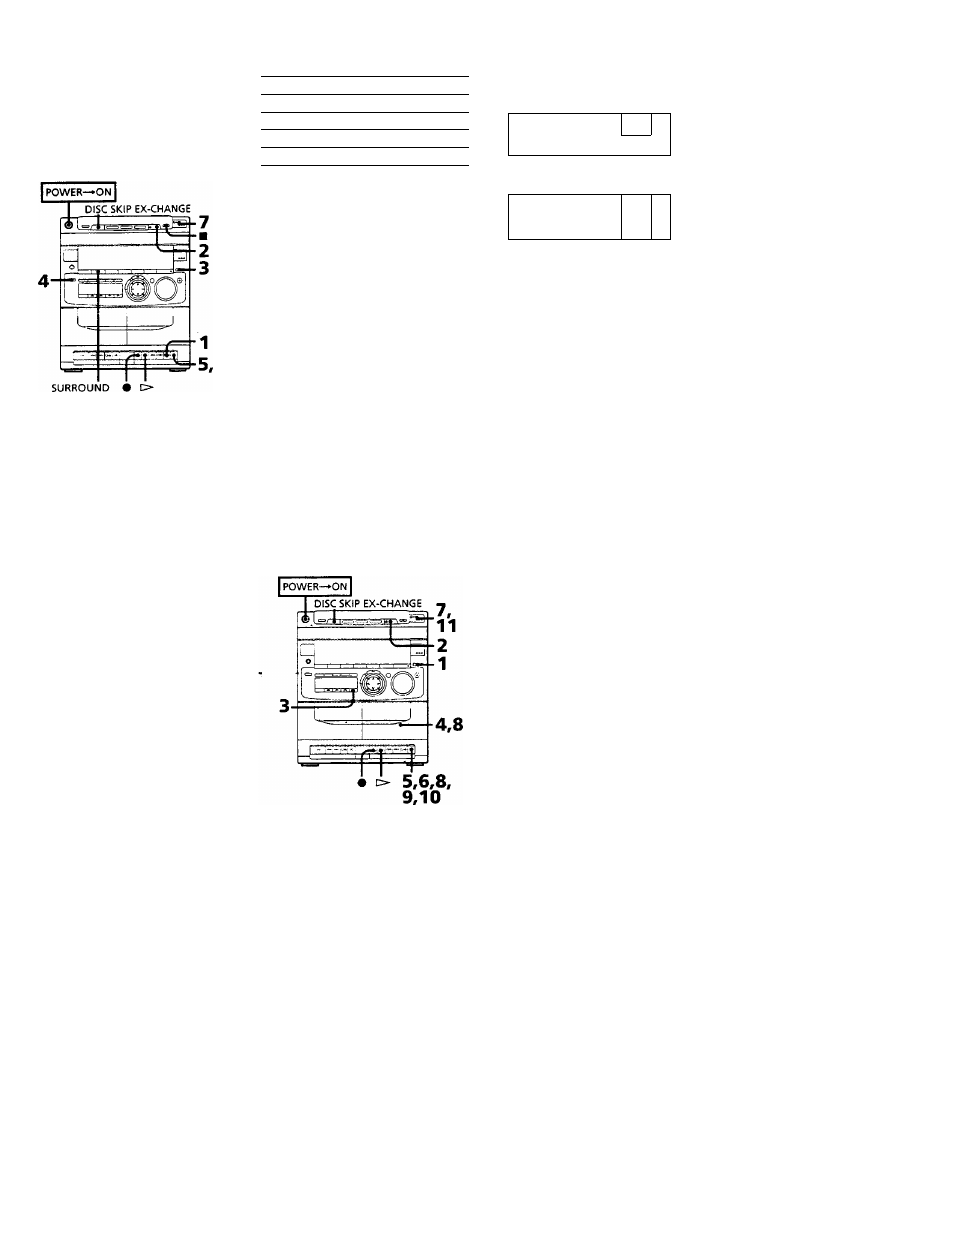
Recording a CD
You can record from a CD to a tape.
Use TTPE I (normal) or TYPE II (Cr02)
tapes. Do not use TYPE IV (metal) tapes for
recording.
To listen to other sources while recording,
you must stop recording.
7
Press !>D0 on the CD player.
The CD starts playing.
1
Press and insert a blank tape into
deck B with the side you want to record
on facing forward.
Recording will start from the front side
of the tape.
Make sure the tabs on the cassette have
not been removed.
2
Press â OPEN/CLOSE and place a CD.
Then, press Ê OPEN/CLOSE again to
close the disc tray.
3
Press FUNCTION to select the CD
player.
If the button for the disc tray containing
the CD you want to record is not lit
green, press DISC SKIP EX-CHANGE
repeatedly so that it lights green.
4 When you want to reduce the hiss noise
in low-level high-frequency signals,
press DOLBY NR so that "DOLBY NR
B" appears in the display.
5
Press II and then press • (O- is lirü and depressed at the same time) on deck 6 Press II on deck B again to release recording pause. To Press Stop recording ■± on deck Pause recording II Stop CD play ■ on the CD player Pause CD play >1ID on the CD player To stop recording Press on deck B or ■ on the CD player. To add the surround effect Press SURROUND so that "SUR iitii«iiiii" Recording a CD: Automatically (tape select edit) You can have the stereo system select and 1 Press FUNCTION repeatedly until "CD" appears in the display. 2 Press â OPEN/CLOSE and place a CD. Then, press â OPEN / CLOSE again to close the disc tray. 3 Press EDIT repeatedly until "TAPE SELECT" appears in the display and the player divides the selections Then the display changes as follows; •eut» T R P E 5 Is ♦ Tape length required ... T R P E -r - I s 6 ~ 4 Insert a blank tape of the indicated length (or longer) into deck B. 5 Press II and then press # (C=*- is linked and depressed at the same time) on deck 6 Press II on deck B again to release recording pause. 7 Press OHIO on the CD player. The determined tracks for side A starts 8 Set the tape to the beginning of side B. Take the tape out and insert the tape 9 Press II and then press • (C>- is linked and depressed at the same time) on deck 10 Press II on deck B again to release recording pause. 1 1 Press >0fl on the CD player. The determined tracks for side B starts Chapter 4: the Tape Player 1 5
B.
Be sure to.press the button firmly and
swiftly.
Deck B stands by for recording.
Recording starts.
appears in the display.
You can record the sound with surround
effect. The equalizer you adjusted will not
be recorded.
Selecting Tape
Length
indicate the most suitable tape length for
recording each disc automatically.
You cannot use Tape Select Edit for discs
which contain 21 tracks or more.
If the button for the disc tray containing
the CD you want to record is not lit
green, press DISC SKIP EX-CHANGE
repeatedly so that it lights green.
automatically.
B.
Be sure to press the button firmly and
swiftly.
Deck B stands by for recording.
Recording starts.
playing and are recorded. After those
tracks have been recorded, the unit will
pause.
with side B facing forward.
B.
Be sure to press the button firmly and
swiftly.
Deck B stands by for recording.
Recording starts.
playing and are recorded.