Connections, Assembling the turntable – Sony PS-J10 User Manual
Page 6
Attention! The text in this document has been recognized automatically. To view the original document, you can use the "Original mode".
Connections
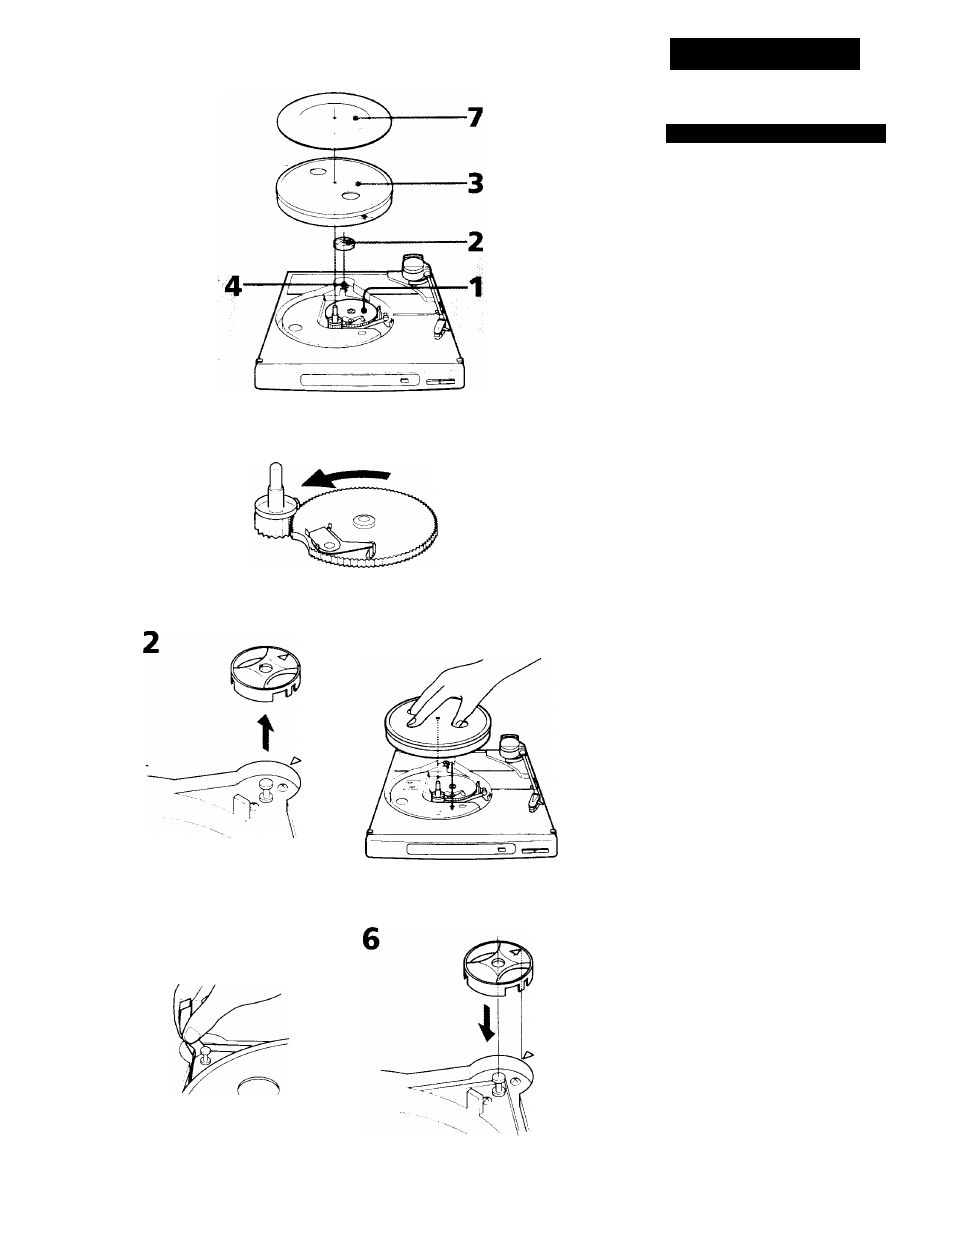
Assembling the Turntable
1
Turn the large plastic gear
counterclockwise until the notch
aligns with the small plastic gear.
2
Remove the adapter for 17-cm
records from the adapter stay.
3
Gripping the platter through the
two holes, place it carefully onto
the spindle.
4 Turn the platter clockwise until
the ribbon tape aligns with the
pulley, then pull both ends of the
ribbon, gently stretching the
rubber belt around the pulley.
5
Carefully remove the ribbon tape
without twisting the rubber belt.
6 Put the adapter for 17-cm records
back into the adaptear stay,
aligning the T mark on the
adapter stay with the ▲ mark
below.
7
Place the rubber mat onto the
platter.
To make sure it operates properly, rotate
the platter clockwise once or twice with
your hand.
Notes on installation
• Place the turntable on a level surface.
• Avoid placing the unit near electrical
appliances (such as a television, hair
drver, or fluorescent lamp) which may
cause hum or noise.
• Place the turntable where it will not be
subject to any vibration, such as from
speakers, slamming of doors, etc.
• Keep the unit away from direct sunlight,
extremes of temperature, and excessive
dust and moisture.