Dell XPS M2010 (MXP061, Mid 2006) User Manual
Page 33
Display: Dell XPS M2010 Service Manual
file:///C|/Users/santhosh_v.ASIA-PACIFIC/Desktop/Hawke/New%20folder/display.htm[2/21/2014 11:26:10 AM]
4. Snap the silver display inlay back into place around the panel.
5. Attach the silver display inlay to the display using four M2.5 x 5-mm screws in the holes labeled "A" and twelve M2.5-
mm shoulder screws in the remaining holes.
NOTE:
When replacing the silver display inlay, ensure that the display latches fit through the correct holes.
6. Snap the black display bezel into place.
7. Set the display upright on the hinge arms, leaning the display slightly forward so it does not tip over backwards.
8. Thread the solenoid and video cables through the opening in the computer base next to the right hinge arm.
9. Seat the computer base onto the hinge arms, aligning the screw holes in the computer base with those in the hinge
arms.
10. Attach the right and left hinge arms to the base using six M2.5 x 8-mm screws.
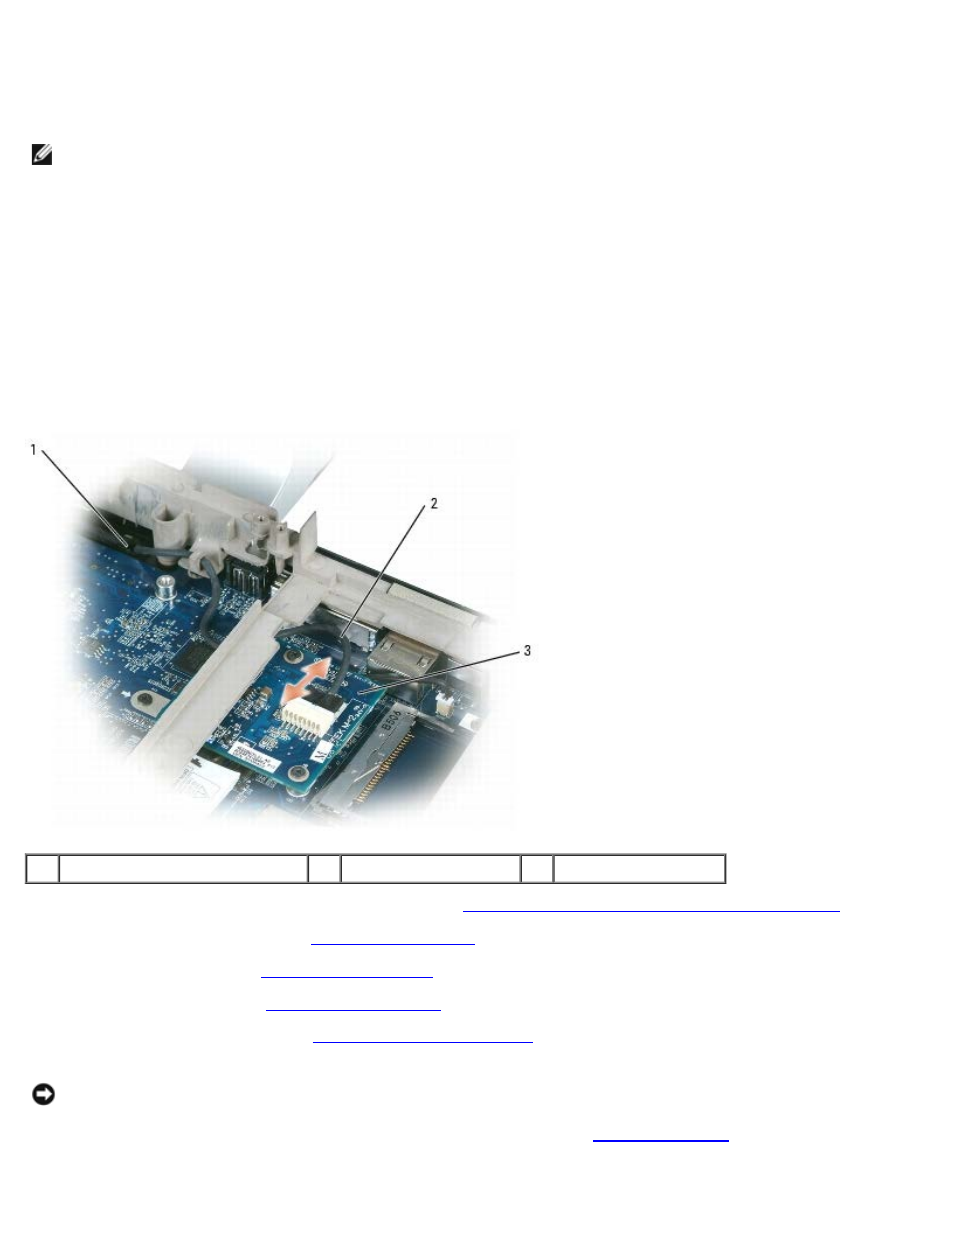
11. Connect the solenoid cable to the solenoid card. Thread the cable through the notch and under the frame as shown
below.
1
opening on the base
2
solenoid cable
3
solenoid card
12. Replace the video card/thermal-cooling assembly (see
Replacing the Video Card/Thermal-Cooling Assembly
13. Replace the right hard drive (see
).
14. Replace the right fan (see
15. Replace the top cover (see
16. Replace the cosmetic covers (see
NOTICE:
Ensure that you attach the keyboard securely to avoid damage to the keyboard.
17. Firmly reattach the keyboard to the computer and close the display (see
18. Turn the computer upside down.