Replacing the hard drive – Dell Inspiron 17 (N7010, Mid 2010) User Manual
Page 32
8.
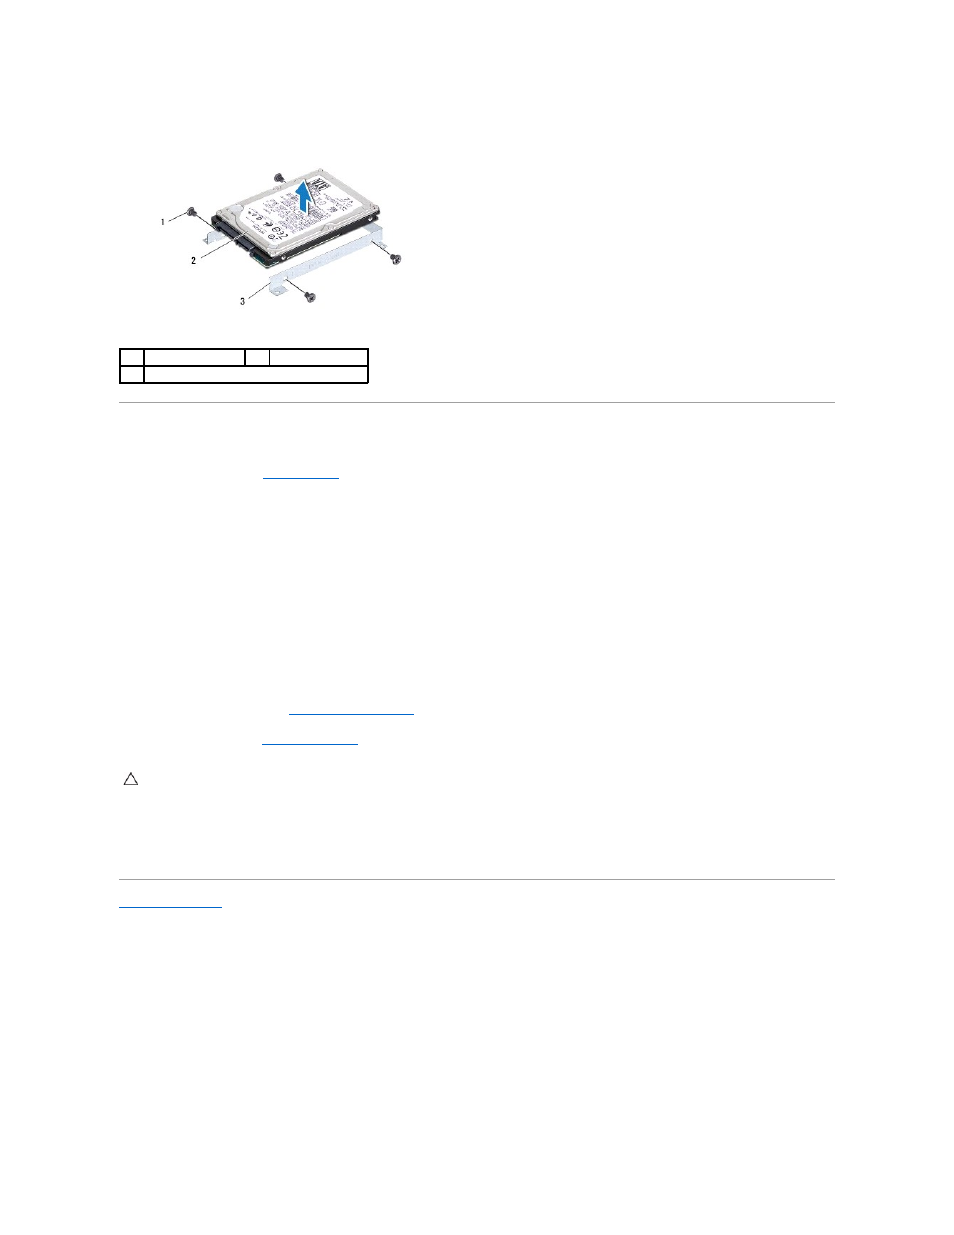
Lift the hard drive out of the hard-drive bracket.
Replacing the Hard Drive
1.
Follow the instructions in
Before You Begin
.
2.
Remove the new hard drive from its packaging.
Save the original packaging for storing or shipping the hard drive.
3.
Place the hard drive in the hard-drive bracket.
4.
Replace the four screws that secure the hard-drive bracket to the hard drive.
5.
Place the hard-drive assembly in the computer base.
6.
Push the hard-drive assembly towards the right to connect it to the connector on the system board.
7.
Replace the four screws that secure the hard-drive assembly to the computer base.
8.
Replace the module cover (see
Replacing the Module Cover
).
9.
Replace the battery (see
Replacing the Battery
).
10.
Install the operating system for your computer, as needed. See "Restoring Your Operating System" in the Setup Guide.
11.
Install the drivers and utilities for your computer, as needed. For more information, see the Dell Technology Guide.
Back to Contents Page
1
screws (4)
2
hard drive
3
hard-drive bracket
CAUTION:
Before turning on the computer, replace all screws and ensure that no stray screws remain inside the computer. Failure to do so may
result in damage to the computer.