Installing the processor – Dell Dimension 4700 User Manual
Page 30
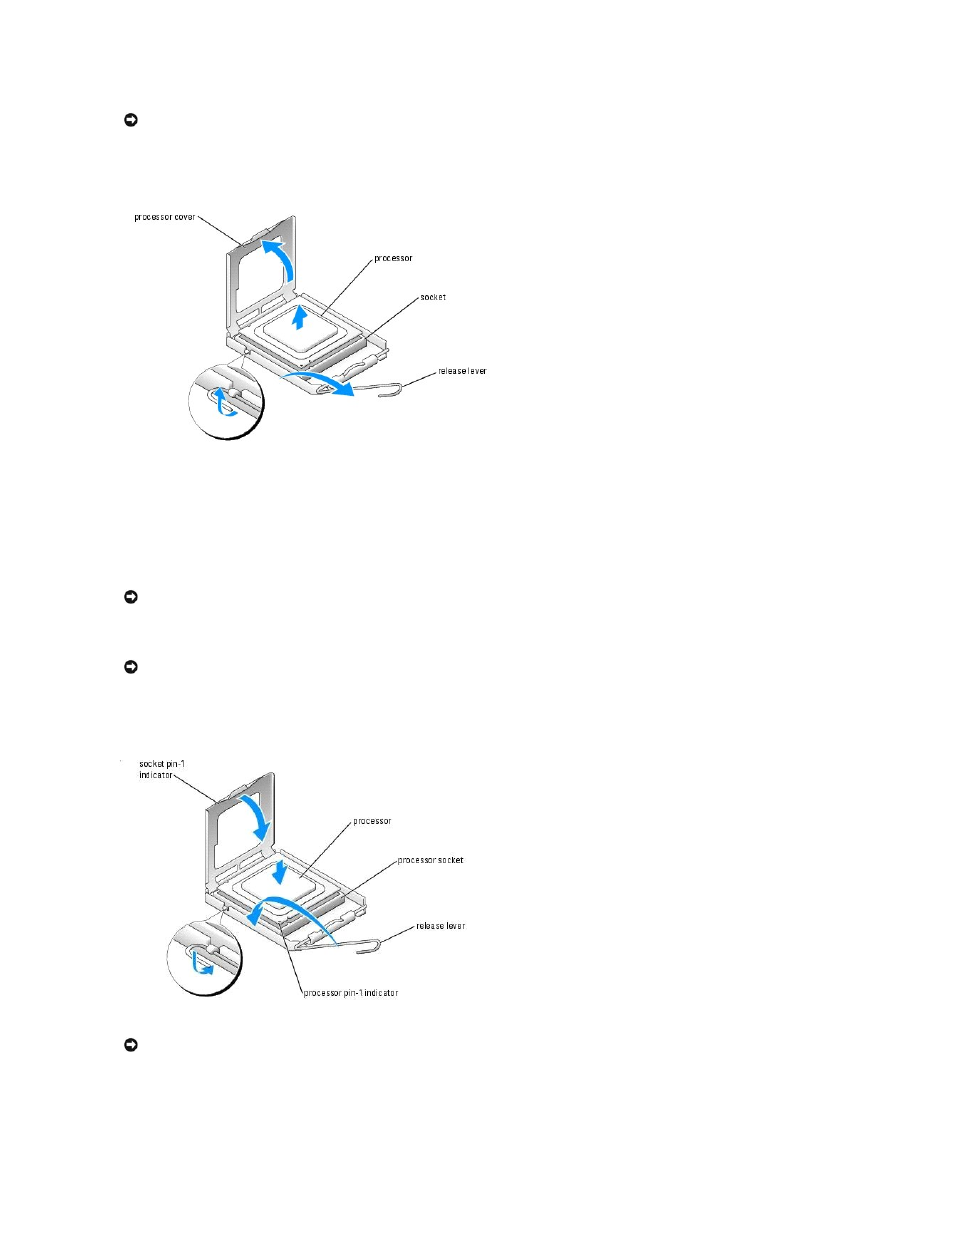
6.
Push down and out on the socket release lever.
7.
Open the processor cover.
8.
To remove the processor from the socket, lift the processor vertically in one motion.
Leave the release lever extended in the release position so that the socket is ready for the new processor.
Installing the Processor
1.
Unpack the new processor.
2.
If the release lever on the socket is not fully extended, move it to that position.
3.
Align the pin-1 corners of the processor and socket.
4.
Set the processor lightly in the socket and ensure that the processor is level in the socket. When the processor is positioned correctly, press it with
minimal pressure to seat it.
NOTICE:
If you are installing a processor upgrade kit from Dell, discard the original heat sink. If you are not installing a processor upgrade kit from Dell,
reuse the original heat sink and blower when you install your new processor.
NOTICE:
Ground yourself by touching an unpainted metal surface on the back of the computer.
NOTICE:
You must position the processor correctly in the socket to avoid permanent damage to the processor and the computer when you turn on the
computer.
NOTICE:
Socket pins are delicate. To avoid damage, ensure that the processor is aligned properly with the socket, and do not use excessive force
when you install the process. Be careful not to touch or bend the pins on the system board.