Heat sink and fan assembly, Removing the heat sink and fan assembly – Dell Latitude XT2 (Early 2009) User Manual
Page 50
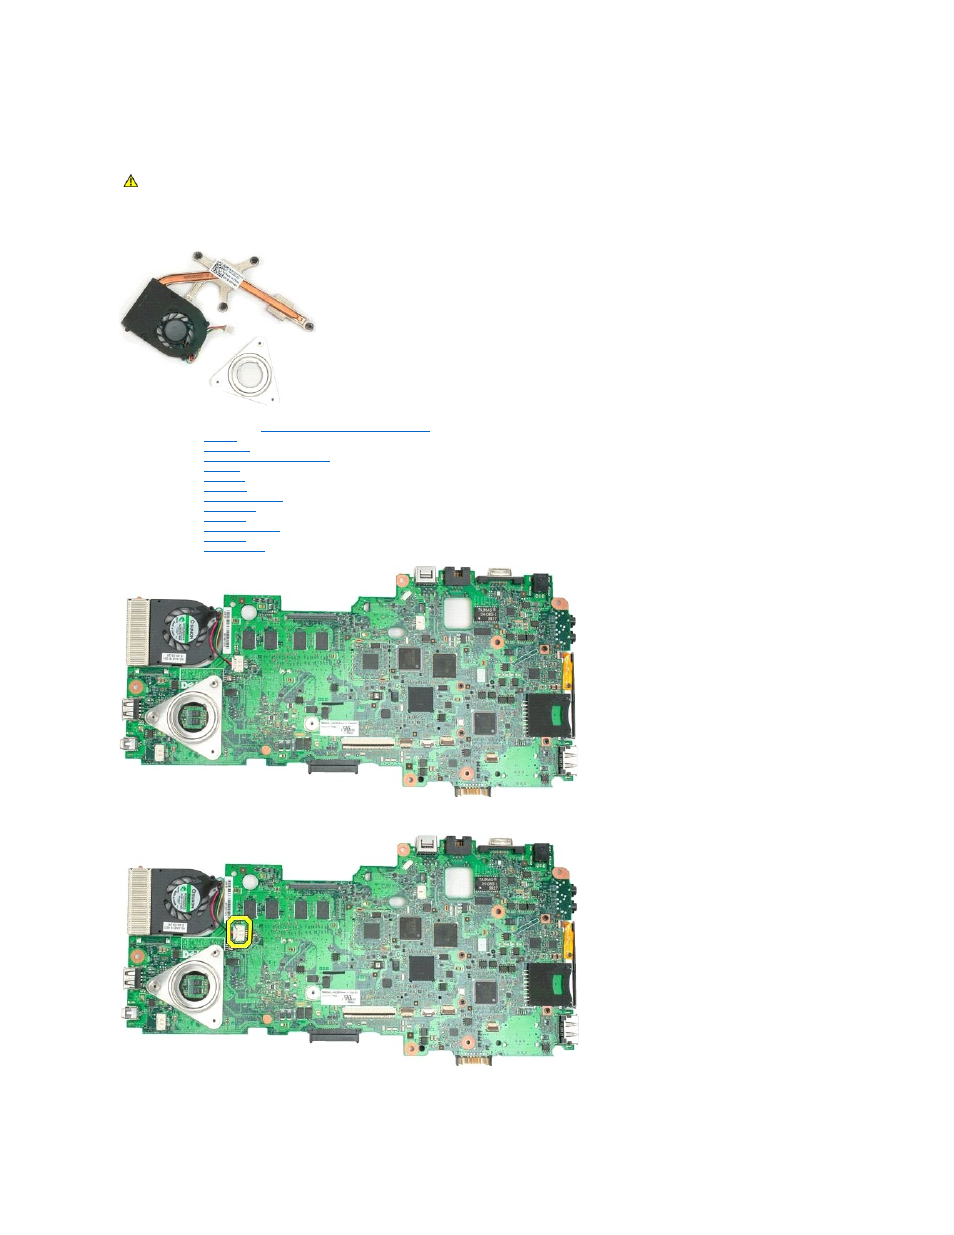
Heat Sink and Fan Assembly
Dell™ Latitude™ XT2 Service Manual
Removing the Heat Sink and Fan Assembly
1.
Follow the procedures in
Before Working Inside Your Tablet-P C
.
2.
Remove the
battery
from the Tablet-PC.
3.
Remove the
hard drive
from the Tablet-PC.
4.
Remove the
memory and mini-card cover
from the Tablet-PC.
5.
Remove the
memory
from the Tablet-PC.
6.
Remove the
mini-card
from the Tablet-PC.
7.
Remove the
BIOS chip
from the Tablet-PC.
8.
Remove the
Bluetooth module
from the Tablet-PC.
9.
Remove the
hinge cover
from the Tablet-PC.
10.
Remove the
keyboard
from the Tablet-PC.
11.
Remove the
display assembly
from the Tablet-PC.
12.
Remove the
palm rest
from the Tablet-PC.
13.
Remove the
system board
from the Tablet-PC.
14.
Disconnect the fan cable from the system board connector, then flip over the system board.
15.
Loosen the four captive screws on the heat sink.
WARNING:
Before working inside your Tablet-PC, read the safety information that shipped with your Tablet-PC. For additional safety best
practices information, see the Regulatory Compliance Homepage at www.dell.com/regulatory_compliance.