Installing the expansion-card riser board – Dell PowerEdge 2850 User Manual
Page 4
a.
Use the system key to unlock the bezel.
b.
Press the tab at the left end of the bezel.
c.
Rotate the left end of the bezel away from the system to release the right end of the bezel.
d.
Pull the bezel away from the system.
2.
Turn off the system and attached peripherals, and disconnect the system from the electrical outlet.
3.
Open the system:
a.
Loosen the two thumbscrews that secure the cover to the chassis.
b.
Slide the top cover backward and grasp the cover at both sides.
c.
Carefully lift the cover away from the system.
4.
Remove the expansion-card cage.
5.
Disconnect the SCSI cable(s) from the SCSI connector(s).
Note the relative location of the SCSI cable(s) to ensure that you properly reconnect the cable(s) to the correct connector(s).
6.
Remove all expansion cards from the expansion-card slots.
7.
If applicable, remove the RAID memory module.
8.
If applicable, disconnect the RAID battery cable.
9.
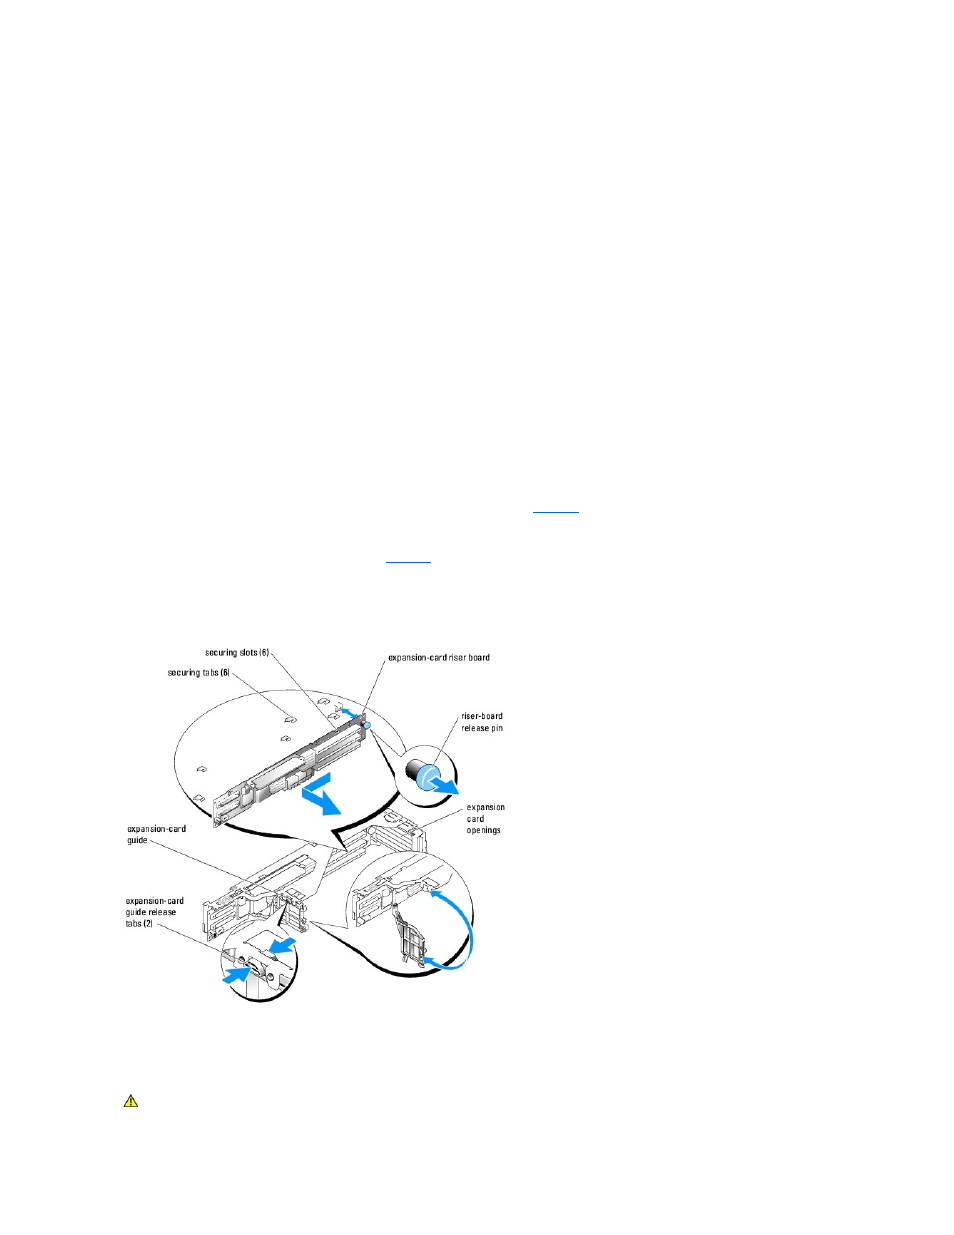
Press both release tabs on the expansion-card guide and swing open the guide. See
10.
Remove the expansion-card riser board:
a.
Pull the expansion-card riser release pin. See
.
b.
While pulling the release pin, slide the riser board away from the expansion card openings.
c.
Lift the riser board from the six securing tabs.
Figure 1-2. Expansion-Card Riser Removal
Installing the Expansion-Card Riser Board
CAUTION:
Only trained service technicians are authorized to remove the system cover and access any of the components inside the system. See
your Product Information Guide for complete information about safety precautions, working inside the computer, and protecting against