Drives – Dell OptiPlex GX200 User Manual
Page 7
Drives
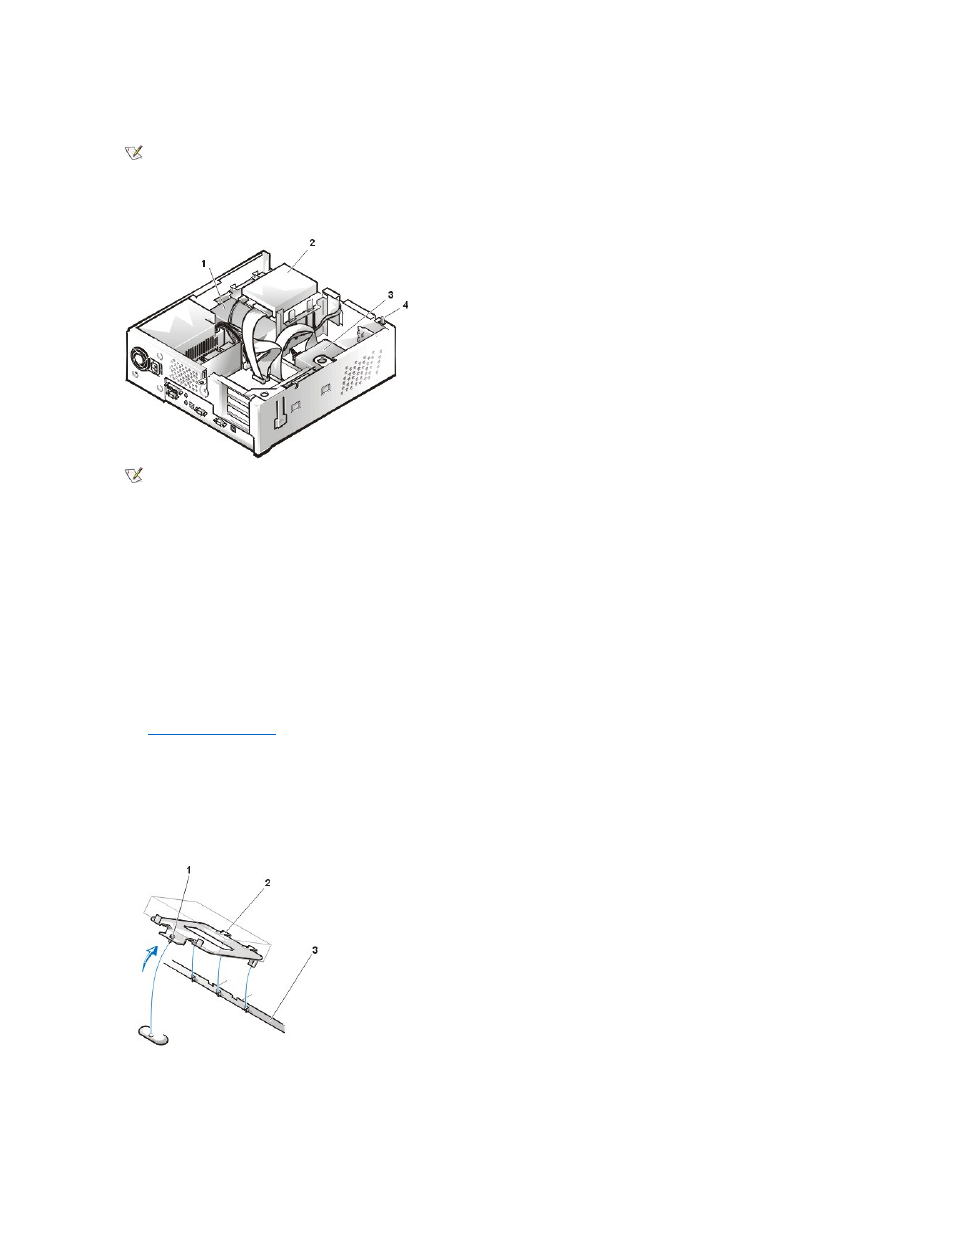
Figure 9. Drive Locations
3.5-Inch Diskette Drive
To remove the 3.5-inch diskette drive assembly from the drive shelf, perform the following steps:
1. Disconnect the DC power cable and the interface cable from the back of the drive.
2. Press both release latches on the left side of the 3.5-inch diskette drive.
3. Pivot the 3.5-inch diskette drive upward 1 inch (2.5 cm), and then pull the drive away from the notched tabs on the right chassis wall.
4. Remove the bracket from the diskette drive you just removed.
5.25-inch Drive
To remove the 5.25-inch drive/bracket assembly (the 5.25 drive is usually a CD-ROM drive), perform the following steps:
1.
and bracket.
2. Disconnect the DC power cable and EIDE cable from the drive.
3. Lift the 5.25-inch drive/bracket straight up and out of the chassis.
Hard-Disk Drive Removal
Figure 10. Hard-Disk Drive/Bracket Assembly Removal
To remove the hard-disk drive/bracket assembly, perform the following steps:
1. Disconnect the DC power cable and EIDE cable from the drive.
NOTE: In all of the following procedures, left and right refer to your left and right as you face the front of the computer.
1 5.25-
inch drive
2 3.5-inch diskette drive
3 Hard-disk drive
4 Chassis intrusion switch
NOTE: Computer configurations differ. Your computer may have an Iomega Zip drive installed instead of a 3.5-inch diskette drive, or
your computer may have no externally accessible drives installed.
1 Captive screw
2 Hinge tabs on back of drive bracket (2)
3 Slots in floor divider (3)