System board – Dell OptiPlex GX200 User Manual
Page 36
1. If possible, enter System Setup and print the System Setup screens.
2.
3. Remove the system battery by carefully prying it out of its socket with your fingers or with a blunt, nonconducting object such as a plastic
screwdriver.
When you replace the system battery, orient the new battery with the "+" facing up. Insert the battery into its socket and snap it into place.
4.
reset the chassis intrusion detector
.
System Board
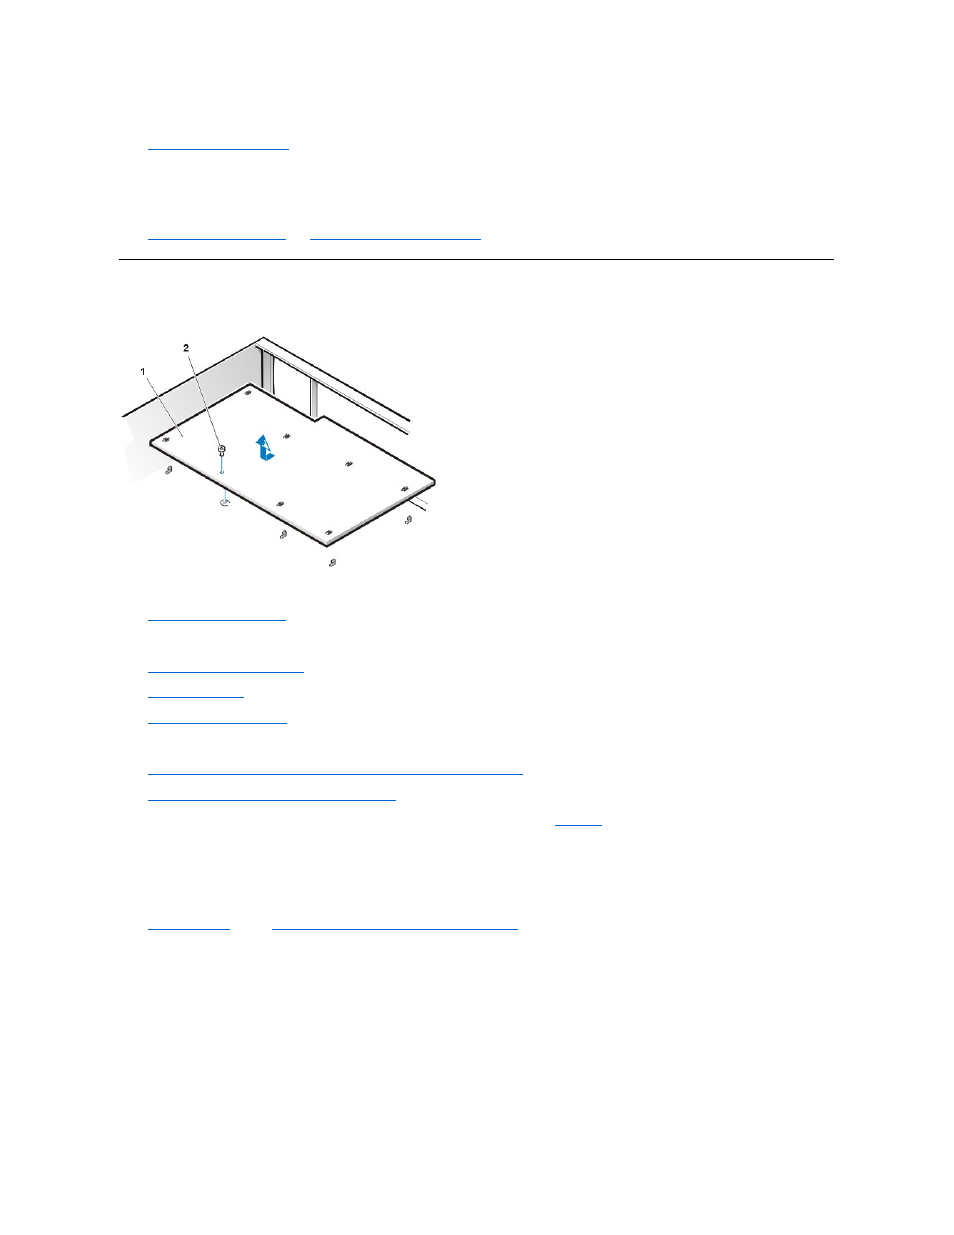
Figure 28. System Board Removal
To remove the system board, perform the following steps:
1.
.
2. Disconnect all cables from the system board.
3.
Rotate the system power supply
4.
.
5.
.
6. Remove the AGP card brace and the AGP video card.
7.
Slide all externally accessible drives and brackets partially out of the chassis.
8.
Slide the hard-disk drive partially out of the chassis
.
9. Remove the screw that secures the system board to the bottom of the chassis (see
).
10. Slide the system board toward the front of the chassis until it stops.
11. Carefully raise the front of the system board and lift the board out of the chassis at an angle.
To replace the system board, perform the following steps:
1.
microprocessor/airflow shroud/heat sink assembly
2. Configure the settings of the replacement board.
Set the jumpers on the replacement system board so that they are identical to those on the existing system board, unless you are performing
a microprocessor upgrade.
3. Replace the system board in the chassis.
4. Push down near each slot to engage the grounding clip onto its corresponding tab.
5. Push evenly on both sides of the system board as you slide and lock it into position (do not twist the system board).
6. Reinstall the mounting screw.
1
System
board
2 Screw