Keyboard assembly, Replacing the mini pci card assembly, Removing the keyboard assembly – Dell Inspiron 4000 User Manual
Page 29
1.
Remove the
.
2.
To release a Mini PCI card subassembly from its connector, spread apart the inner tabs of the connector just far enough for the Mini PCI card assembly
to disengage from the connector. The module should pop up slightly from the interface connector.
3.
Lift the Mini PCI card subassembly out of its connector and disconnect any attached cables.
Replacing the Mini PCI Card Assembly
1.
Align and press the Mini PCI card subassembly into the system board interface connector.
2.
Connect the interface cables.
3.
Replace the memory module cover.
Keyboard Assembly
Removing the Keyboard Assembly
1.
Remove the
.
2.
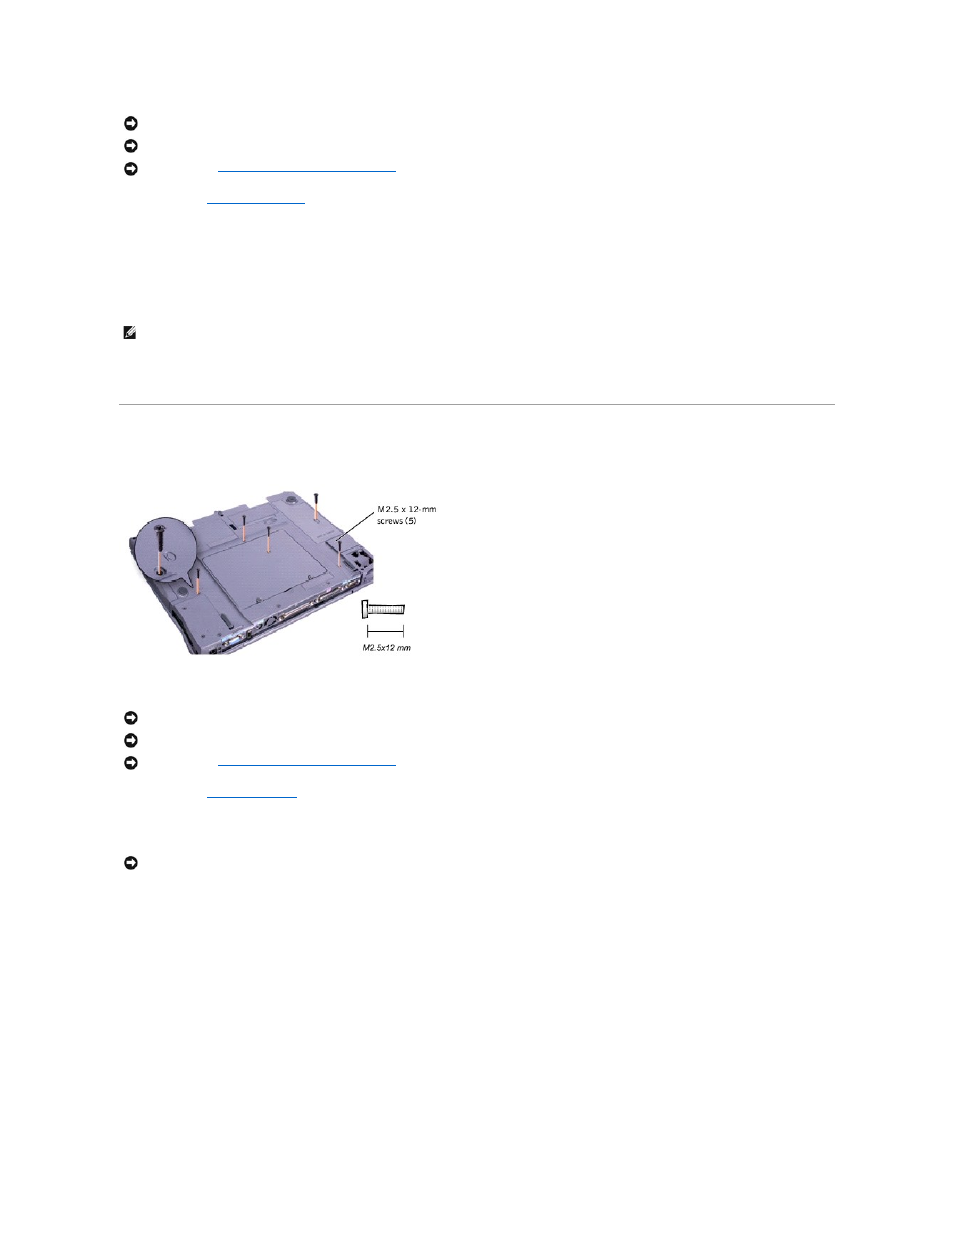
Turn the computer bottom-side up, and remove the five screws labeled with a "circle K."
3.
Turn the computer right-side up and open the display.
4.
Insert a small, flat-blade screwdriver or plastic scribe into the scalloped edge next to the right
assembly.
NOTICE:
Disconnect the computer and any attached devices from electrical outlets, and remove any installed batteries.
NOTICE:
To avoid ESD, ground yourself by using a wrist grounding strap or by touching an unpainted metal surface on the computer.
NOTICE:
Preparing to Work Inside the Computer
" before performing the following procedure.
HINT:
A modem-only Mini PCI card has only one cable and connector.
NOTICE:
Disconnect the computer and any attached devices from electrical outlets, and remove any installed batteries.
NOTICE:
To avoid ESD, ground yourself by using a wrist grounding strap or by touching an unpainted metal surface on the computer.
NOTICE:
Preparing to Work Inside the Computer
" before performing the following procedure.
NOTICE:
The key caps on the keyboard are fragile, easily dislodged, and time-consuming to replace. Be careful when removing and handling the
keyboard.