Replacing the wlan card – Dell Inspiron 11z (1110, Mid 2009) User Manual
Page 37
3.
Remove the keyboard (see
Removing the Keyboard
).
4.
Remove the palm rest (see
Removing the Palm Rest
).
5.
Disconnect the speaker cable from the speaker cable connector on the I/O board (see
Removing the Speakers
).
6.
Remove the hard drive (see
Removing the Hard Drive
).
7.
Remove the memory module (see
Removing the Memory Module
).
8.
Remove the palm rest bracket (see
Removing the Palm Rest Bracket
).
9.
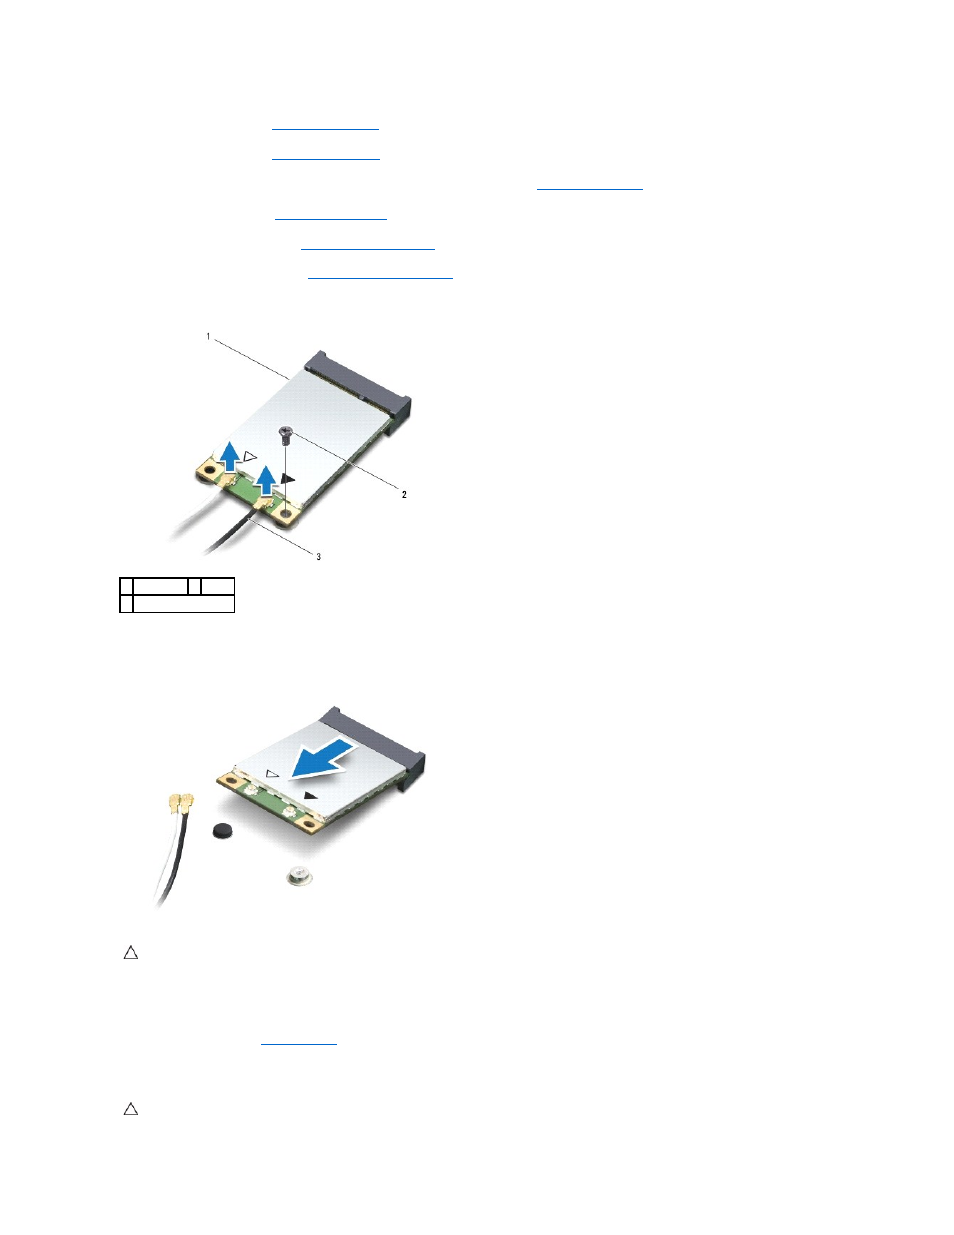
Disconnect the antenna cables from the WLAN card.
10.
Remove the screw that secures the WLAN card to the system board.
11.
Lift the WLAN card out of the system board connector.
Replacing the WLAN Card
1.
Follow the procedures in
Before You Begin
.
2.
Remove the new WLAN card from its packaging.
1 WLAN card 2 screw
3 antenna cables (2)
CAUTION:
When the Mini-Card is not in the computer, store it in protective antistatic packaging. For more information, see "Protecting Against
Electrostatic Discharge" in the safety information that shipped with your computer.
CAUTION:
Use firm and even pressure to slide the card into place. If you use excessive force, you may damage the connector.