Installing the upgrade kit, For more information, see, Installing the contents of the upgrade kit – Dell PowerEdge VRTX User Manual
Page 18: In this document
13. Pull the backplane release pins in the direction of the system board and lift the backplane from the
chassis.
Keep the lower corner of the backplane near the SAS cable clear of the EMI gasket as you lift the
backplane up.
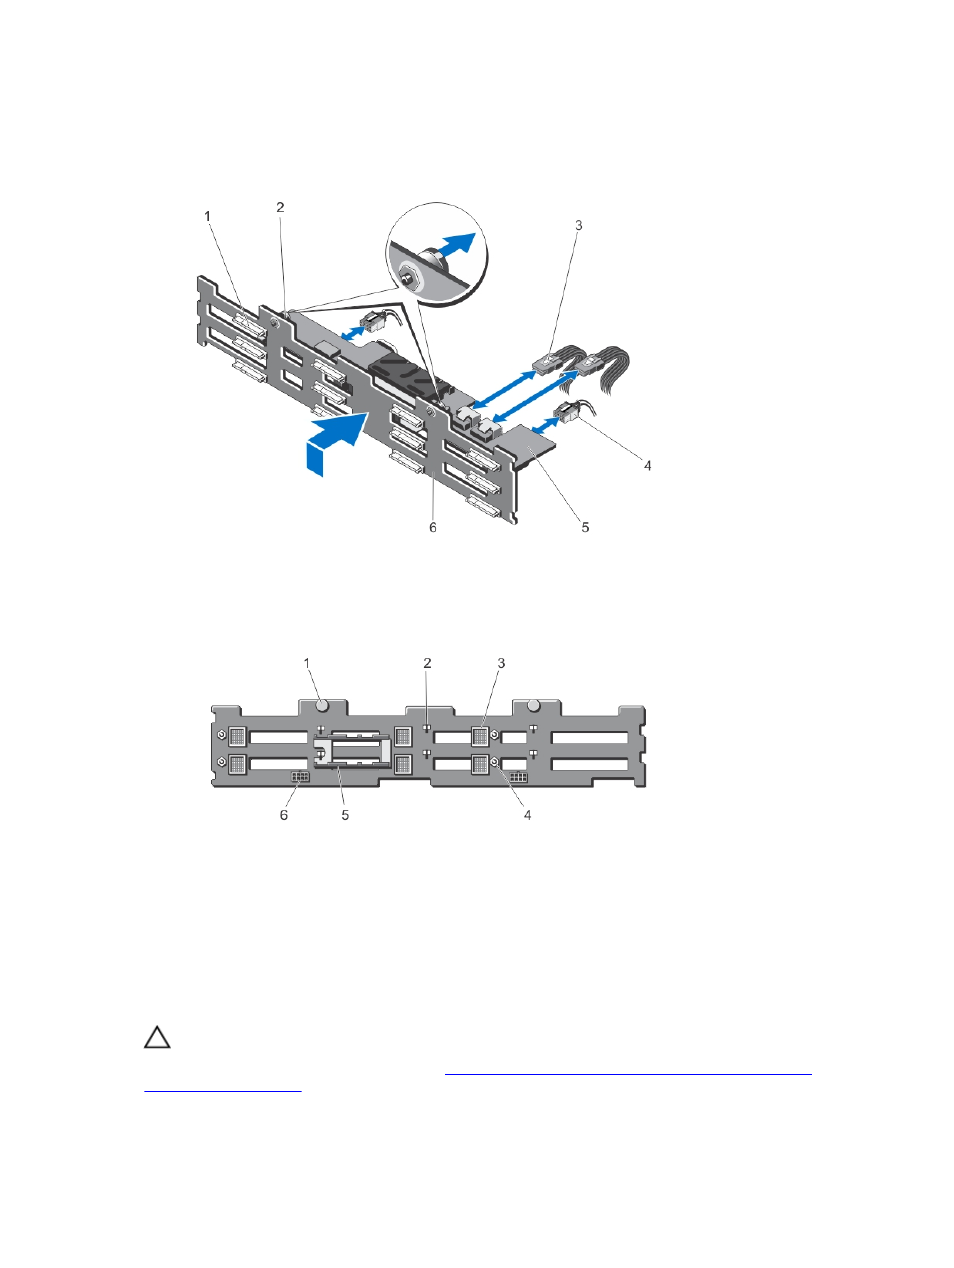
Figure 7. Removing and Installing the 3.5 inch (x12) Hard-Drive Backplane
1.
hard-drive connectors (12)
2. release pins (2)
3. SAS cables on backplane expander board
(2)
4. power cables (2)
5. backplane expander board
6. hard-drive backplane
Figure 8. Back View of the 3.5 inch (x12) Hard-drive Backplane
1.
release pins (2)
2. slots for chassis hooks (10)
3. backplane expander board connectors (6)
4. guide pins for backplane expander
boards (4)
5. backplane expander board brackets (2)
6. power cable connectors (2)
14. Remove the SAS cables from the system board.
Installing the Upgrade Kit
CAUTION: Handle the backplane expander board with care.
Before following the steps in this section, see
Preparing the PowerEdge VRTX System to Support Fault
18