Drain system options, 1 draining system through the rear outlet – Carrier ZC User Manual
Page 17
9. DRAIN SYSTEM OPTIONS
Remove the rear plug from the unit, and
install the drain (item 6, page 4).
NOTE
17
Hold tip angle and mark with chalk the location of
screw holes to be drilled in each side of the casing for
fastening in wall opening.
Drill 3 screw holes in each side of wood frame.
Recheck outward tip.
Install the draining system for the condensing water
before positioning the unit in the cabinet. You must use
one of the two existing systems, depending on how,
and where the unit will be installed.
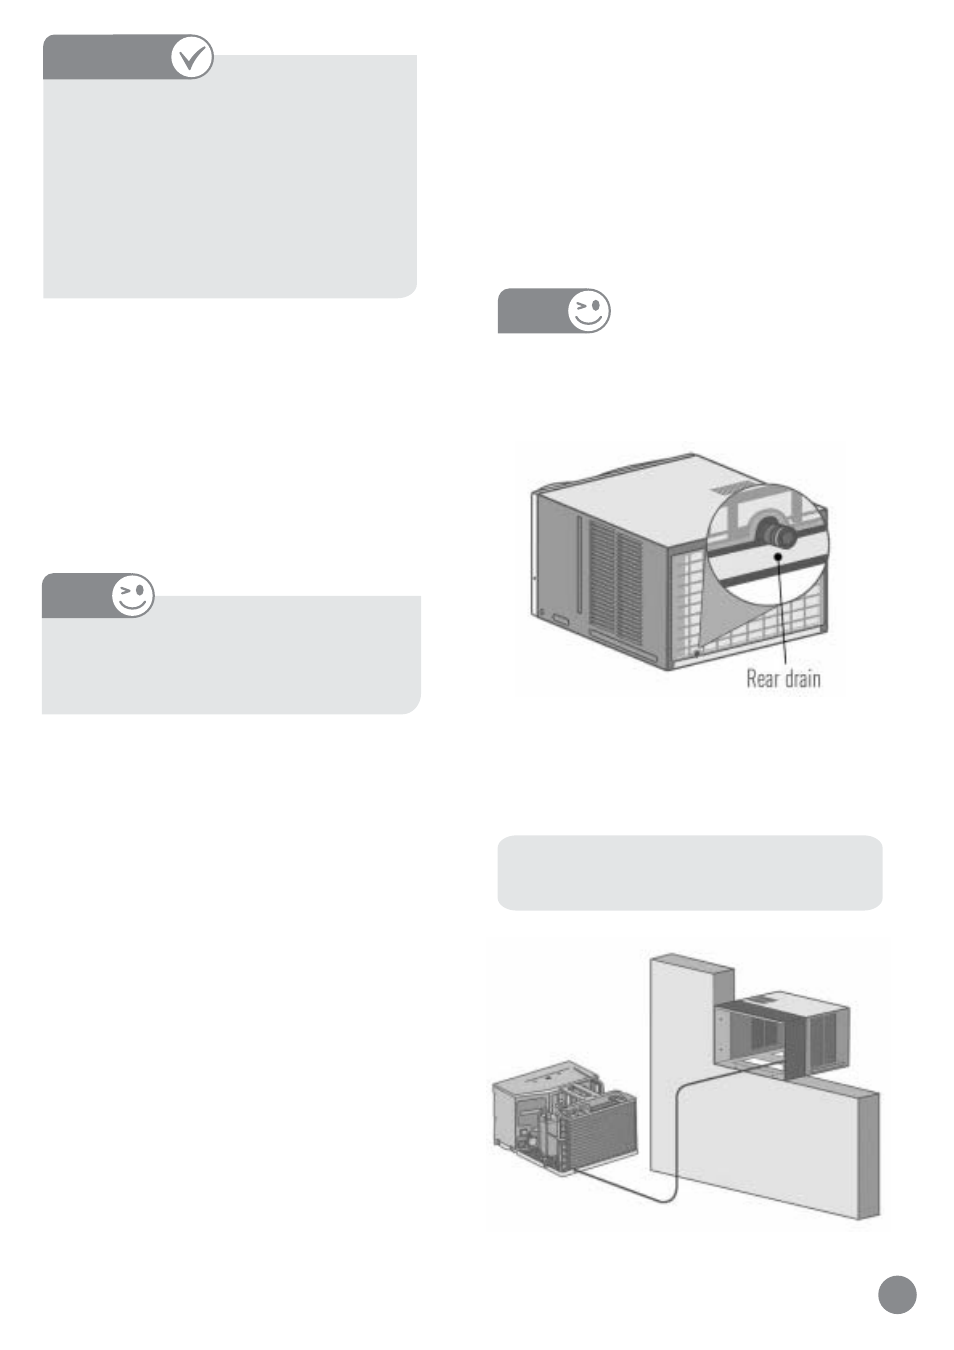
9.1 DRAINING SYSTEM THROUGH THE REAR
OUTLET
Pass a 5/8" (15,9 mm) plastic hose through the hole
located on the rear of the cabinet.
The hose must be long enough to reach the
rain water drain.
If unit is installed where condensate
drainage from the back of the unit can
drip onto pedestrians or neighboring
property, use the external drain kit
supplied with the unit. See installation
instructions on drain kit. - Step 9.
IMPORTANT
Chassis is heavy. Obtain help when lifting
to avoid personal injury.
NOTE
The conditioner comes with the two drain holes closed
by plugs.
The conditioner is projected to use one of the three
function options:
1) No drain connection. That way provides the most
efficiency operation, but has splash noise, dripping
of rain water or condensate water.
2) Rear drain, which provides a good efficiency for
operation and very low splash noise, or
3) Drain pan, which captures the most condensate and
does not have splash noise, but has lower efficiency
operation. Both the rear drain and the drain pan can
be connected to a hose and directed to a convenient
location on the ground, or a suitable floor drain.