Edge Lighting Plaza Small Dimmable User Manual
Page 3
G
N
L
G
N
L
13
G
N
L
G
N
L
13
13
13
3
F
MOUNTING
PLATE
G
N
L
G
N
L
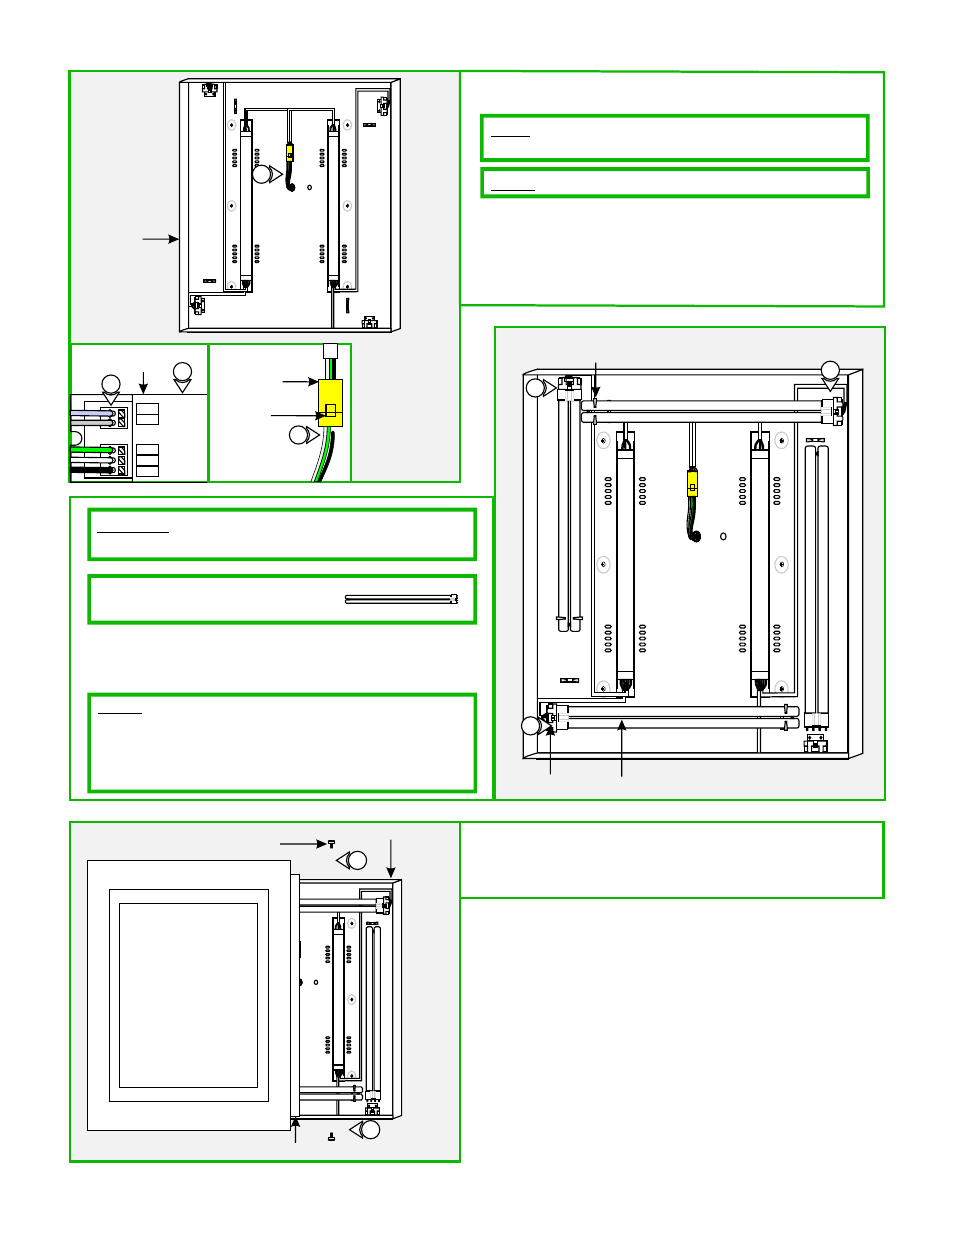
10: Connect the hot, neutral power wires into the wago
connector.
NOTE: If necessary, push the tab down and then pull the Wago
connector for a quick disconnect.
NOTE:
Omit steps 11 & 12 for non-dimming wiring.
11: For dimming, run the violet and gray wires from the
dimmer to each ballast. The wires must be solid copper
(refer to the dimmer instruction for more details).
12: Branch the violet wire to the (+) & the gray wire (-)
terminals of each ballast respectively.
VIOLET
GRAY
(+) Dimming
(-) Control
GREEN
G
N
WHITE
BLACK
L
11
BALLAST
12
G
N
L
10
TAB
WAGO
CONNECTOR
G
N
L
10
G
13: Push the lamp pins completely into the socket holes and
secure by snapping into the spring clips. Repeat this step
for the remaining sockets.
CAUTION:
To reduce risk of a burn or electrical shock during
lamping, disconnect the power to the fixture.
Use
MAX
55 Watt Type 2G11 Base
Compact Fluorescent Lamp For Each Socket.
NOTE:
NEMA fluorescent lamp manufacturers recommend to
reduce possible flicker or instability when new dimming systems
are commissioned, lamps should be operated at the ballast's
maximum light output setting overnight (approximately
12 hours).
SPRING CLIP
SOCKET
LAMP
H
14: Place the mirror housing into the mounting plate and
secure it in place by tightening the two thumb screws from
the top and bottom of the mounting plate into the mirror
housing.
MIRROR HOUSING
MOUNTING PLATE
THUMB SCREW
14
14