Troubleshooting – EcoPure EP40 User Manual
Page 22
22
Troubleshooting
Need help troubleshooting? Call Toll Free 1-800-693-1138
Monday- Friday, 7 AM - 6 PM CST
or visit www.ecopurewaterproducts.com
When you call, please be prepared to provide the model and serial number,
found on the rating decal, located on the rim below the salt lid hinges.
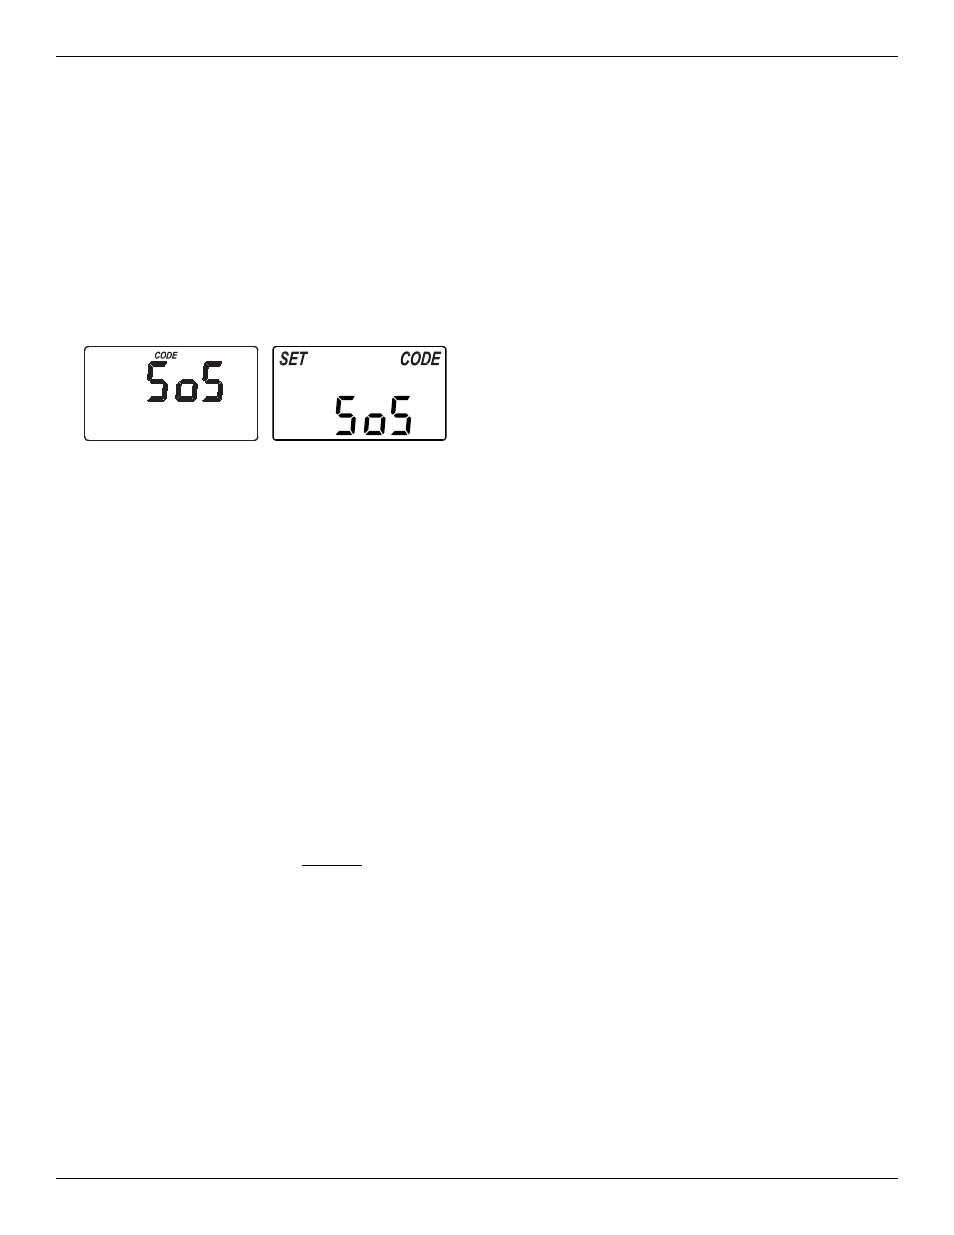
RESETTING TO FACTORY DEFAULTS
To reset the electronic controller to its factory default
for all settings (time, hardness, etc.):
1. Press the SELECT button and hold it until the dis-
play changes twice to show “CODE” and the flash-
ing model code.
2. Press the
p
UP button (a few times, if necessary)
to display a flashing “SoS”.
3. Press the SELECT button, and the electronic con-
troller will restart.
4. Set the present time, hardness, etc., as described
on pages 12 & 13 (for Models EP27 & EP30) or
pages 15 & 16 (for Models EP34 & EP40).
MANUAL ADVANCE REGENERATION
CHECK
This check verifies proper operation of the valve
motor, brine tank fill, brine draw, regeneration flow
rates, and other controller functions. Always make
the initial checks, and the manual initiated diagnos-
tics.
NOTE: The electronic control display must show a
steady time (not flashing). If an error code
shows, first press the SELECT button to enter
the diagnostic display.
1. Press the RECHARGE button and hold in for 3
seconds. RECHARGE begins to flash as the soft-
ener’s valve advances from the service to fill posi-
tion. Remove the brinewell cover and, using a
flashlight, observe fill water entering the tank.
FIG. 47
Models EP34 & EP40
Models EP27 & EP30
If water does not enter the tank, look for an
obstructed nozzle, venturi, fill flow plug, brine tub-
ing, or brine valve riser pipe.
2. After observing fill, press the RECHARGE button to
move the softener’s valve into the brine position. A
slow flow of water to the drain will begin. Verify
brine draw from the brine tank by shining a flash-
light into the brinewell and observing a noticeable
drop in the liquid level. This may take 15 to 20
minutes.
NOTE: Be sure water is in contact with the salt, and
not separated by a salt bridge (See "Breaking
A Salt Bridge" section).
If the water softener does not draw brine, check for
(most likely to least likely):
= Dirty or plugged nozzle and venturi, see
"Cleaning the Nozzle and Venturi" section.
= Nozzle and venturi not seated on the gasket, or
gasket deformed.
= Valve seals leaking.
= Restriction in valve drain, causing a back-pres-
sure (bends, kinks, elevated too high, etc.). See
"Install Valve Drain Hose" section.
= Obstruction in brine valve or brine tubing.
NOTE: If water system pressure is low, an elevated
drain hose may cause back pressure, stop-
ping brine draw.
3. Press the RECHARGE button to move the soften-
er’s valve into the backwash position. Look for a
fast flow of water from the drain hose. Check that
the drain can adequately handle the flow and vol-
ume.
An obstructed flow indicates a plugged top distribu-
tor, backwash flow plug, or drain hose.
4. Press the RECHARGE button to move the soften-
er’s valve into the fast rinse position. Again look
for a fast drain flow. Allow the softener to rinse for
a few minutes to flush out any brine that may
remain in the resin tank from the brining cycle test.
5. To return the softener’s valve to the service posi-
tion, press the RECHARGE button.